
There are a number of Side Quests to be found in The Legend of Zelda: Tears of the Kingdom. Some of the longer side quests involve the three labyrinths in the game, which are tied to the Evil Spirit armor set. This page will focus on The South Lomei Prophecy side quest.
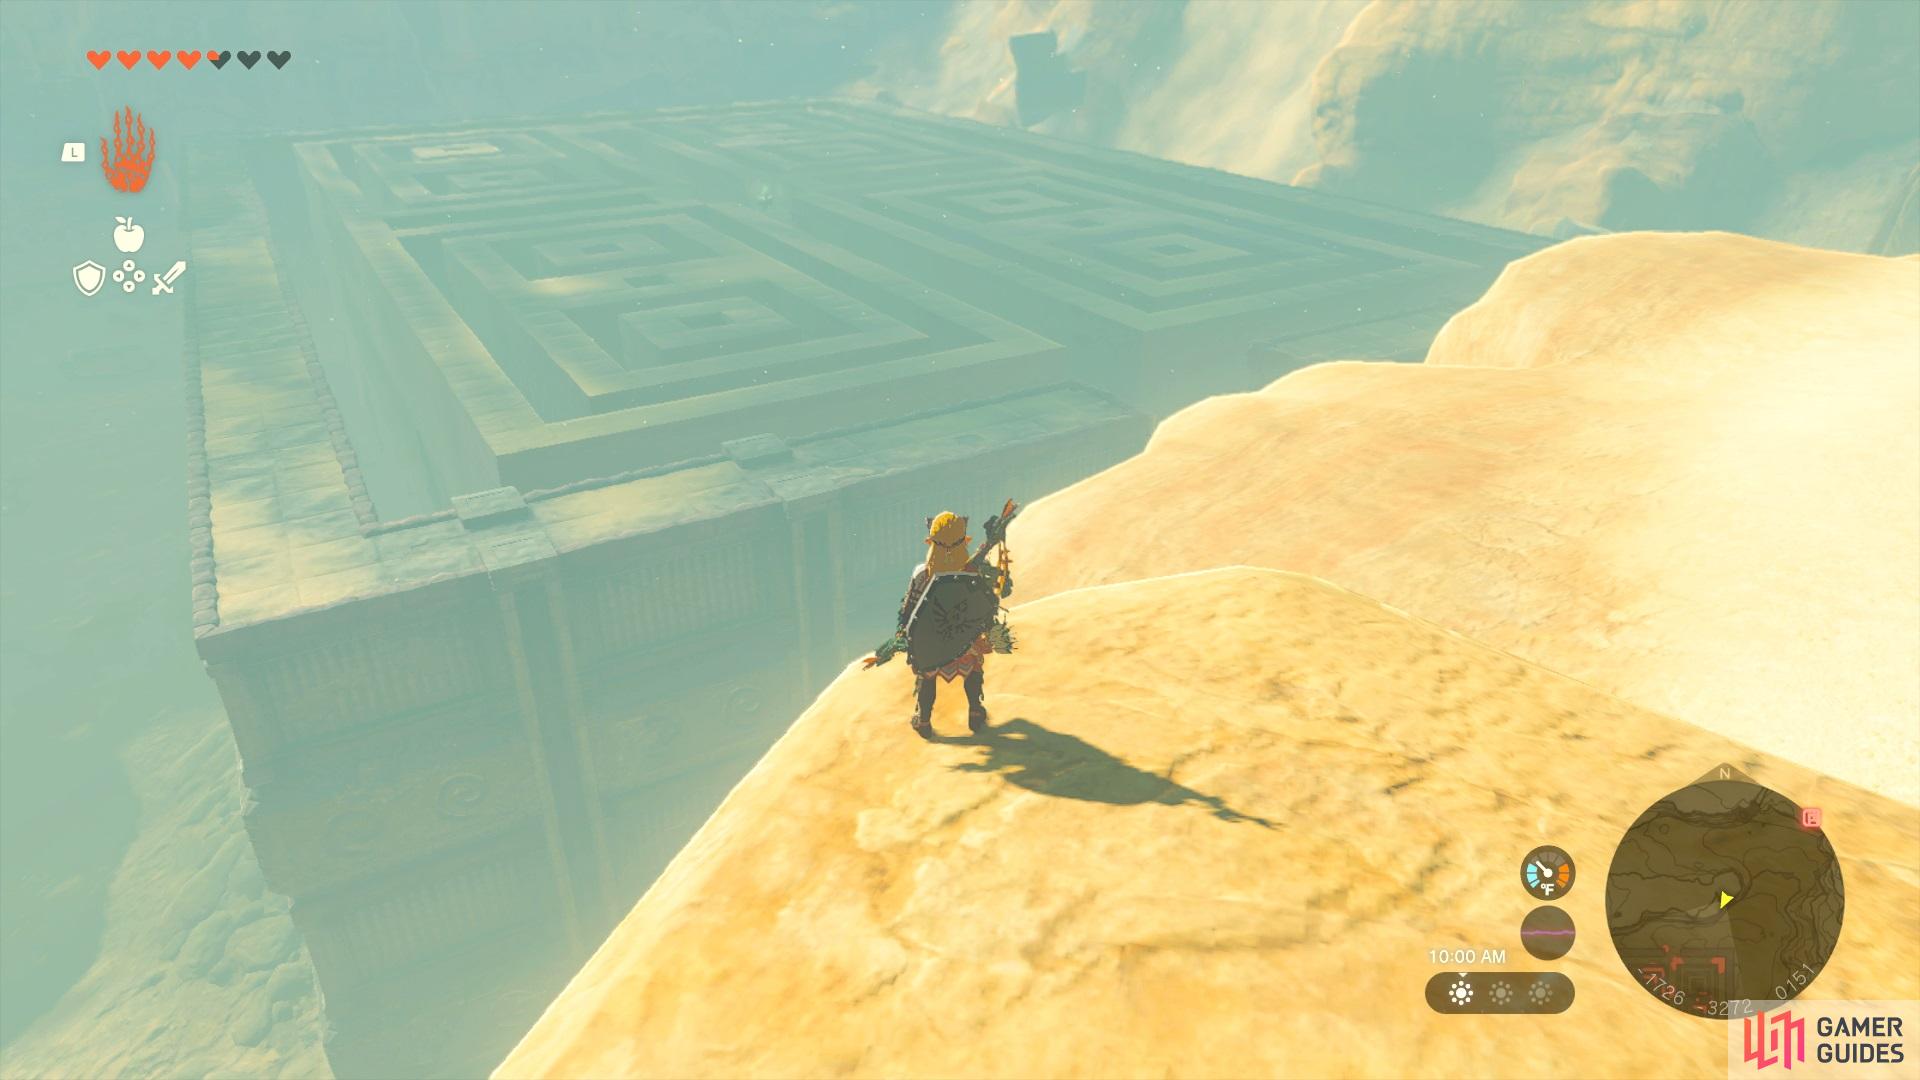
The South Lomei Labyrinth is the maze that is found near the Gerudo region.
Where to Find the South Lomei Labyrinth in Tears of the Kingdom
The South Lomei Labyrinth is found towards the southwestern corner of the map, and is just in between the Gerudo and ![]() Faron regions on the map. This place is both hot and cold, depending on the time of day, so you will want protection from both as you venture there. Just food isn’t really going to cut it here, so it’s best to have armor that provides the same benefits. Or, another thing you can do is combine a weapon with something fiery or icy to create the same effect. As long as you have the weapon currently equipped, you won’t lose health from the harsh element.
Faron regions on the map. This place is both hot and cold, depending on the time of day, so you will want protection from both as you venture there. Just food isn’t really going to cut it here, so it’s best to have armor that provides the same benefits. Or, another thing you can do is combine a weapon with something fiery or icy to create the same effect. As long as you have the weapon currently equipped, you won’t lose health from the harsh element.
As for getting to the labyrinth, it’s not too bad, as you can fly down from the Gerudo Canyon Skyview Tower (after launching), as one way. The labyrinth is south/southeast of the tower, but if you have the ![]() Kitawak Shrine (southeast of tower), then that will be closer. The entrance to the labyrinth is on the northern side.
Kitawak Shrine (southeast of tower), then that will be closer. The entrance to the labyrinth is on the northern side.
How to Complete the South Lomei Labyrinth in Tears of the Kingdom
Read the journal at the entrance to get an idea of how to go about navigating the maze. If you’ve done either of the other labyrinths, then you know that the researcher left a trail of acorns and nuts as a guide. Start off by taking the western path at the beginning, until you eventually reach a pool of gloom. If you have some ![]() Wood,
Wood, ![]() Flint and a
Flint and a ![]() Hylian Pine Cone, then you can use those to start a campfire, with the pine cone creating an updraft, so you can glide over the gloom. Just past the gloom will be a second journal, as well as some stairs.
Hylian Pine Cone, then you can use those to start a campfire, with the pine cone creating an updraft, so you can glide over the gloom. Just past the gloom will be a second journal, as well as some stairs.

Take the stairs to the side to continue through the labyrinth, following the acorns/nuts. Eventually, you’ll run across a third journal, so keep going past that. When you drop down into the eastern section, continue east, past another pool of gloom. Note that just running through it is another option, as the heart loss is just temporary up on the surface, since the heart becomes untainted very soon after you “lose” it. When you reach the middle of the southeastern and northeastern quadrants, you will find one final journal.
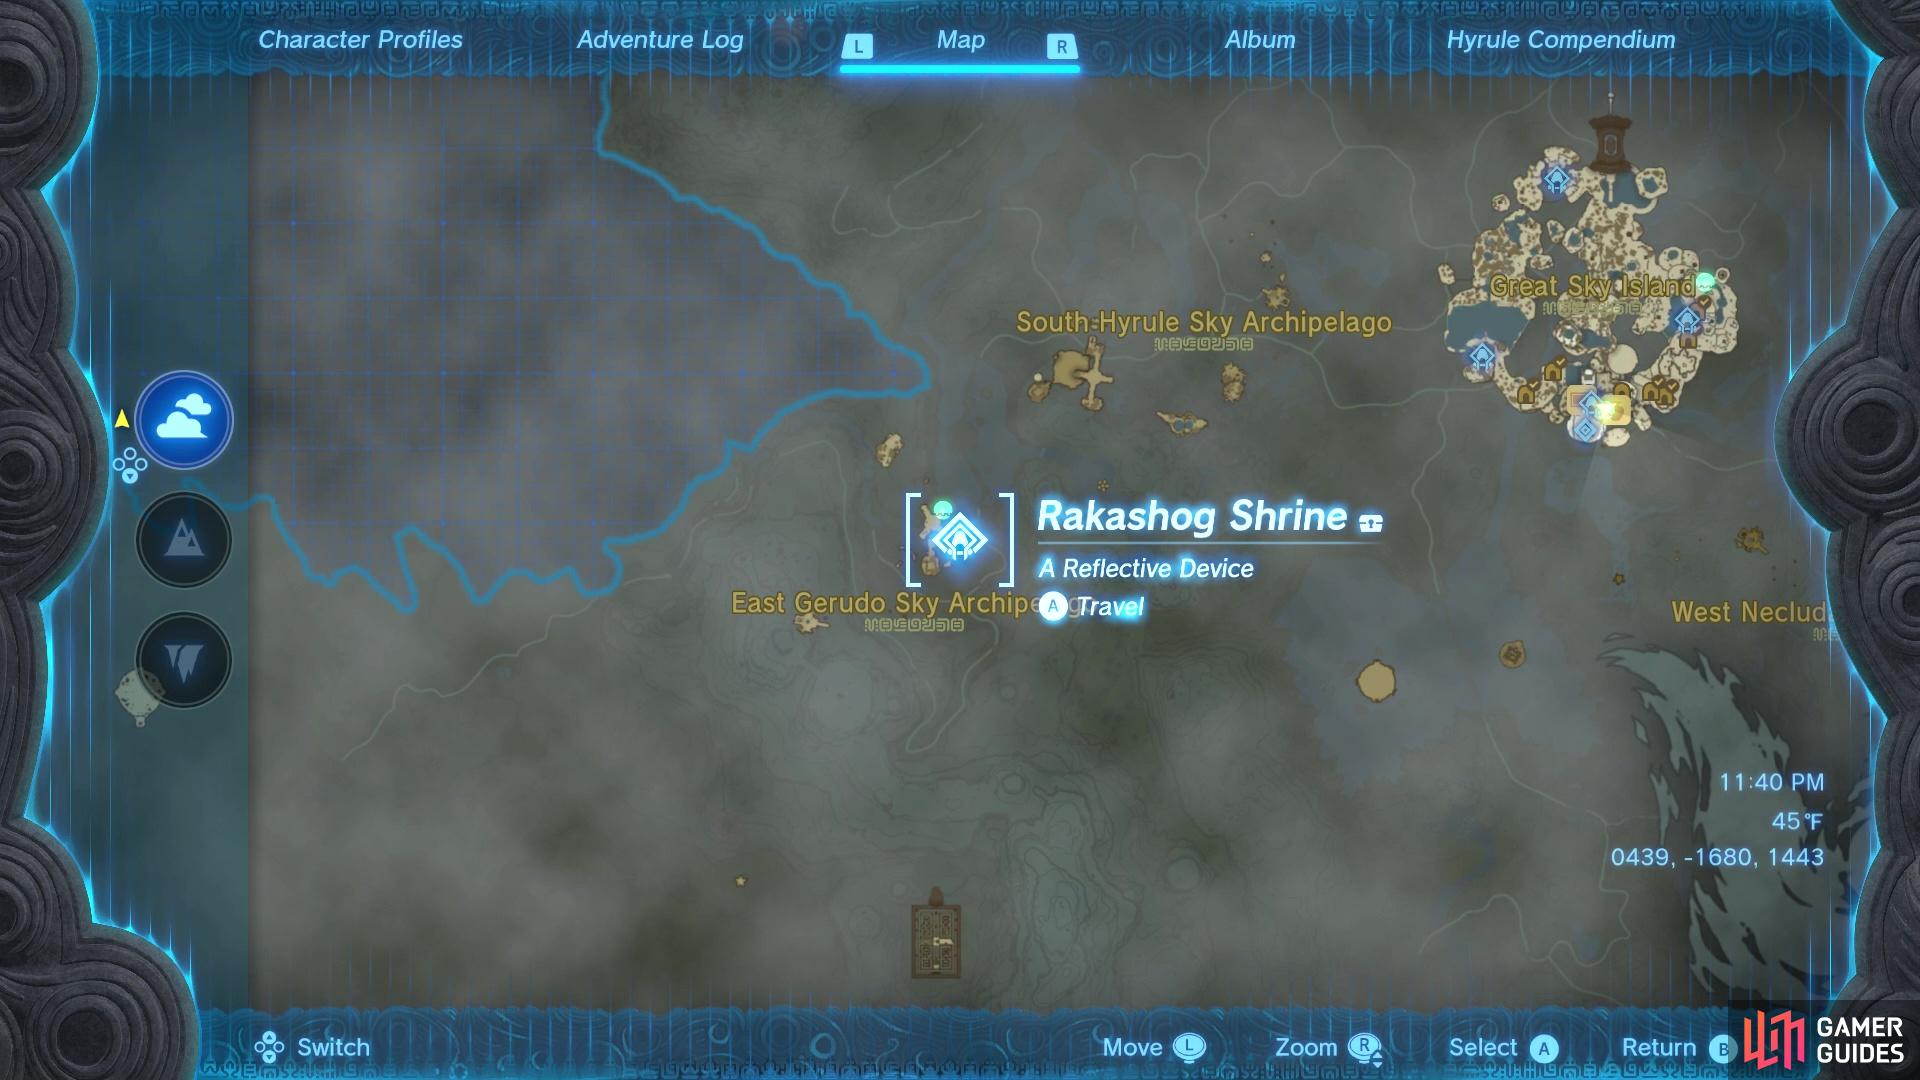
Look next to the journal to find a spot to drop down, where the ![]() Motsusis Shrine is located, as well as the dragon ring that opens up the way to the sky portion of the labyrinth.
Motsusis Shrine is located, as well as the dragon ring that opens up the way to the sky portion of the labyrinth.
How to Reach the South Lomei Castle Top Floor in Tears of the Kingdom
Firstly, travel to the !Gerudo Canyon Skyview Tower and launch yourself into the sky. As soon as you regain control, look southeast to find an island, so glide towards it. There will be some Wings on this island, with Fans attached to them, as well as some Rockets sitting there. Attach the rockets to the back of the wing that’s on the track, then put a Steering Stick on it. Look at your map to see the labyrinth is to the south/southeast, so that will be your destination. The entrance is on the northern side, too, so you want to get enough height, just in case the wing breaks before reaching it.
If you have a ![]() Large Zonai Charge in your inventory, it’s a good idea to use that when your batteries are running low. If you don’t, you definitely won’t have enough distance to reach. The wing should be able to make it, though, as long as you use the rockets to get that initial boost. Upon landing at the entrance, activate the
Large Zonai Charge in your inventory, it’s a good idea to use that when your batteries are running low. If you don’t, you definitely won’t have enough distance to reach. The wing should be able to make it, though, as long as you use the rockets to get that initial boost. Upon landing at the entrance, activate the ![]() Siyamotsus Shrine for the fast travel point, then use the dragon ring to begin the trial.
Siyamotsus Shrine for the fast travel point, then use the dragon ring to begin the trial.
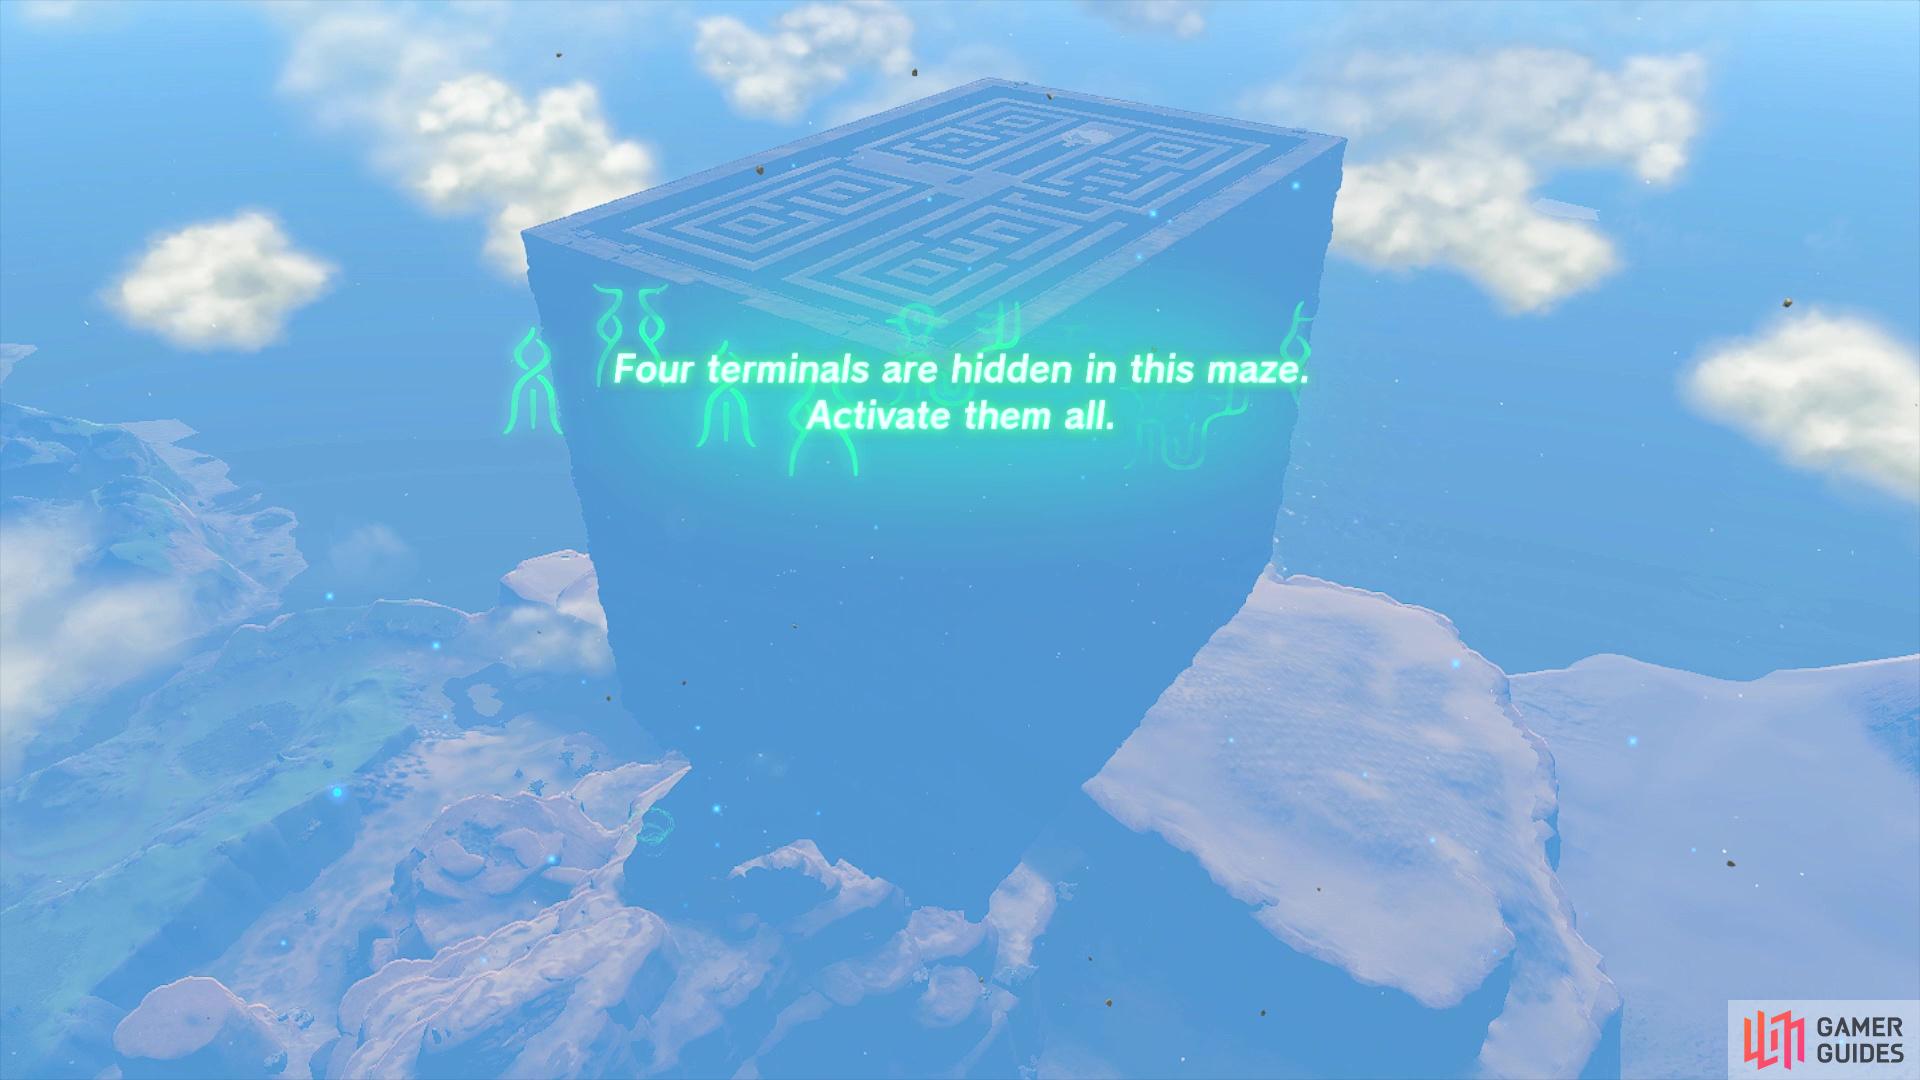
The sky labyrinth here is the same as the others, as there will be four terminals you have to activate. Doing this will cause a fifth one to appear the the very top of the labyrinth. There will be wind constantly flowing upward from the bottom of the maze, so you will never fall down, as long as you have enough stamina and never dip below the bottom. Just make sure you land on the platforms throughout the labyrinth to replenish your stamina. If you need a height boost, drop down (not below the labyrinth), then deploy your ![]() Paraglider to get a big boost. When you do all four terminals, the wind will now take you up to the roof of the labyrinth, where you can unlock the way to the Depths portion.
Paraglider to get a big boost. When you do all four terminals, the wind will now take you up to the roof of the labyrinth, where you can unlock the way to the Depths portion.
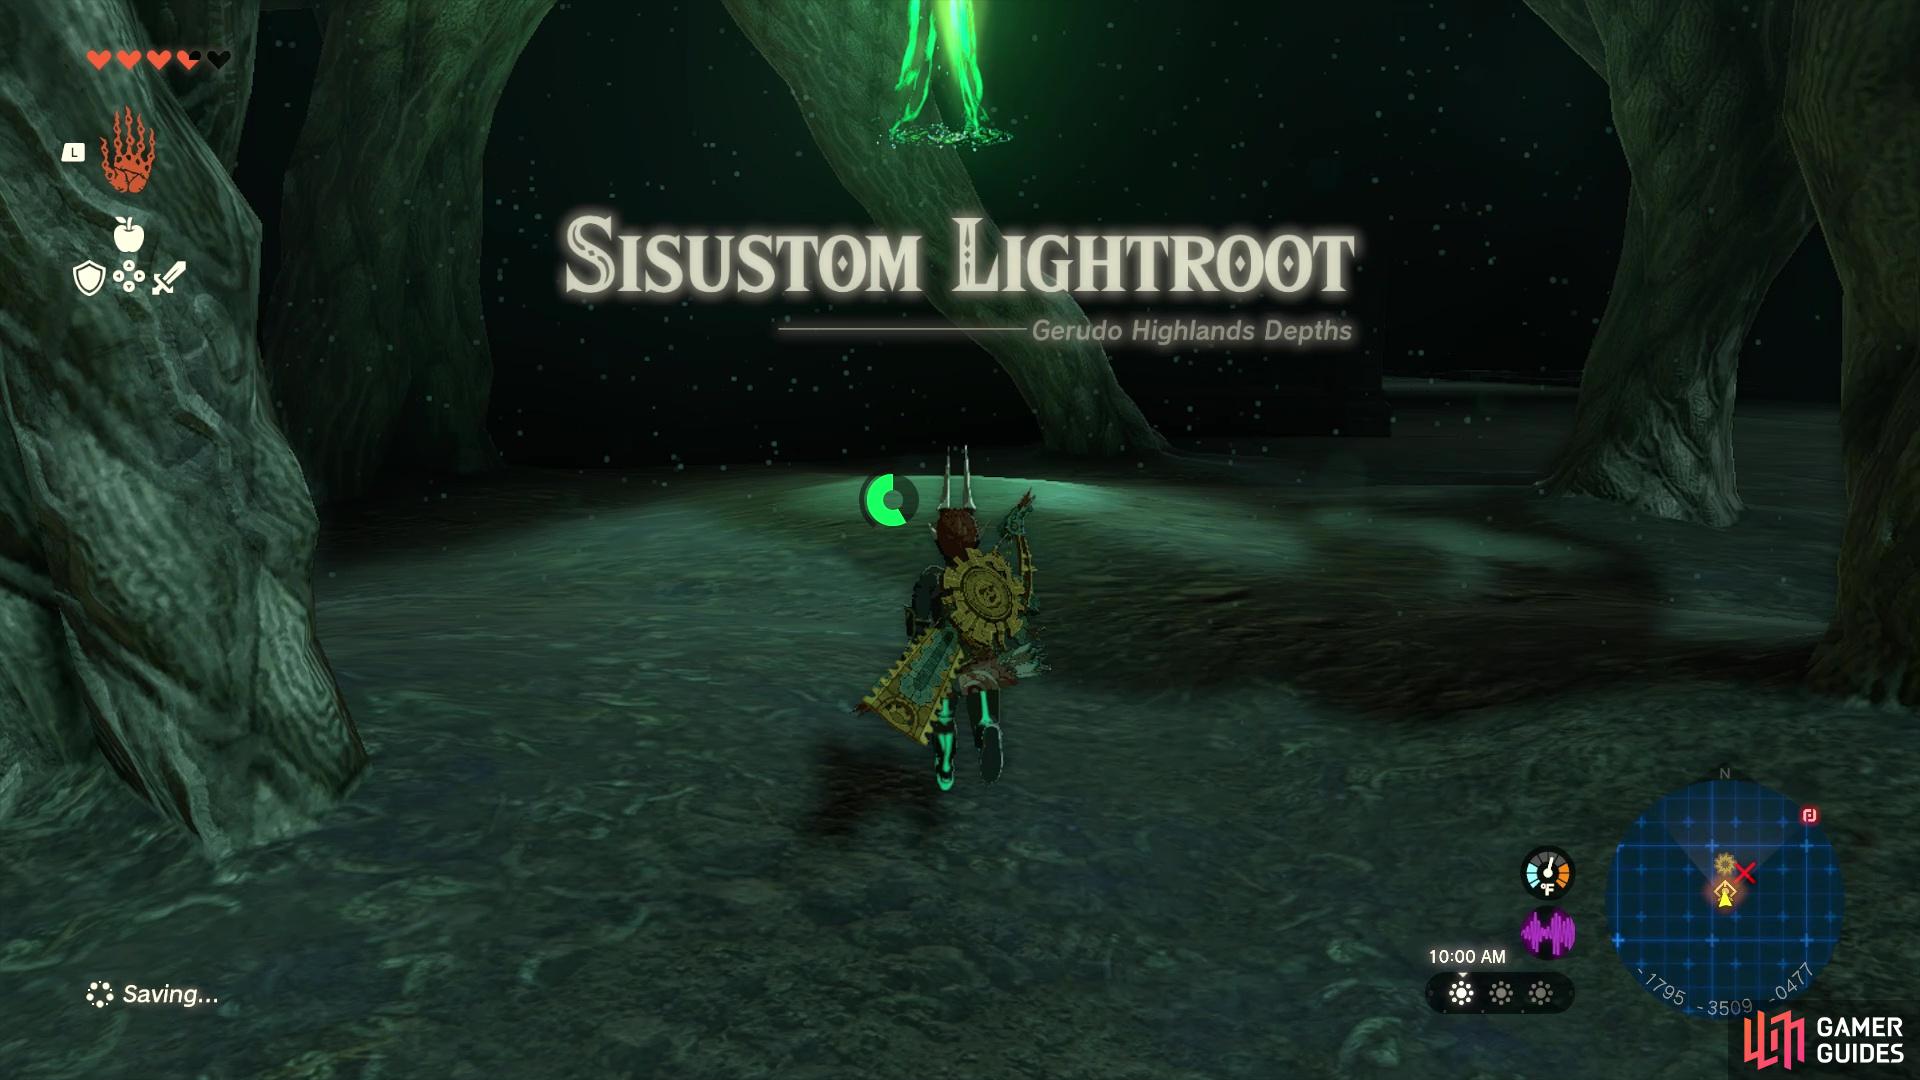
How to Find the Sisustom Lightroot in Tears of the Kingdom
After falling into the chasm and reaching the depths underneath the labyrinth, shed some light by tossing a ![]() Brightbloom Seed or two. The first thing you should do is activate the Lightroot in the area, which is on top of the labyrinth. All you need to do is find a spot where you can
Brightbloom Seed or two. The first thing you should do is activate the Lightroot in the area, which is on top of the labyrinth. All you need to do is find a spot where you can ![]() Ascend, then do that to get on top of the maze and find the
Ascend, then do that to get on top of the maze and find the ![]() Sisustom Lightroot. If you can’t find your way back into the inner labyrinth, fast travel to the shrine at the end of the surface one and dive back down into the chasm.
Sisustom Lightroot. If you can’t find your way back into the inner labyrinth, fast travel to the shrine at the end of the surface one and dive back down into the chasm.
From here, you need to make your way into the inner sanctum, where you will find a ![]() Flux Construct III waiting for you. If you’ve fought one of these enemies before, then it’s no different, but if not, then here’s a few tips for you. The construct is comprised of multiple blocks and only one of them will be weak. Considering this is the toughest variant of this enemy, it will switch the weak block around every few seconds. Use
Flux Construct III waiting for you. If you’ve fought one of these enemies before, then it’s no different, but if not, then here’s a few tips for you. The construct is comprised of multiple blocks and only one of them will be weak. Considering this is the toughest variant of this enemy, it will switch the weak block around every few seconds. Use ![]() Ultrahand to grab it, and hold onto it until the creature falls apart, after which you can strike it with your weapon until it reforms. Eventually, you will fell the creature, which triggers a nearby dragon ring to activate. Interact with the ring to complete the quest and make a chest appear, which contains the
Ultrahand to grab it, and hold onto it until the creature falls apart, after which you can strike it with your weapon until it reforms. Eventually, you will fell the creature, which triggers a nearby dragon ring to activate. Interact with the ring to complete the quest and make a chest appear, which contains the ![]() Evil Spirit Mask.
Evil Spirit Mask.
No Comments