
The ![]() Eutoum Shrine is yet another Proving Grounds shrine that strips you off all belongings after you enter, pitting you against various Constructs. Many of these shrine types feature some form of gimmick and while this one is no different, you can massively take advantage of it.
Eutoum Shrine is yet another Proving Grounds shrine that strips you off all belongings after you enter, pitting you against various Constructs. Many of these shrine types feature some form of gimmick and while this one is no different, you can massively take advantage of it.
We’ll reveal what you need to do to make your life that bit easier with this shrine so you can box it off nice and fast then onto the next challenge. We’ll also run you through where to find it just in case you’re having issues there also.
Where to Find Eutoum Shrine in Tears of the Kingdom
The Eutoum Shrine is actually pretty tucked away so if you haven’t found it as of yet you’re probably not alone.
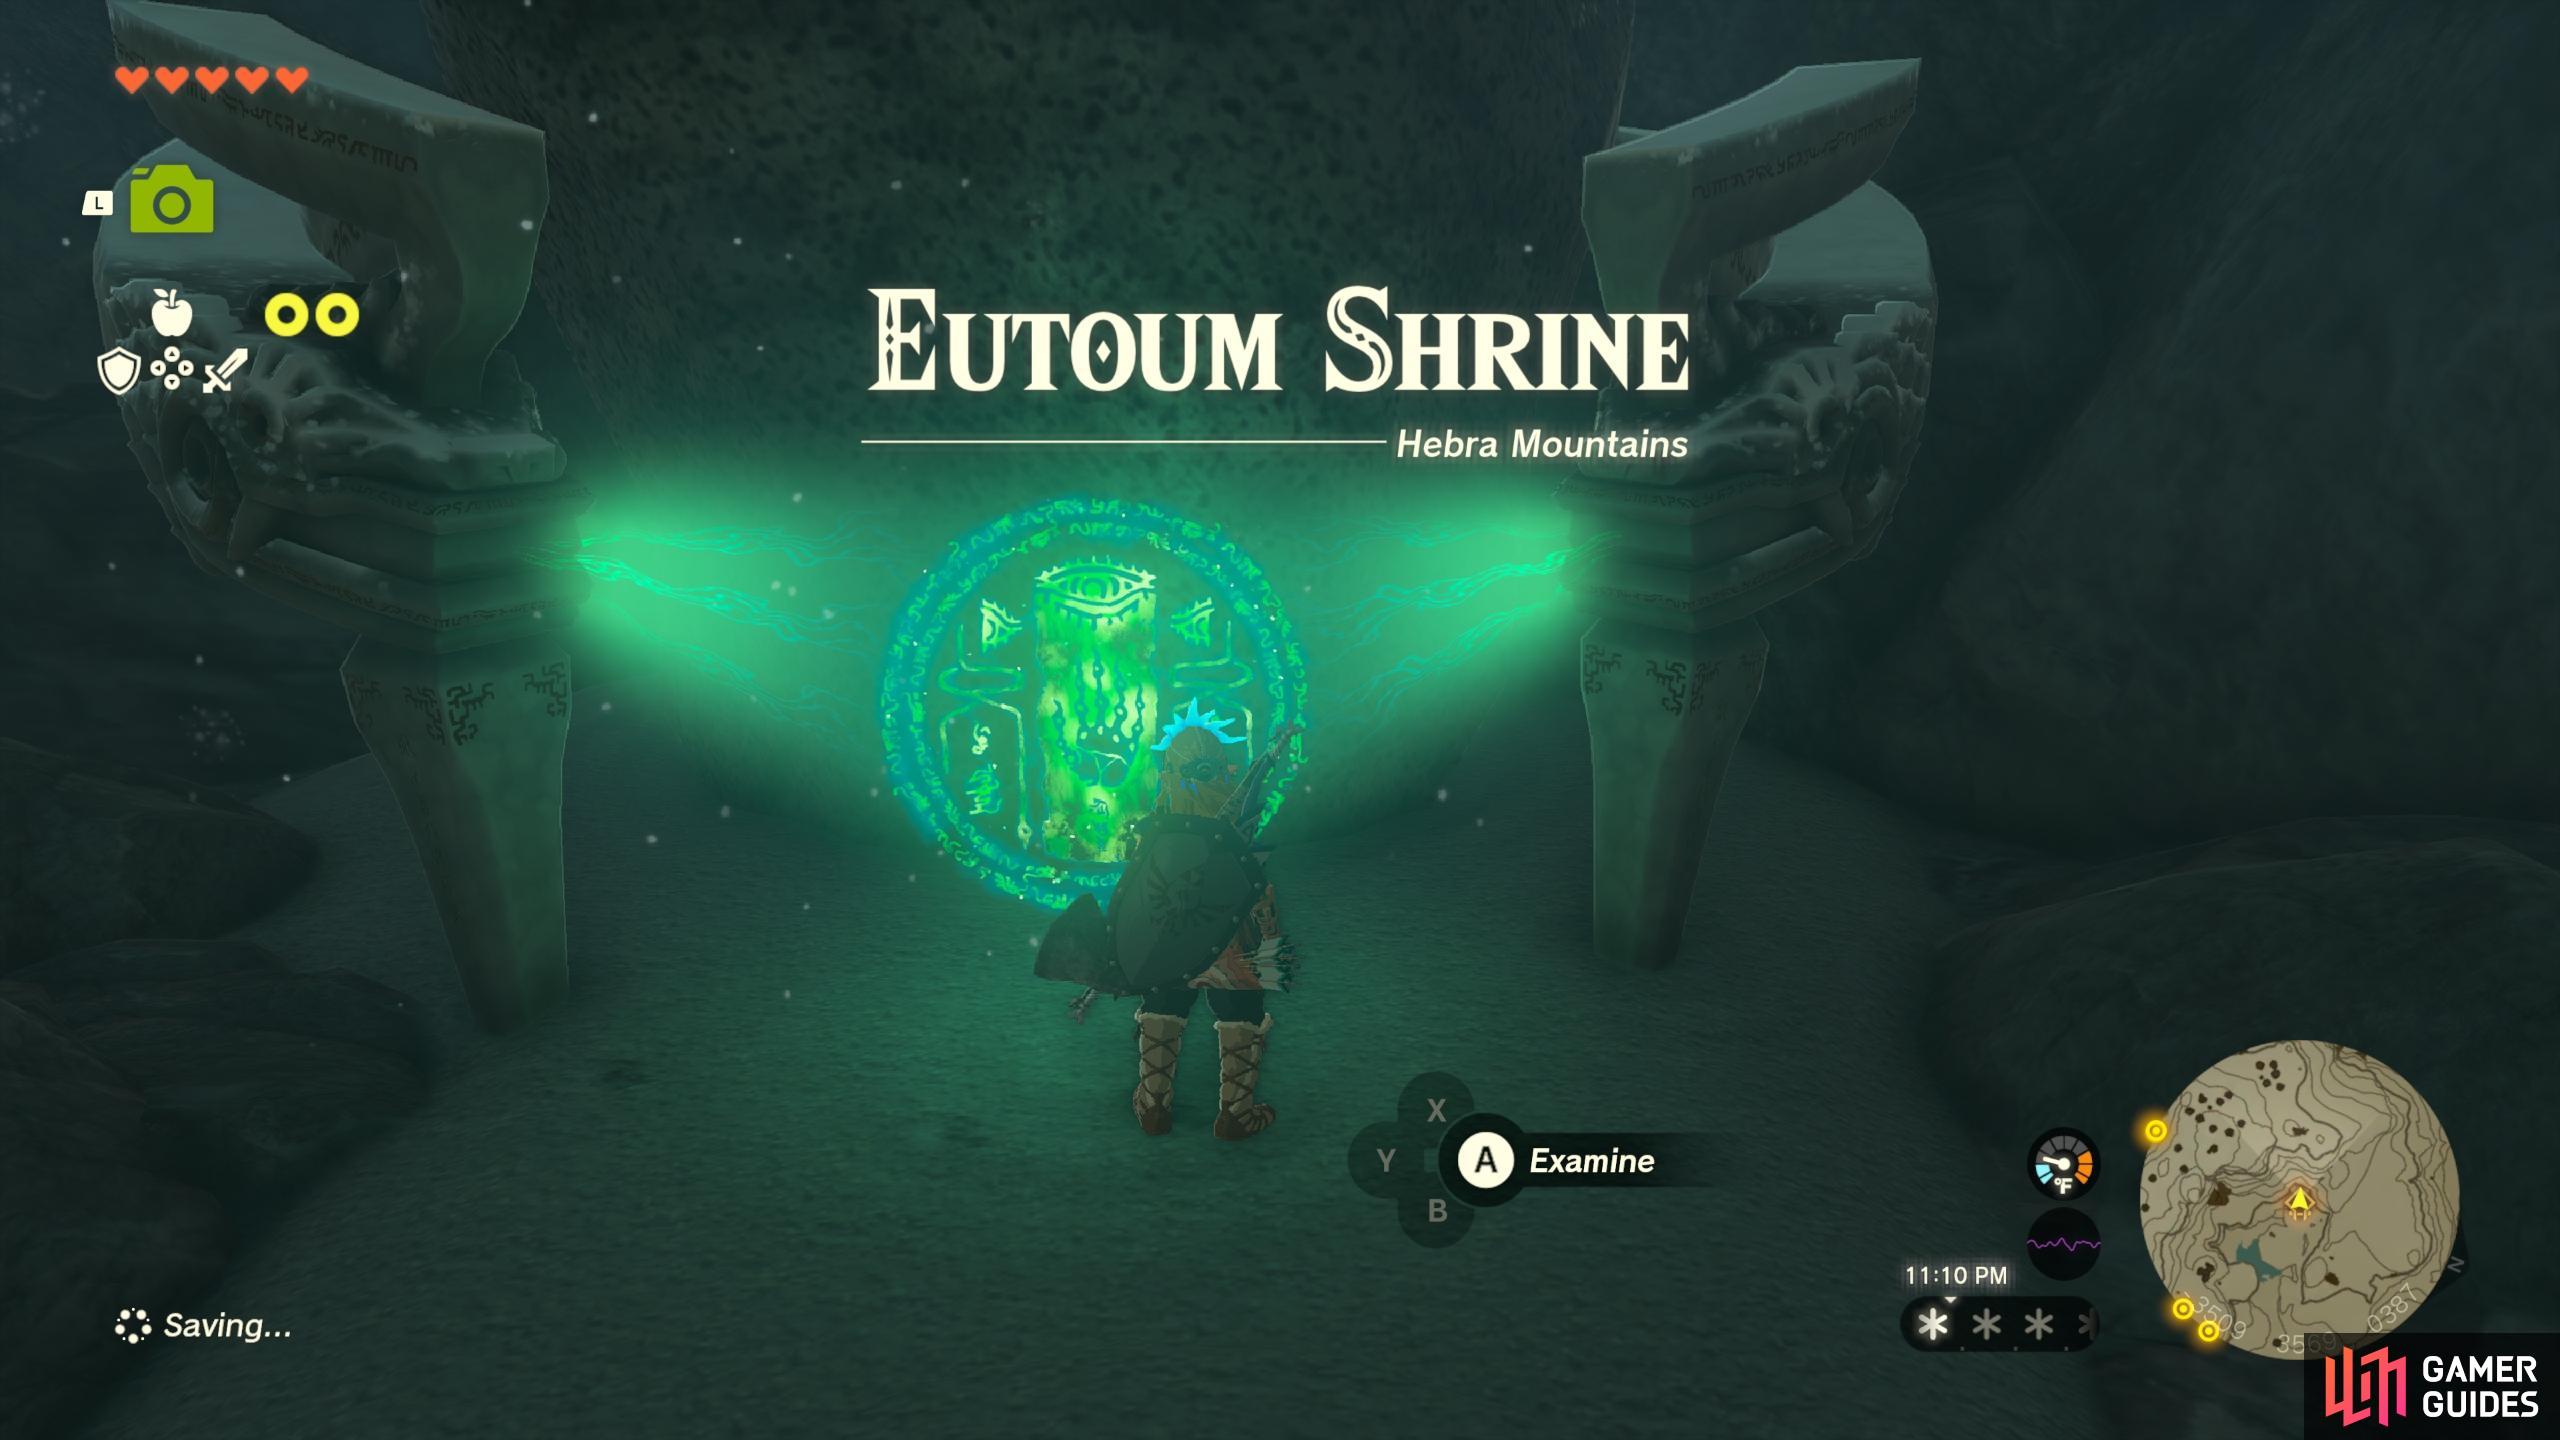
The !Eutoum Shrine entrance.
You’ll be heading to the Hebra Mountains for this one, close to the Hebra North Crest in the north west corner of the map. It’s not located high up on the mountain itself though, you’ll have to traverse those higher areas, but actually drop down into a small area which also contains Goflam’s Secret Hot !Spring.
Since this is a tricky one to find, here is a direct map marker on our interactive map to help eliminate some of the guesswork.
How to Complete Eutoum Shrine in Tears of the Kingdom
Once you’ve found the Eutoum Shrine, it’s time to tackle the challenge within. As previously stated, this is a Proving Grounds shrine thus meaning there isn’t a puzzle per se. Instead, it’s all about combat and using your surroundings to gain an advantage.
In this one, you’ll certainly be doing that as there is a little cheese you can do to get rid of some enemies without needing to worry about incoming damage. We’ll get onto that in a moment, but you’ll need to do some setting up.
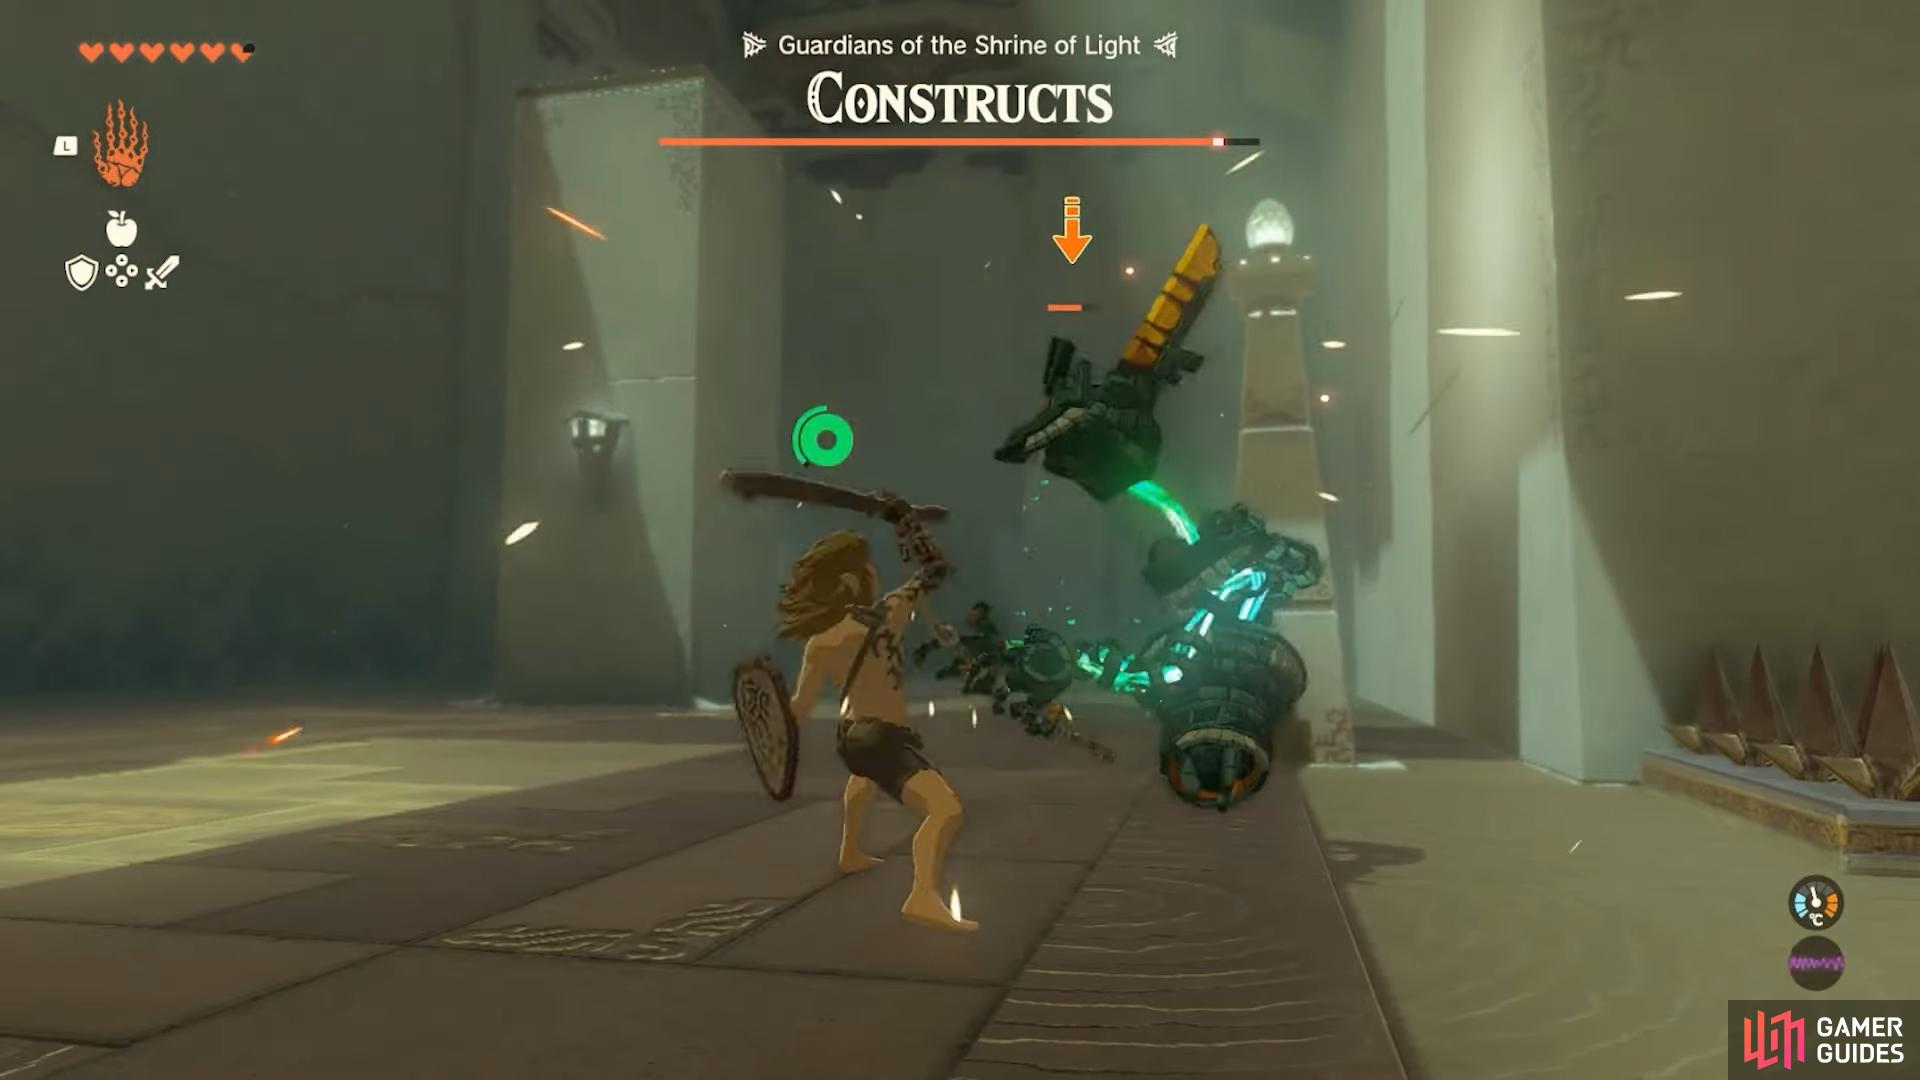
As you enter the shrine, you’ll definitely need to pick up the weapons and shield that is made available to you as you’re going to have an impossible task on your hands if not. Then, progress forward but take an immediate right where you should be able to see your first Construct enemy. Try to be as stealthy as possible here by sneaking but if the alarm sounds, there’s no need to worry.
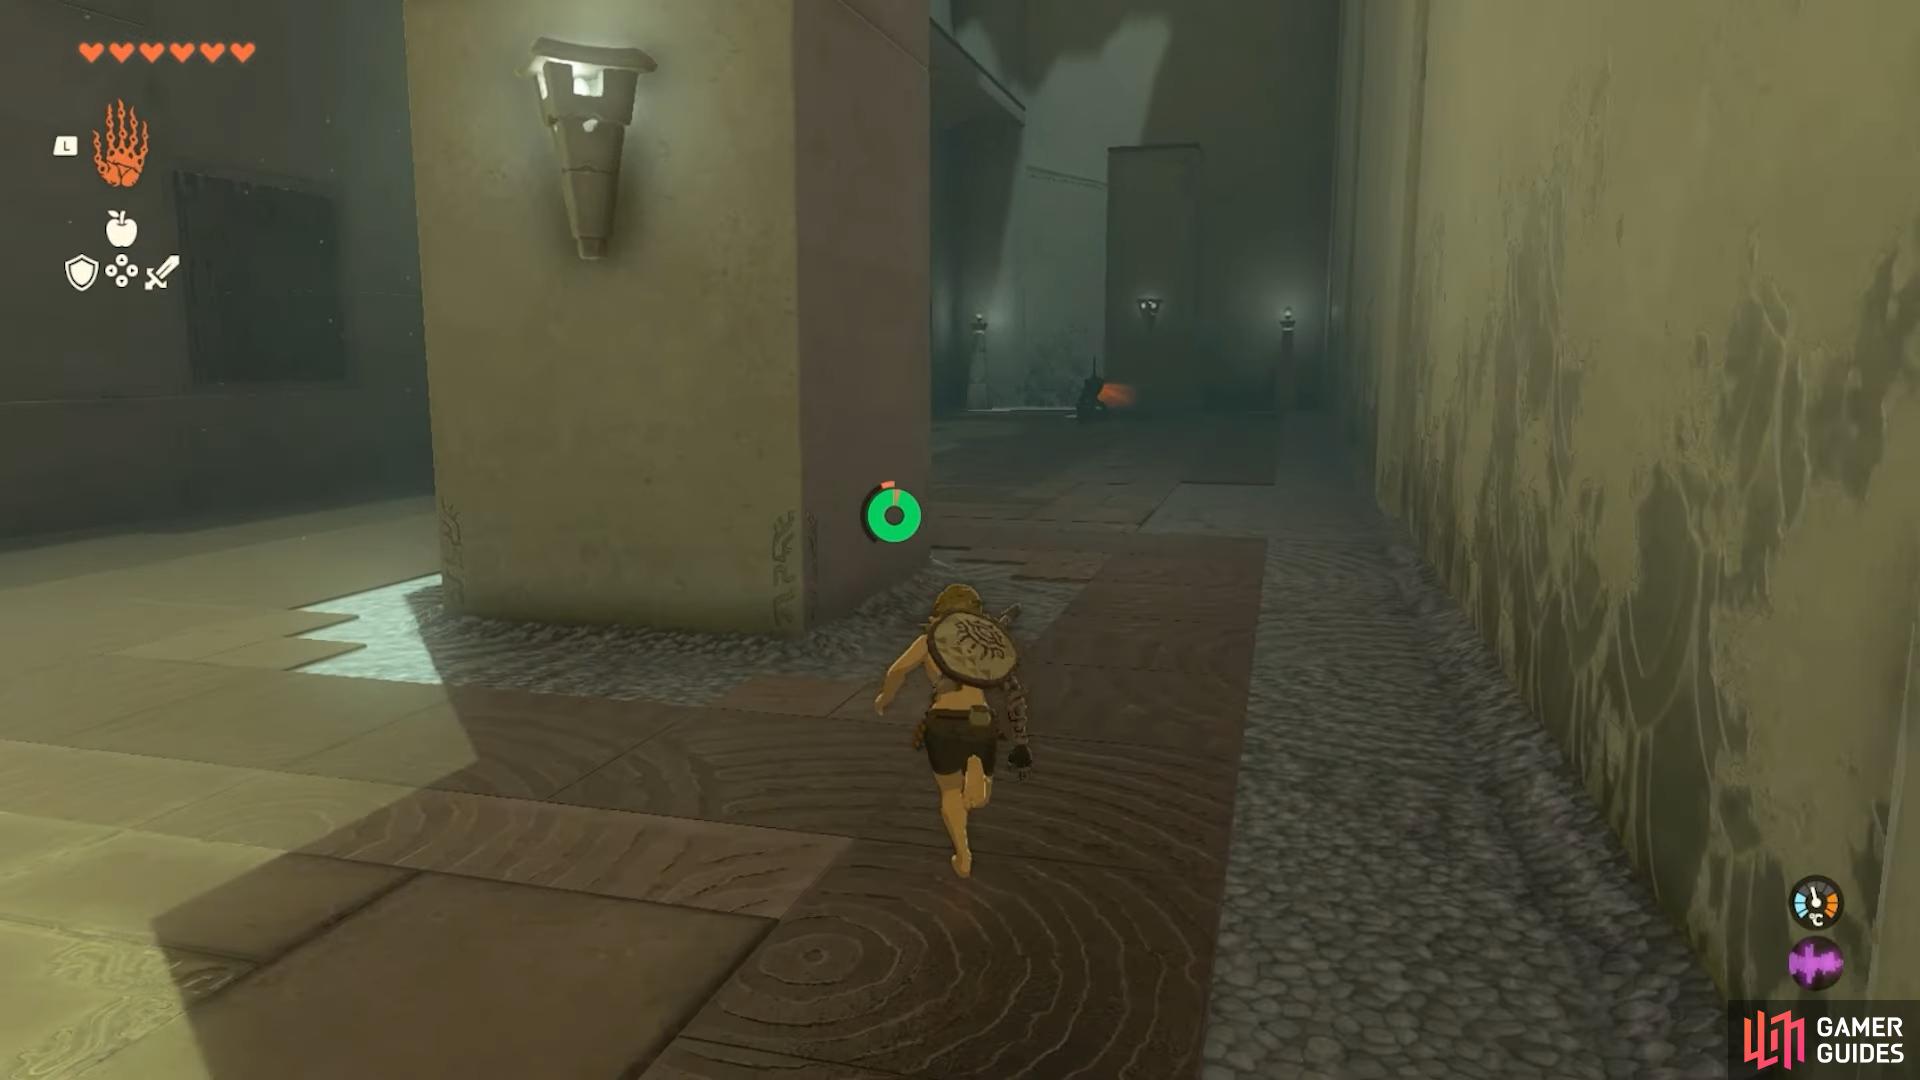
Head down the right path
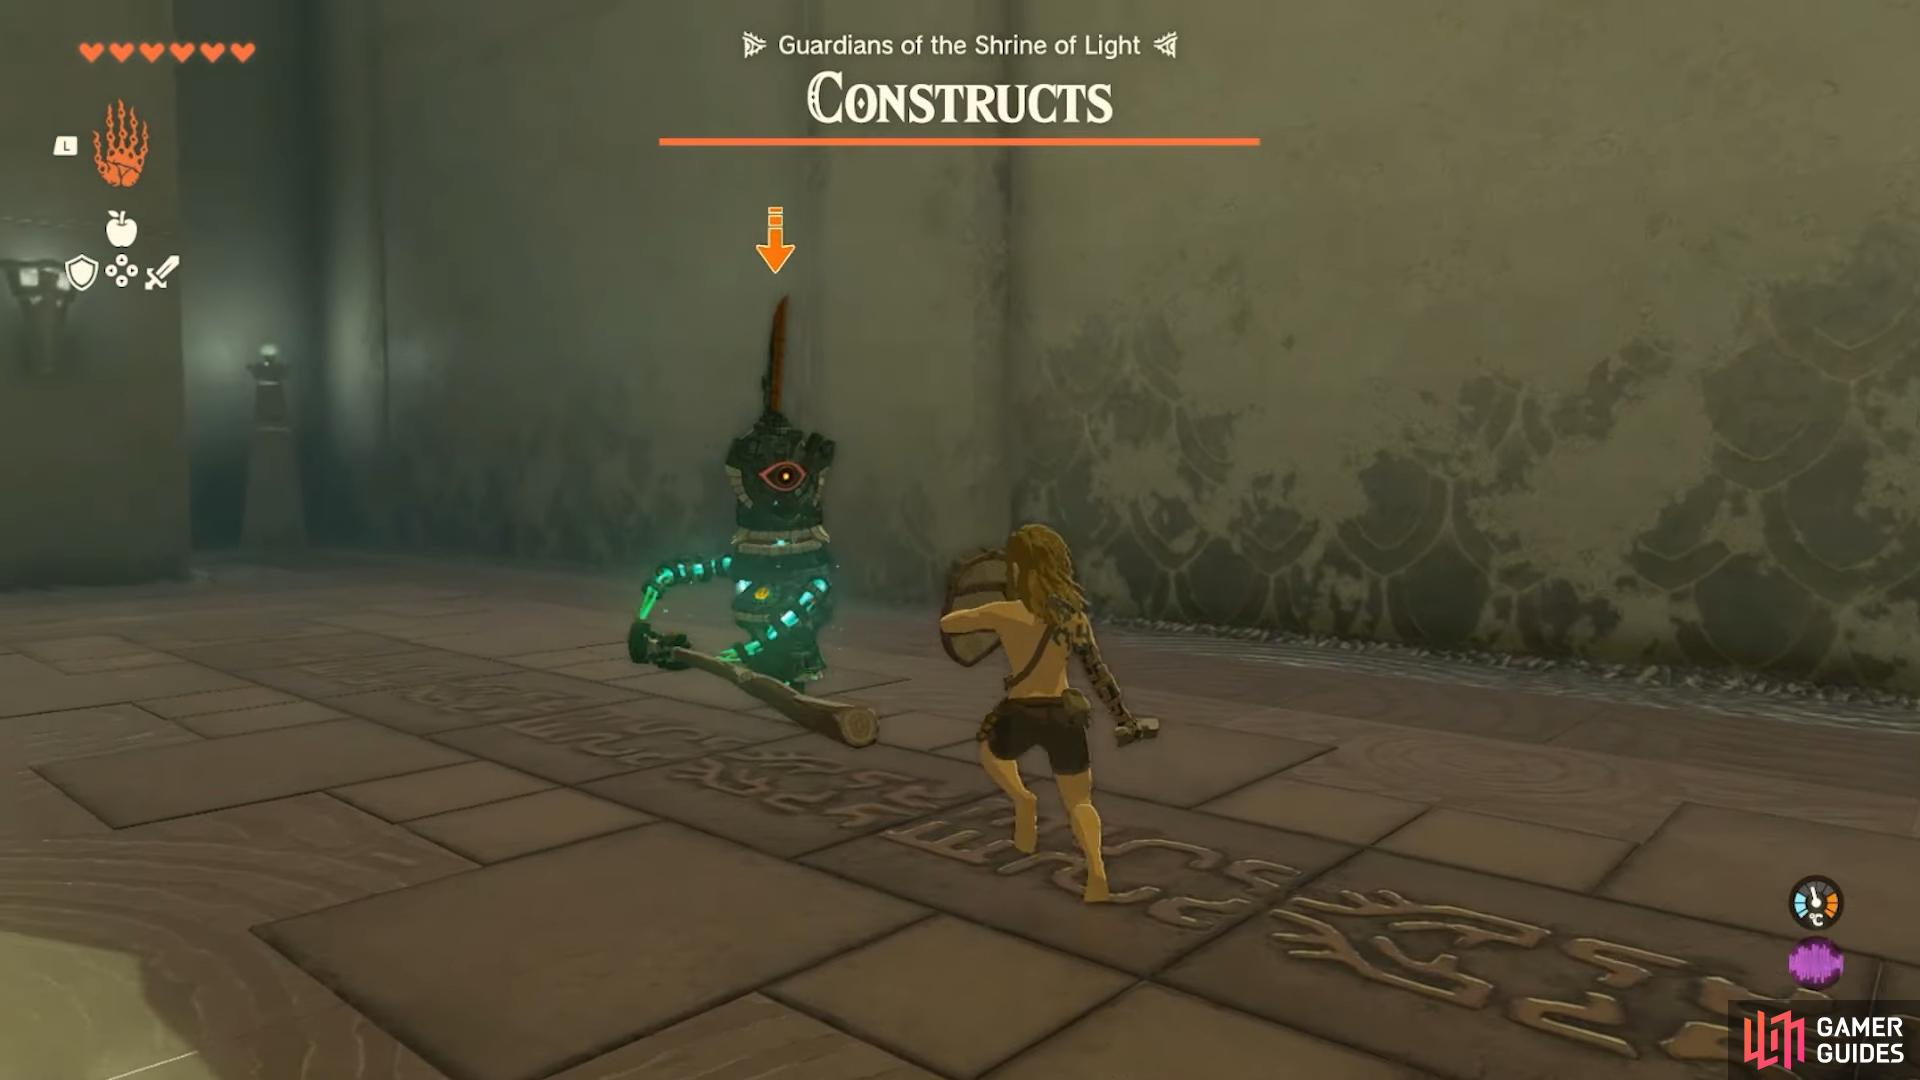
and take on the first Construct.
Take this enemy out with your stick and shield to ensure victory and pick up any items it drops just in case. Then, retrace your steps but take a right where another Construct lies in wait. Use the large pillar to entice it in and leave the others guessing your whereabouts, then take it out as fast as you can.
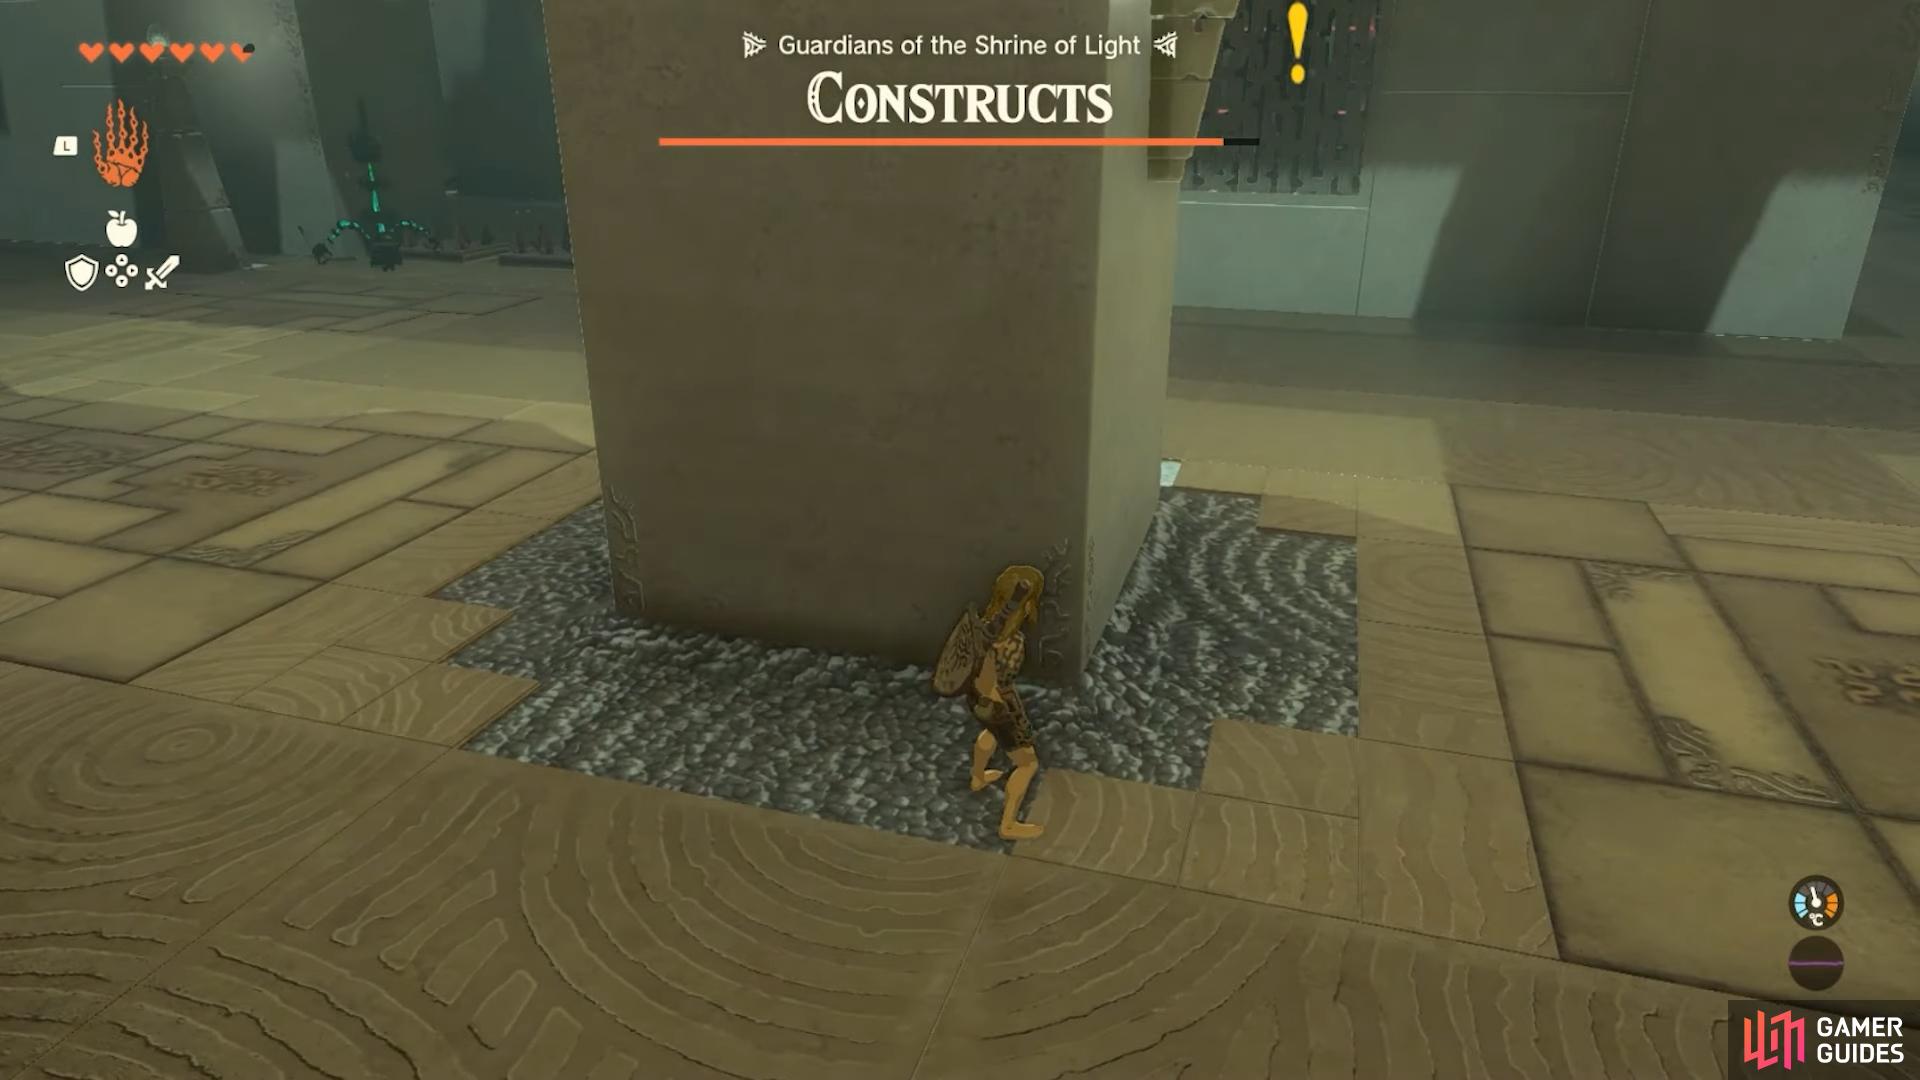
Use the pillar as cover
then take on the second enemy.
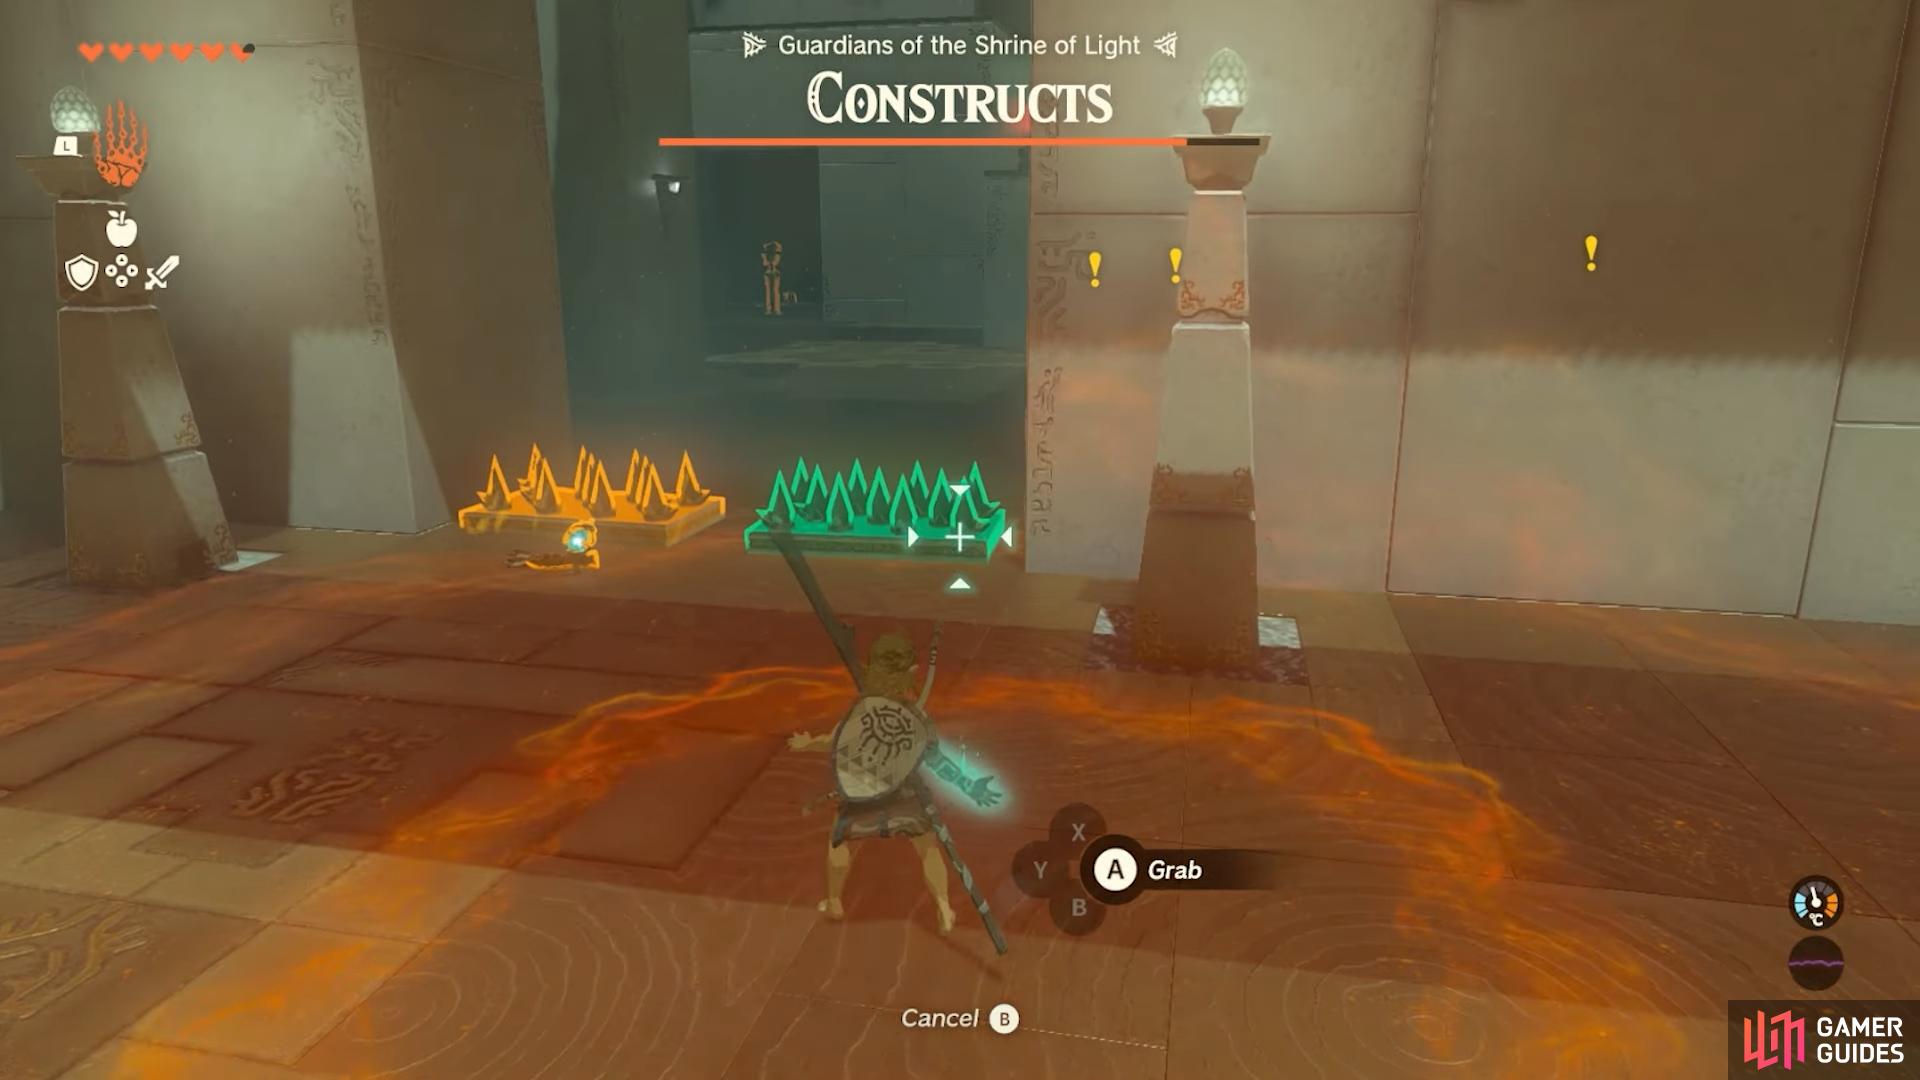
After this one is out of the way, this is where the real strategy begins. Use ![]() Ultrahand on the spikes in front of you and attach the second set onto the first, creating a spiked barrier. Turn it on its side facing away from you in an effort to block anyone that attempts to get through.
Ultrahand on the spikes in front of you and attach the second set onto the first, creating a spiked barrier. Turn it on its side facing away from you in an effort to block anyone that attempts to get through.
This barrier will inflict slow but steady damage to any Constructs that want to come for you, and hopefully mitigate any potential damage. These Constructs will try and throw rocks at you but you can just do a little moving to dodge them or move the spiked barrier up and down to block.
Once this set of enemies are down for the count, progress forward still with barrier in hand. The final enemy should be a stronger Construct with shock arrows but don’t worry, your barrier comes to the rescue once more.
Get as close as you can to the Construct and it will attempt to hit you with the shock arrows. Instead, these will hit the barrier and shock itself, doing some pretty insane damage, likely killing it in a couple of shots.
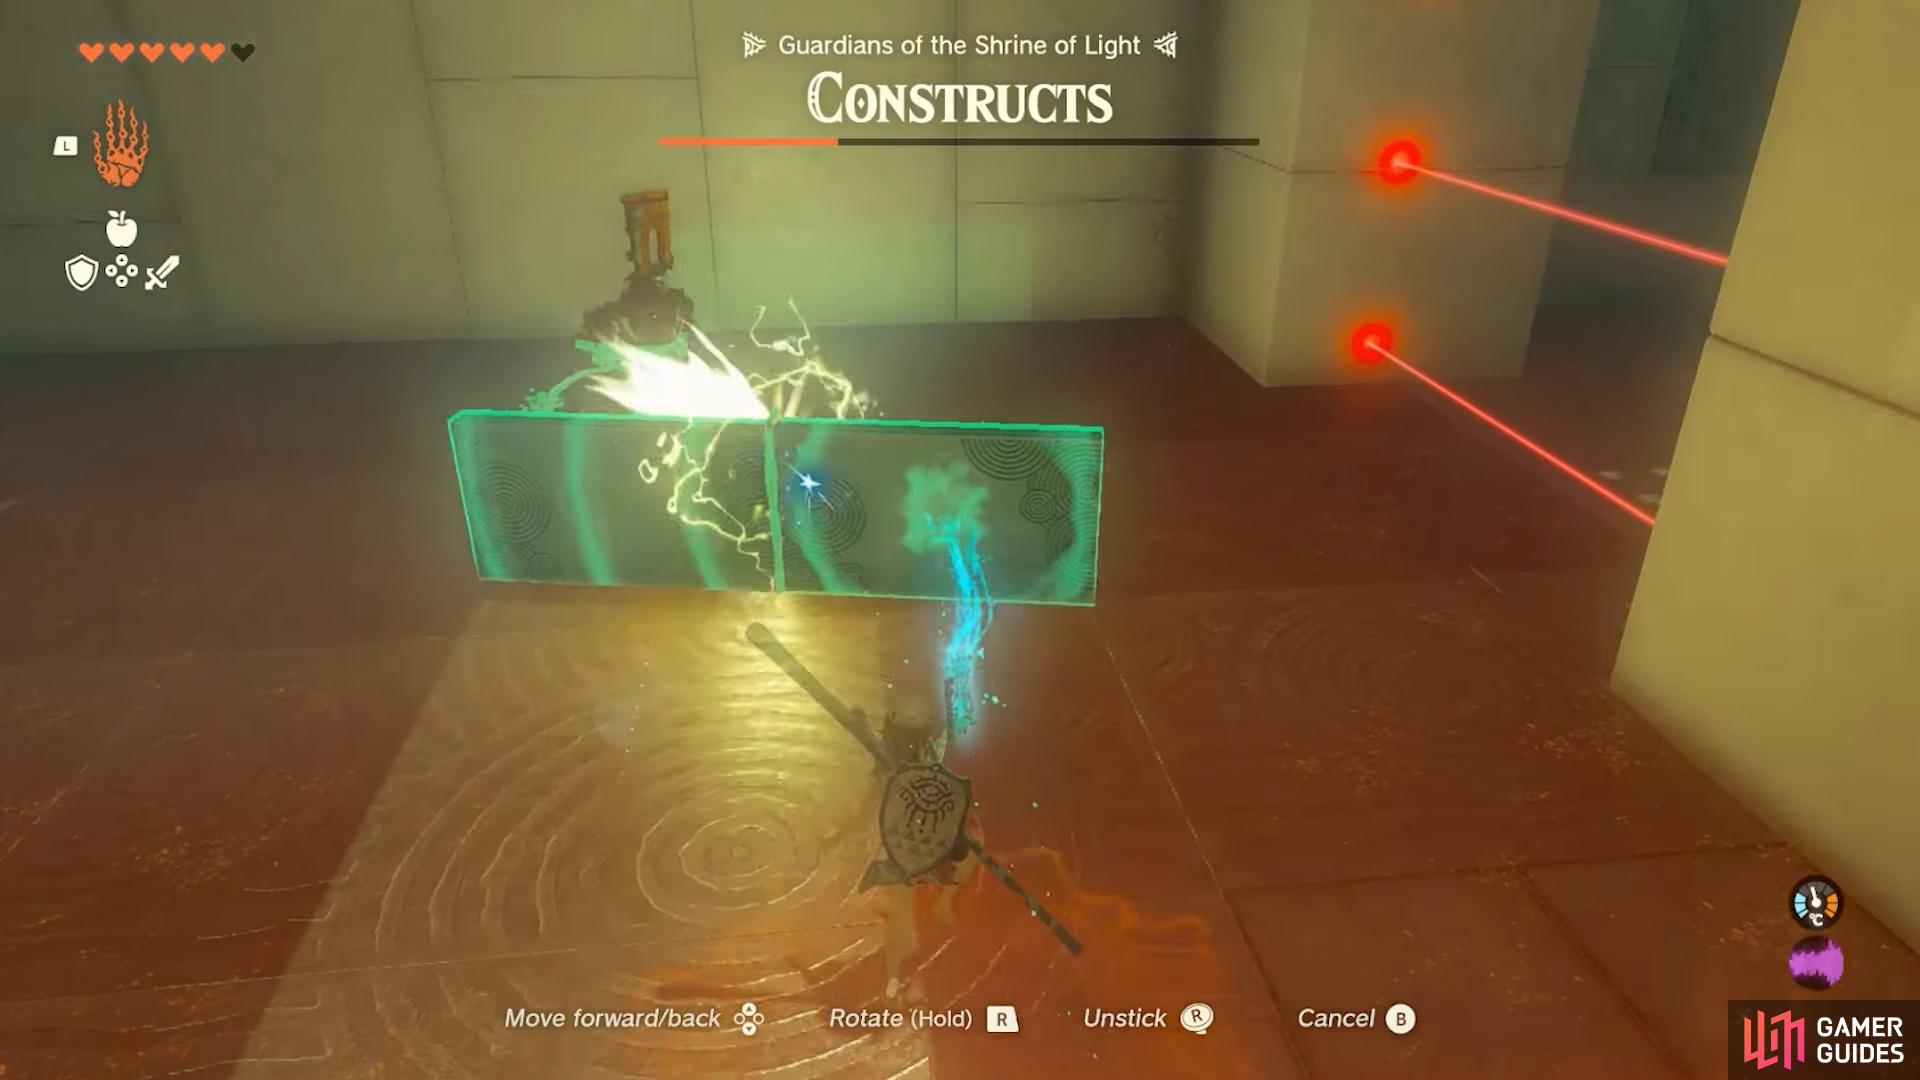
Using the spikes once more on the final enemy
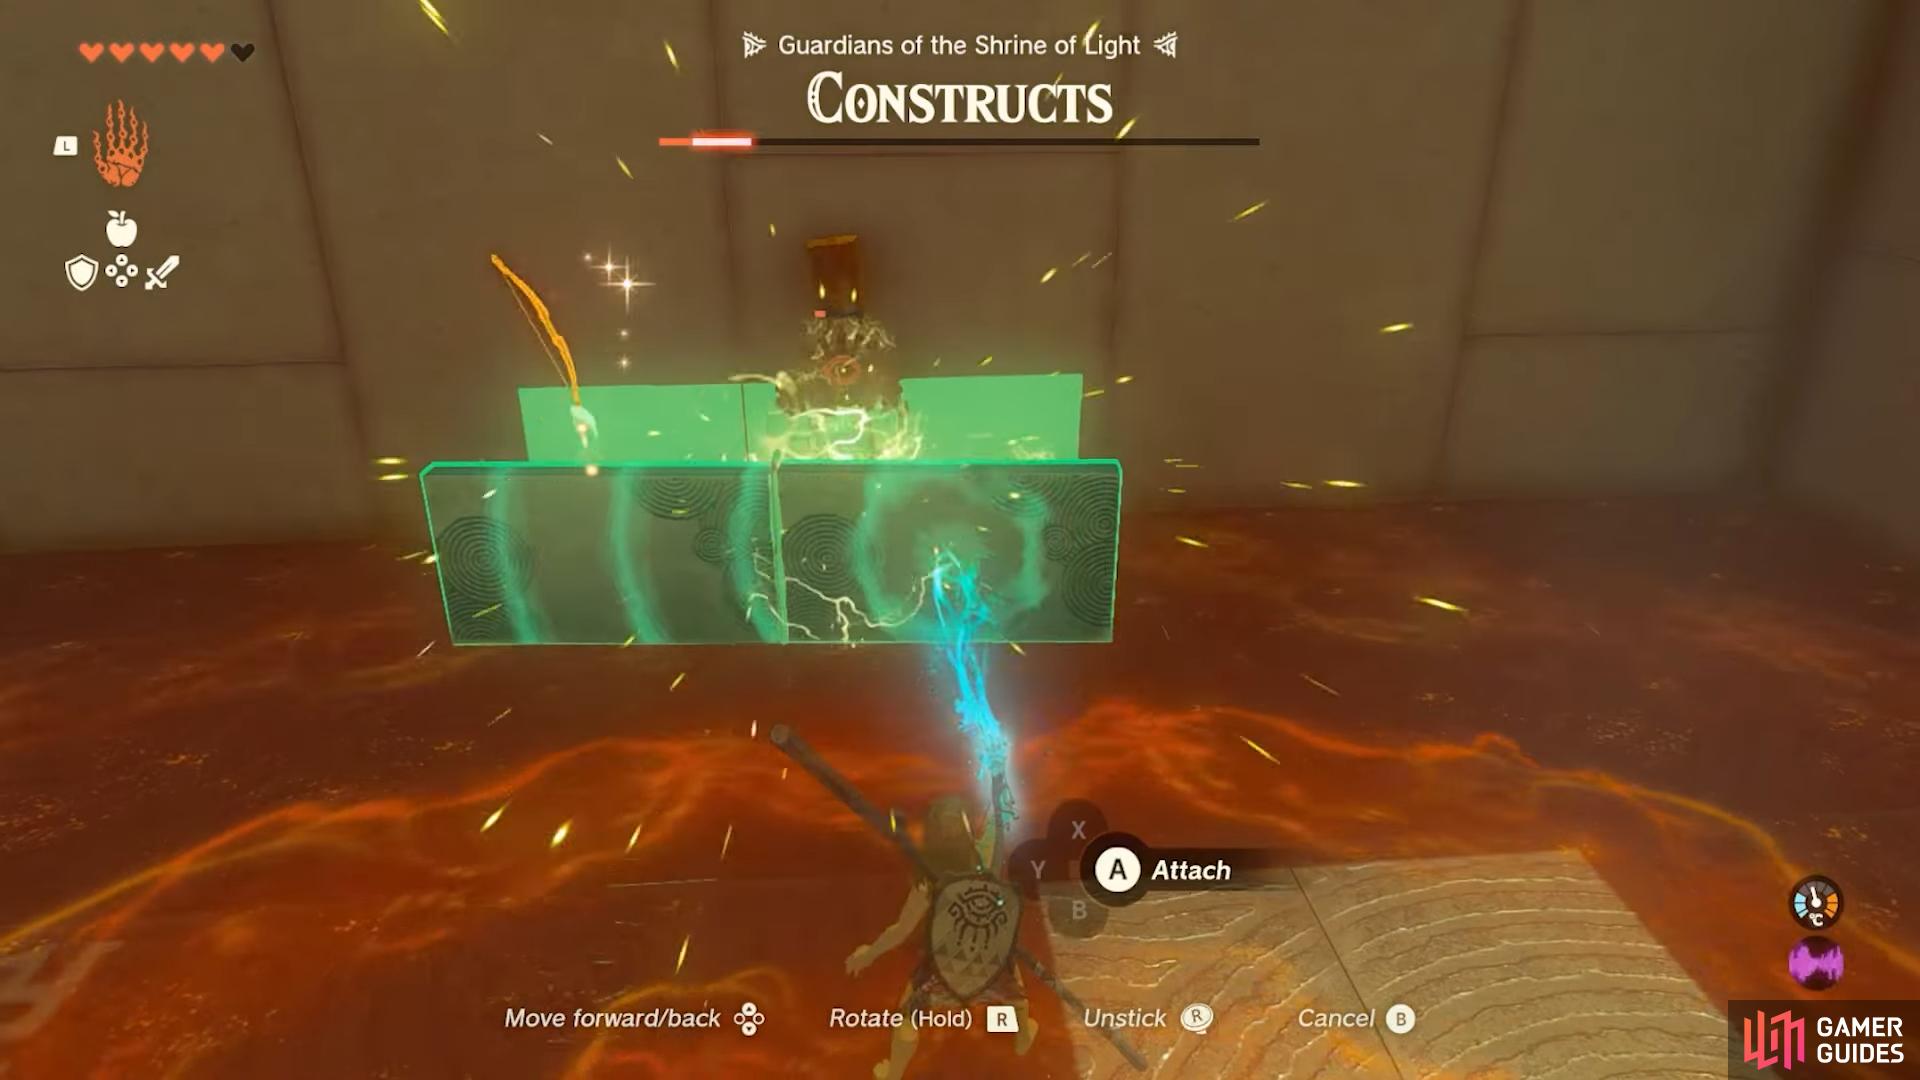
and then countering the shock arrows with the spiked barrier.
And with that, you should have completed the Eutoum Shrine, with your belongings returned to you. Head to the exit door and a chest will be waiting for you containing a ![]() Sapphire. Then, simply pick up your
Sapphire. Then, simply pick up your ![]() Light of Blessing to finish!
Light of Blessing to finish!
No Comments