
Shrines are one of the core gameplay elements in The Legend of Zelda: Tears of the Kingdom. Scattered throughout Hyrule, shrines typically require you to solve some sort of puzzle or combat trial, upon the completion of which you’ll be rewarded with a ![]() Light of Blessing and potentially equipment. Shrines can also serve as fast travel points - all you have to do is interact with them. Since completing shrines will make your character stronger and provide exploration footholds, it’s essential that you conquer them whenever possible. This page will provide a walkthrough for
Light of Blessing and potentially equipment. Shrines can also serve as fast travel points - all you have to do is interact with them. Since completing shrines will make your character stronger and provide exploration footholds, it’s essential that you conquer them whenever possible. This page will provide a walkthrough for ![]() Mayatat Shrine.
Mayatat Shrine.
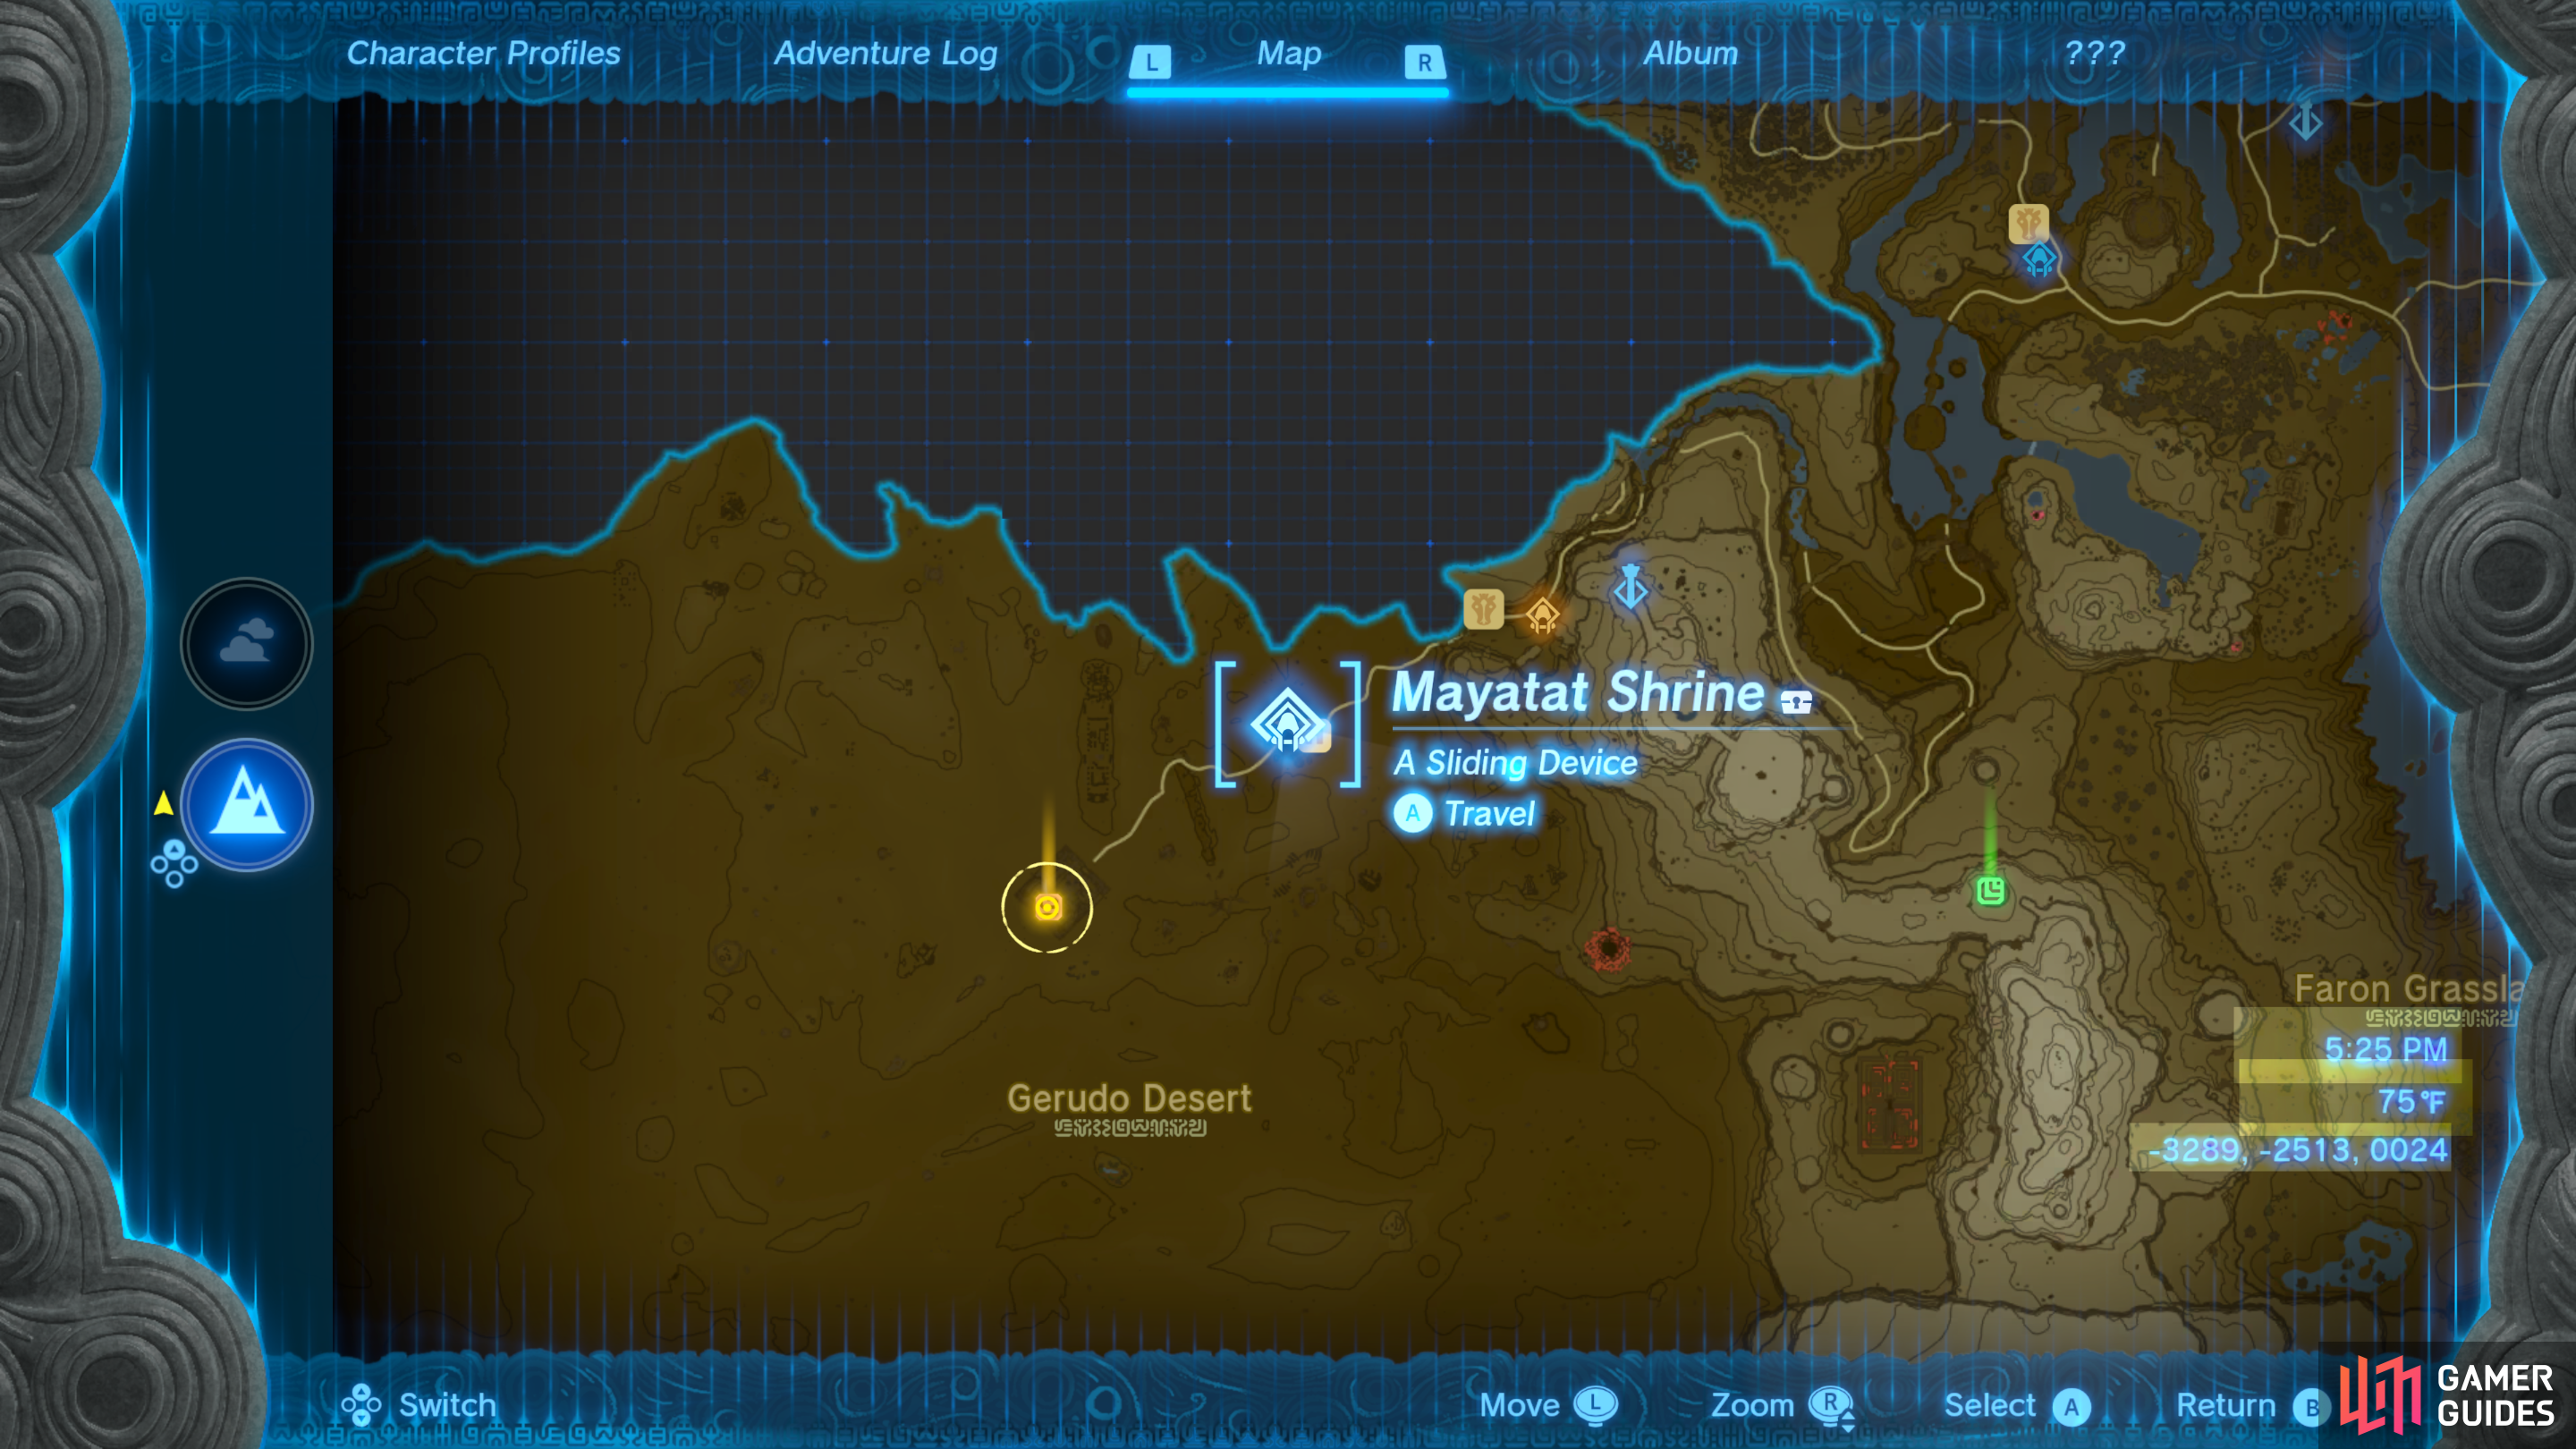
Mayatat Shrine can be found near the Kara Kara Bazaar, midways between the Gerudo Canyon Skyview Tower and Gerudo Town.
Where to find Mayatat Shrine in Tears of the Kingdom
Mayatat Shrine - not to be confused with Mayachin Shrine, can be found in the Gerudo Desert subregion, just northeast of the Kara Kara Bazaar. Examining this shrine effectively counts as the fast travel waypoint for the Kara Kara Bazaar(a), and a port just before the storm around the Desert Rift area to the southwest, which obscures travel to Gerudo Town. This shrine is easy to spot from the Gerudo Canyon Skyview Tower.
Hit one of the sleds with Recall,
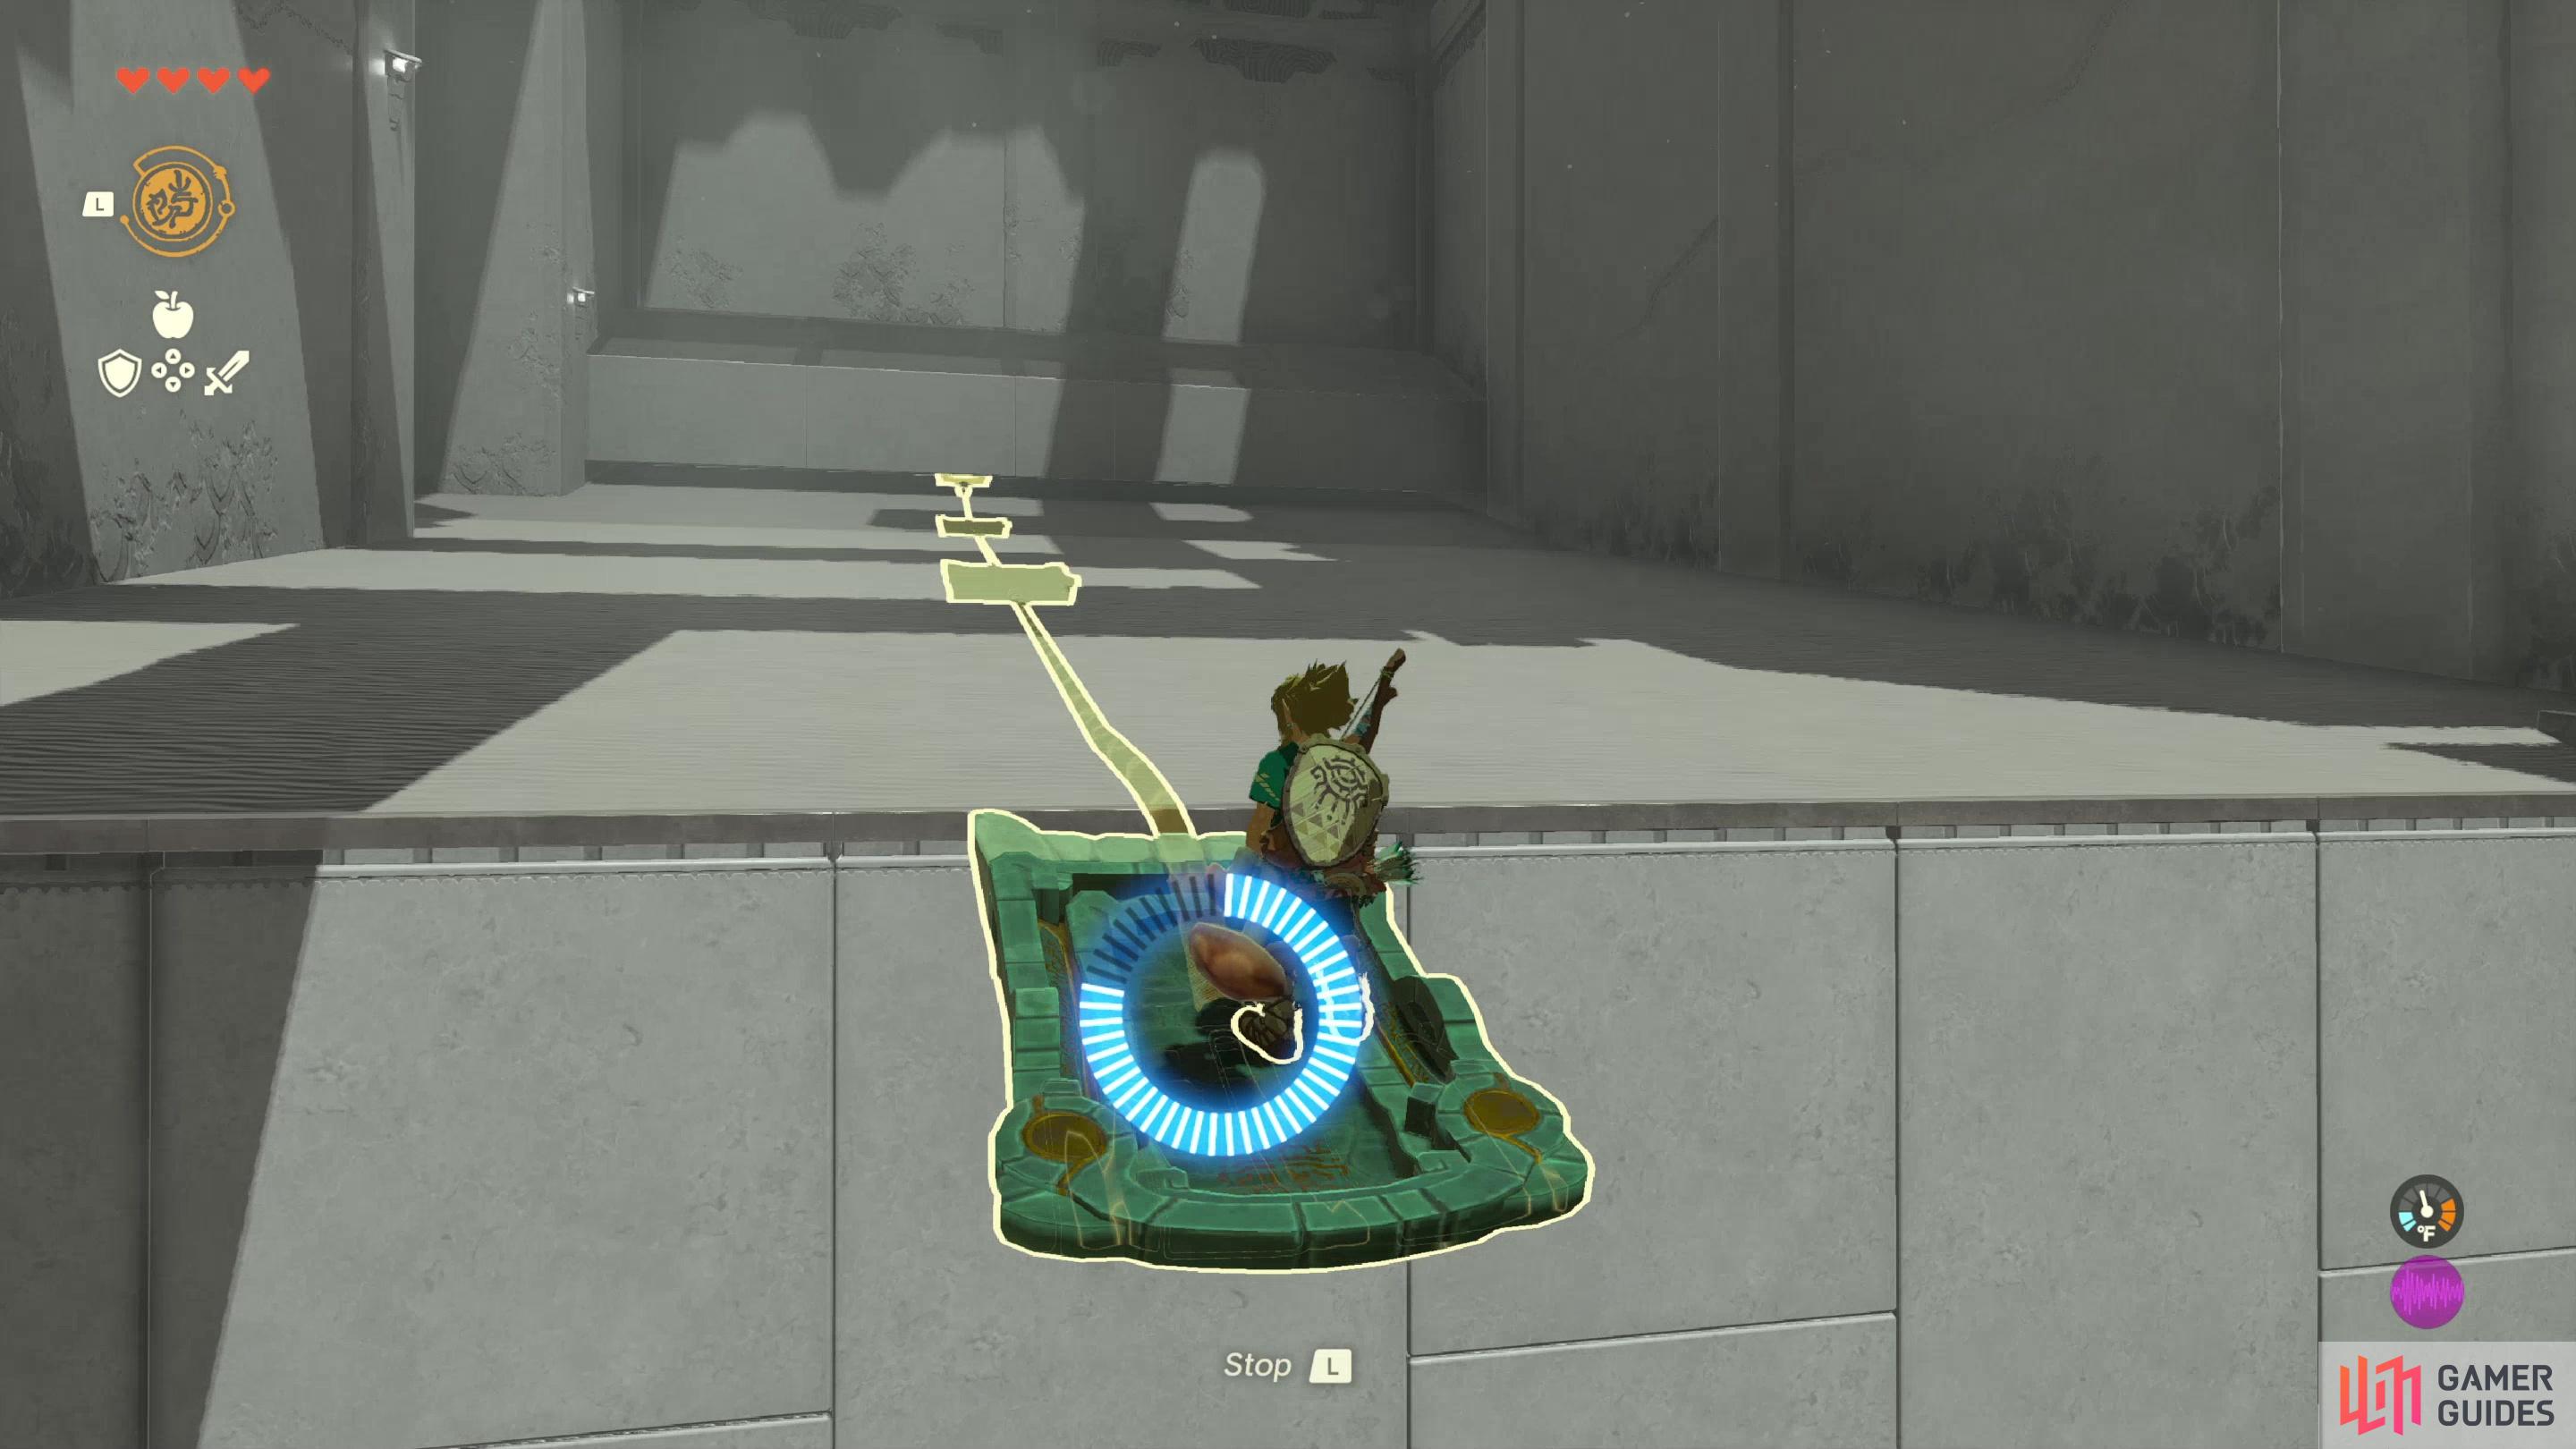
then ride it up to complete the first puzzle.
How to Complete the Mayatat Shrine in Tears of the Kingdom
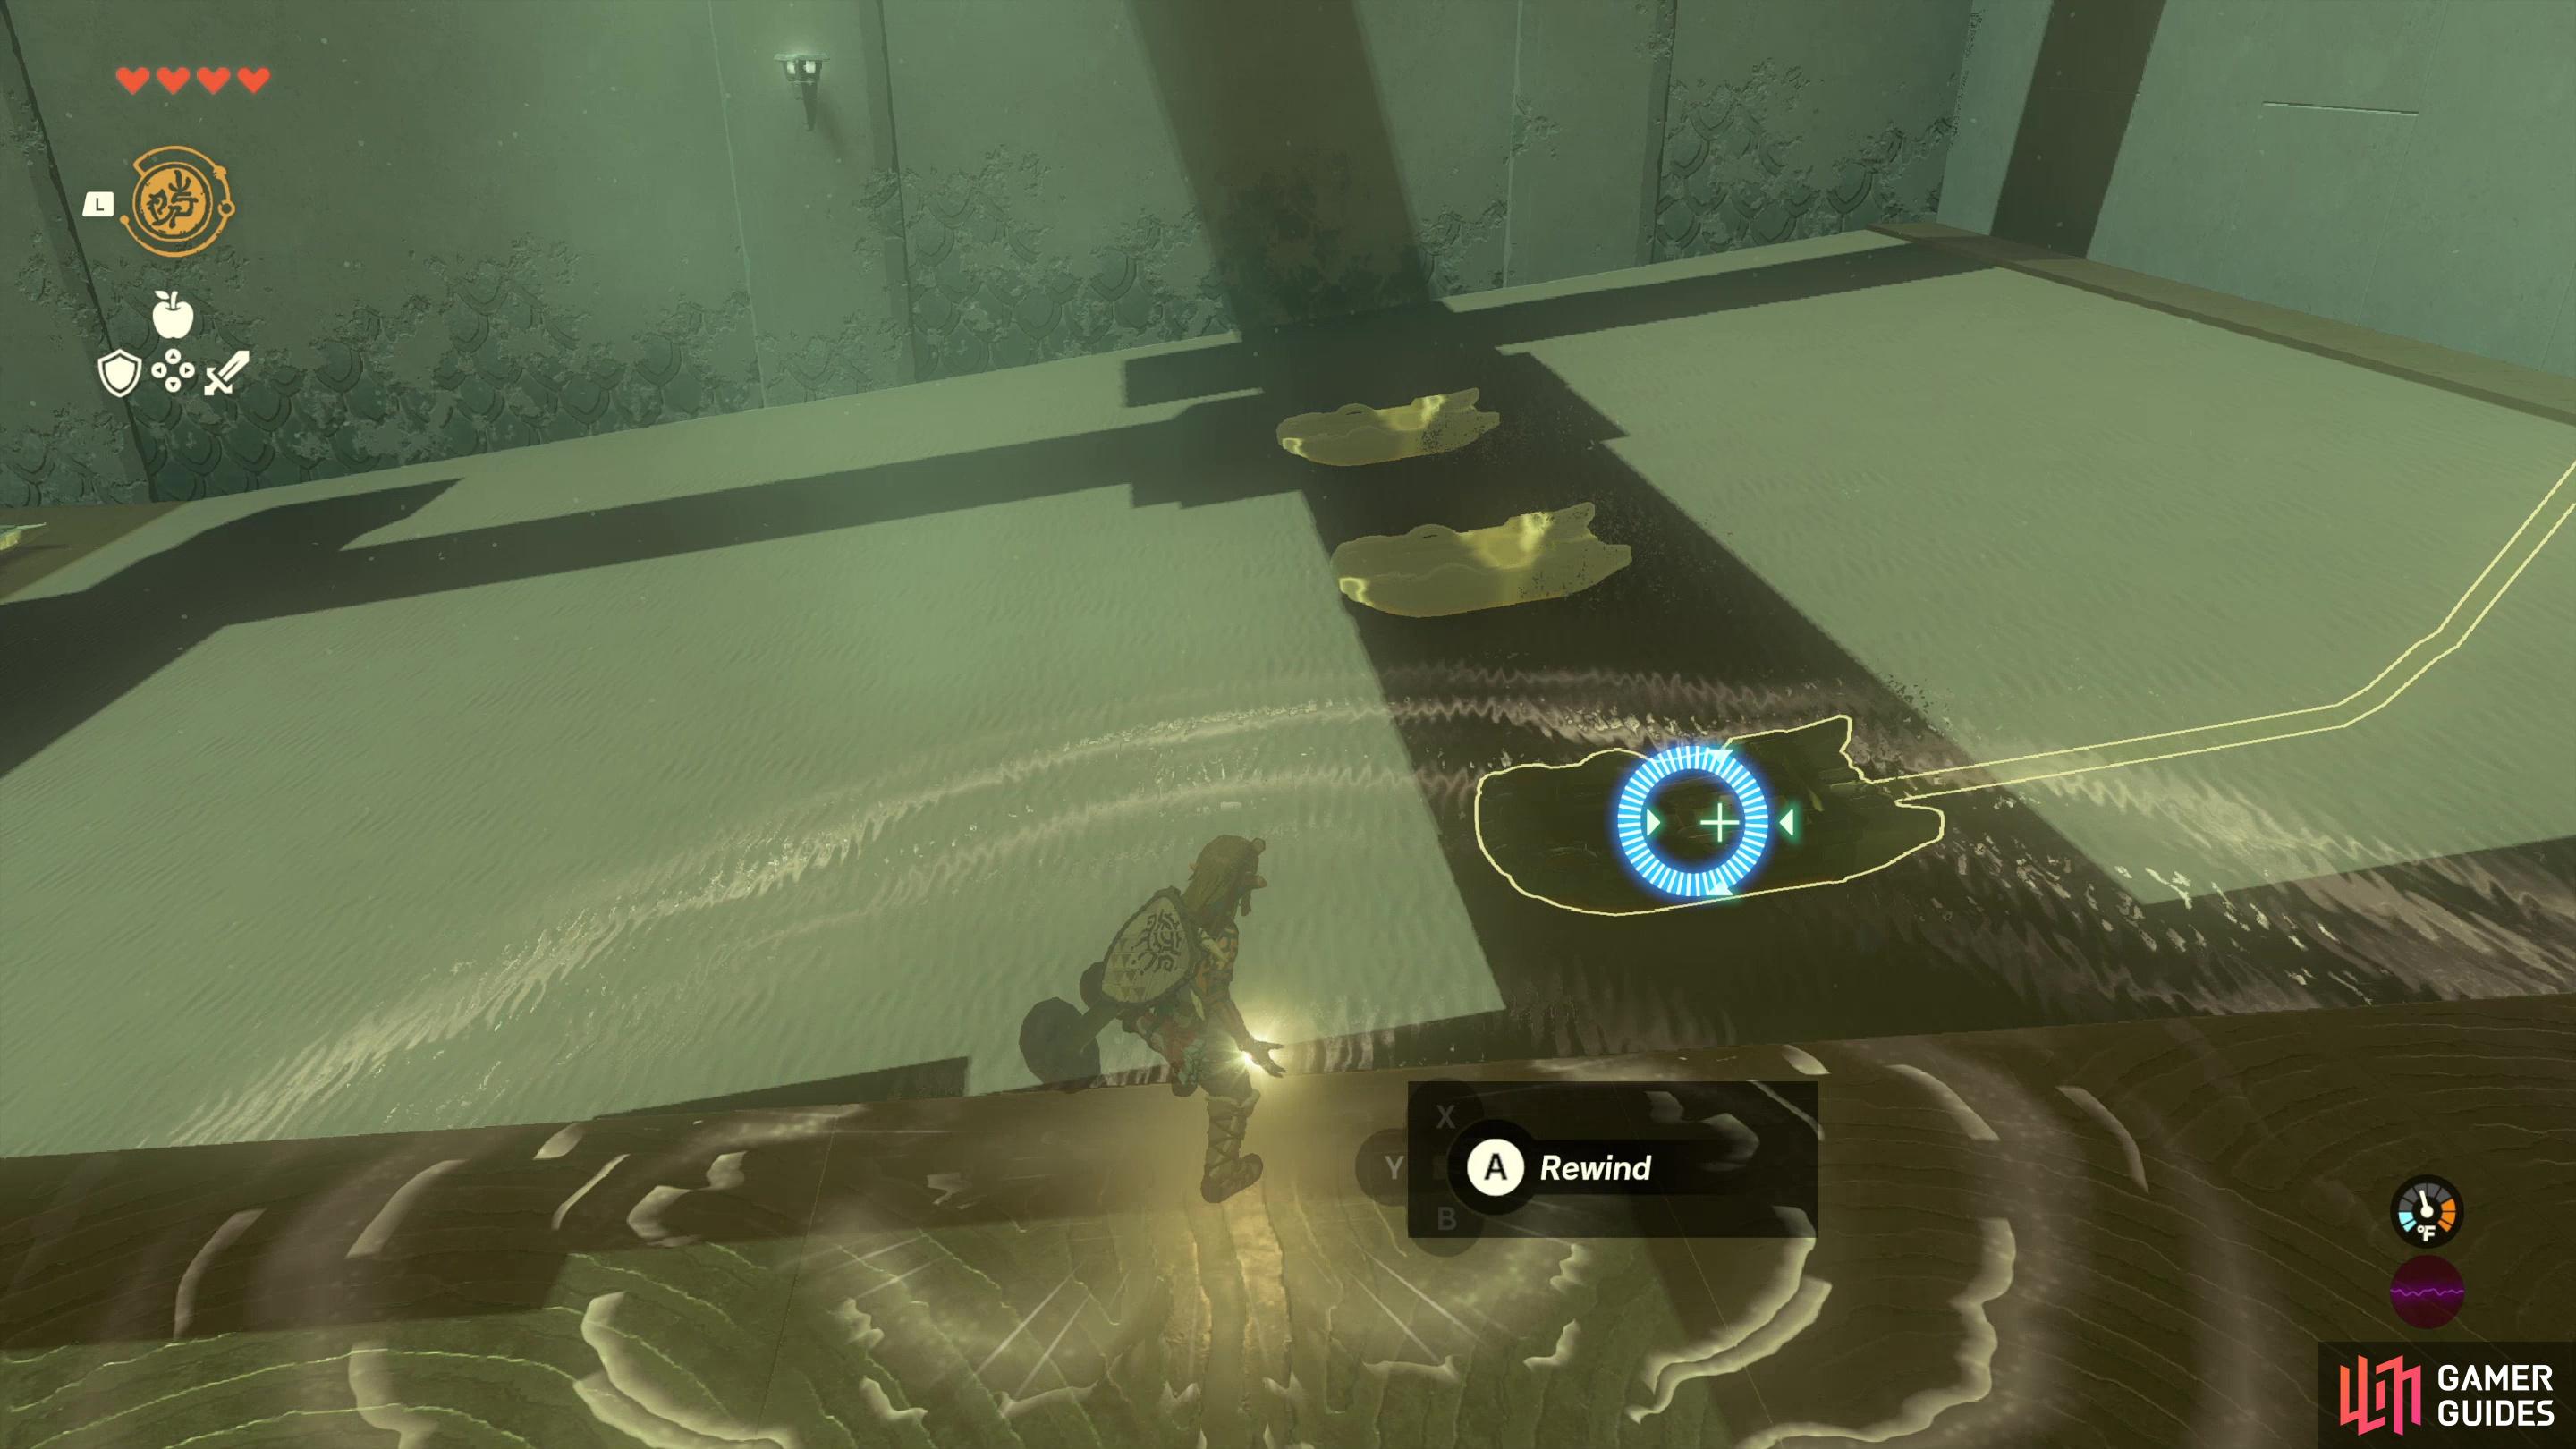
Titled “A Sliding Device”, you’ll have to make use of sleds in various ways to navigate the shrine, which consists of two main puzzles. From where you start, head downstairs and you’ll find three sleds sliding down a sandy ramp. Nothing to this one, wait for the ramps to pass by you, grab one with ![]() Ultrahand and turn it sideways so you can mount it, do so, then use
Ultrahand and turn it sideways so you can mount it, do so, then use ![]() Recall on it to rewind it back up the ledge it vaulted down. The Ultrahand step is unnecessary, but can be useful if you’re finding it tricky to get onto the sleds with just Recall alone. Once you’re up on the next ramp, continue uphill until you find some stairs to the left, which will lead to the next puzzle.
Recall on it to rewind it back up the ledge it vaulted down. The Ultrahand step is unnecessary, but can be useful if you’re finding it tricky to get onto the sleds with just Recall alone. Once you’re up on the next ramp, continue uphill until you find some stairs to the left, which will lead to the next puzzle.
This one’s not as simple. Your destination is far in the distance, past the flowing quicksand and to the right. Fortunately you have all the tools you need to make the crossing, even if it’s not immediately apparent. Grab a sled and put it in the sand near a platform - anything in the sand will slow down, but you can use platforms and pillars to arrest their movement. You, on the other hand, will sink - you’ll get three jumps on a full bar of stamina, but if you don’t reach your destination before running out of Stamina, you’ll take damage and be teleported back to where you started.
(1 of 4) Use platforms to keep your sled from flowing away from you, and use the sled to cross the quicksand.
Use the sled to jump onto the platform, then move the sled over to the other side of the platform and jump up towards a larger platform with two Zonai fans on it. Once you reach the fan platform, Ultrahand your sled over to the top of this larger platform to prevent it from running away, then attach a Zonai fan to the back of the sled. Once done, move the fan-bearing sled back to the other side of the platform, hop on it, and let the sand carry you back to where you started - you do not need to activate the fan yet.
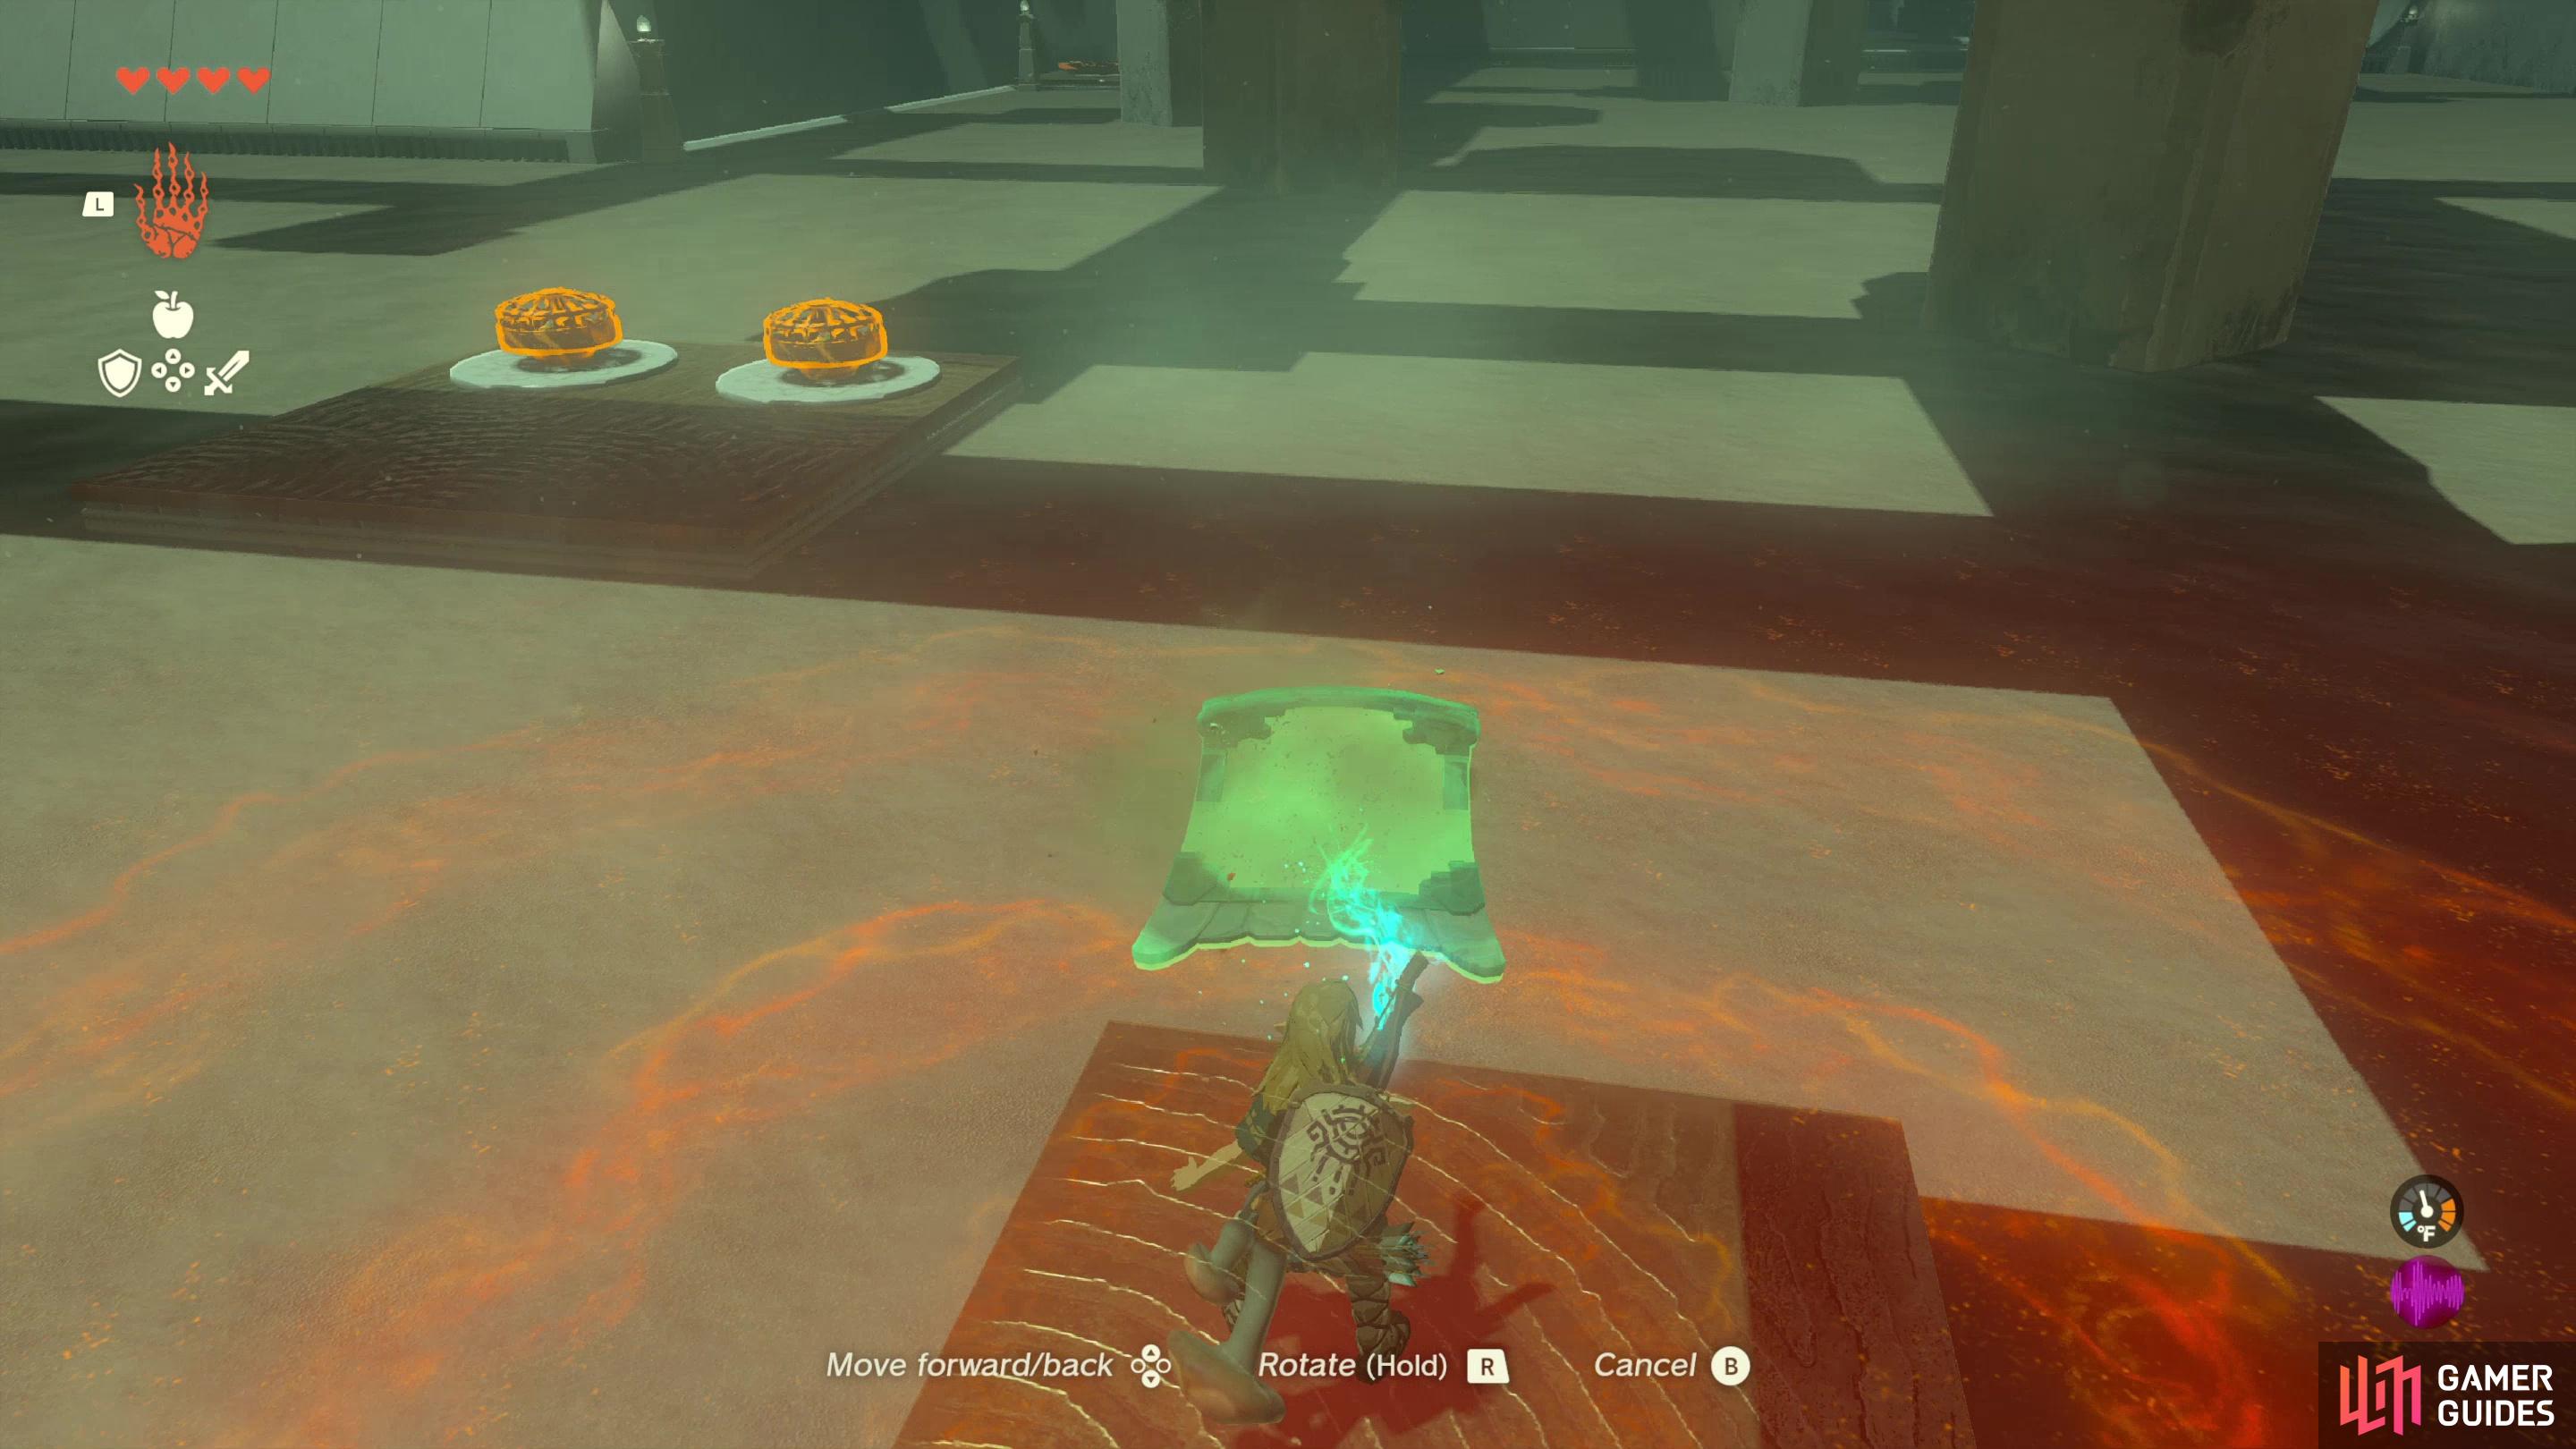
Now that you’re back where you started with a fan-bearing sled, grab the Steering Stick device on a humble dias near the sand and attach it to the front of your sled. Rotate your sled so it’s facing forward and hop on, then press  to control the sled. Now you can steer, and while you’re steering the fan will power on, allowing you to sail across the flowing quicksand. Just don’t run into any pillars or platforms (or worse, drive into a pit!) and you should have no trouble reaching the far side of the chamber, where the glowing green disc of success awaits. Interact with it to get your Light of Blessing… unless you’d rather take a detour to get some treasure, first.
How to Get the Chest in Mayatat Shrine
Since you have a self-propelled, steerable sled built, you may as well grab the treasure in this shrine. From the platform at the start of the second puzzle, steer your sled to the left around a pit, then turn right to find some solid ground to your right. Get close, jump off, then Ultrahand your sled onto the ground near you to keep it from wandering away. Go up some stairs to find a chest and loot it to score 10x ![]() Arrows. Not the most lucrative of prizes, but at least you’re done with the shrine!
Arrows. Not the most lucrative of prizes, but at least you’re done with the shrine!
No Comments