This page details everything you need to know about how to complete the Helheim run in Niflheim, part of the Forgotten Saga DLC. We’ll cover where to find the Hidden Merchant in Helheim, and how to defeat Hel and her hound, Garmr (Best of Hounds).
How to Complete the Helheim Niflheim Run
The run through Helheim is slightly different from those of the other regions in Niflheim. This time, there’s no quest to complete. Instead, you’ll have a series of areas which you can only enter and leave through portals. Each area will have specific objectives (generally to defeat all enemies in the area) which you’ll need to complete before the portal will become functional, so you can’t just run through one area straight to the portals and then find yourself at the boss room within a few minutes.
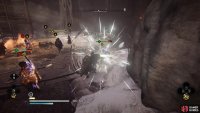
The enemies that you’ll be facing in Helheim are almost exclusively Draugr. These are undead elites of various kinds, with a decent mixture of melee and ranged enemies in each area. You’ll need to make the most of surrounding architecture to avoid being caught off guard by crossbows in particular, since these can inflict a massive amount of damage if you get hit by one of the shots that are wound up.
One of the areas that you’ll teleport to has numerous poison clouds scattered around the chest, with crossbow enemies guarding the area. You should try to clear as many of these as possible quietly using assassinations, but if you are discovered you can aim for their weak points and kill them in one swift stun attack. The last thing you want is to be shot at from different angles, so if all else fails just use the stone pillars to hide behind ranged attacks while you goad enemies to your position.
Aside from the potentially deadly crossbows, there are plenty of dangerous melee elite Draugr that you’ll need to deal with as well. Make good use of hitting their weak points to kill them in one stun attack, and be ready to use plenty of dodges and rolls if you become overwhelmed by multiple elites. Some useful abilities to focus on acquiring and upgrading are Fire Arrow and Jotun Dive. If you set afire multiple enemies at once, they will flail around helplessly as you focus on others. Jotun Dive is particularly useful to inflict damage on a bunch of enemies nearby, while making yourself invulnerable to damage for the duration of the attack.
The most important thing to remember in Helheim is that you will have very few opportunities to heal, since there are no Elk Shrines here. The only way that you can heal is by purchasing one from a merchant. You will come across a couple of merchants during your path through Helheim, so make good use of their heals if you’ve sustained a lot of damage. You don’t want to be entering the boss fight with Hel with less than half of your health remaining, so take your time through this region and don’t do anything that will unnecessarily expose you to attacks.
Helheim Hidden Merchant Location
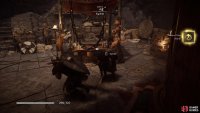
As with some other regions, the Hidden Merchant in Helheim isn’t so hidden. In fact, you won’t be able to avoid the room where the merchant (Hel’s Majordomo) is located, so don’t worry about missing them as you make your way through each area. You’ll find the merchant towards the end of the region, just before the area where the boss room is found. Be sure to make the most of your coins here and purchase any last minute runes, abilities, weapons or upgrades if there are any on offer. If you have any weapons or abilities which inflict Shock Damage, you should focus on purchasing runes which enhance this, especially since Hel is vulnerable to this damage type. You’ll have no further need for your coins after this merchant, so you might as well spend all you have.
Helheim Boss Fight: Hel and Garmr (Best of Hounds)
How to Deal With Garmr
This is arguably the most difficult fight in all the Niflheim runs. Hel is generally much faster than other bosses in her basic attacks, and she has numerous special attacks that you’ll need to get used to. In addition to worrying about Hel, you’ll also need to deal with her hound named Garmr. The hound is far weaker than Hel, but they can still catch you off guard with a swift pounce attack. It may be tempting to focus on killing Garmr first, but this isn’t worthwhile since the hound doesn’t really die and will come back soon after. Instead, you should just keep moving around the boss room and be ready to dodge or roll away from Garmr’s pounce attacks, as you continue to inflict damage on Hel with ranged or melee attacks.
If the above tactic isn’t working for you, it may be easier if you kill Garmr as soon as possible with some of your most devastating attacks. Although the hound will come back, you’ll have at least 10 - 20 seconds of it not being around, which will make dealing with Hel’s attacks much easier. A good way to keep Garmr occupied as you focus on Hel is by using Fire Arrow to apply damage over time. If your fire damage is sufficiently enhanced by runes, the damage over time could even kill Garmr within a few seconds.
How to Defeat Hel
The main thing to look out for during the first phase of the fight with Hel are her magical sword attacks. She will cast arcs of damage from her sword (usually two white followed by a red one) which will track you to some extent. You’ll need to dodge or roll out of the way of each of these to avoid being damaged by them, but once you’re familiar with the attack it should be fairly easy to do this.
Magic Arc Attacks
In addition to the magical attacks, Hel will also sometimes fly into the air and then charge at you incredibly quickly. This attack can be difficult to avoid unless you get the timing right, so it’s likely that you’ll be caught off guard by it a few times until you’re familiar with the movements which precede it. There will be a yellow rune aura that surrounds Hel’s head just before she charging down at you from the air, so look out for this and be ready to dodge a split second after it occurs. If you dodge or roll too soon, you’ll almost certainly be hit.
Sword Slash Attacks
Aside from the magical arc casts and the flying charge, the other attacks from Hel at this stage of the fight are fairly easy to avoid. She will often spam slashes with her sword if you get too close, but if you have the Brush With Death skill you can continually avoid these while retaining your full stamina, since each successful Perfect Dodge with this skill equipped will replenish your stamina in full. You can then quickly follow the dodge with a few attacks of your own before dodging the next series of slash attacks.
At a certain point in the fight (usually when Hel is around 50% - 25% health), Hel will incorporate Garmr into her being and begin to use attacks which utilize the roots of a tree. These attacks can be devastating if you’re caught in them, so you’ll need to learn the motions of each quickly. The first attack that you’ll likely need to avoid involves small red circles appearing beneath your feet. You’ll need to sprint away from these to keep avoiding them until the attack is over. If you’re caught in one, the roots will inflict heavy damage.
Red Circle Root Attack
Another special root attack involves Hel flying into the air and spinning. When she stops a part of the ground will be highlighted in red, indicating an incoming damage area. Within a few seconds a mass of roots will erupt from the ground, knocking you down and damaging you in the process. You can dodge or roll out of this highlighted damage area to avoid it, but sometimes the entire space of the fight arena will be highlighted in red. When this happens, you’ll need to save the dodge until the very last moment, just before the roots erupt from the ground, to avoid any damage. If you time it correctly you should be able to roll through the attack, as shown in a gif below.
Ground Roots Eruption
Side Roots Eruption
Another version of this attack can occur as roots erupt from the side of the arena instead of the ground. The same principle applies here: just get out of the area highlighted in red as quickly as possible before the roots appear.
Root Spin Attack
Finally, the last couple of new root-based attacks involves Hel extending entwined roots from beneath her dress, looking almost like a tail. She will then spin around and attempt to hit you with the entwined roots, so be ready to move out of the way with a quick dodge or roll.
Root Whip Attack
The other attack occurs as Hel raises roots around and above her while floating in the air, before using them as whips that will lash out at you from across the arena. It may take a few attempts to get the timing right for avoiding these, but once you do they shouldn’t cause you too much trouble.
As you avoid all of these special attacks, you should be hitting Hel with your own ranged attacks wherever possible. Using special abilities to inflict Shock or Fire damage will help you by applying damage over time, but ultimately the most damaging attacks will come from direct melee strikes. You’ll need to balance your timing carefully between dodging and hitting in melee, since Hel will be relentless in retaliatory melee strikes of her own. Keep the pressure on her to prevent the use of special root attacks and you should be fine. An upgraded melee weapon, especially once which inflicts Shock or Fire damage over time, will make this fight much easier.


No Comments