
This page details where to find and how to defeat the Ghost Auroch, a legendary animal in the Amienois region of Francia, Siege of Paris DLC.

Ghost Auroch, Siege of Paris DLC.
Where to Find and How to Defeat the Ghost Auroch
The Ghost Auroch is located in the northwest of Amienois, Francia. You’ll find it waiting in some Roman ruins, but as soon as you enter the circle it will attack. The Ghost Auroch is one of the more difficult legendary animal fights, especially if you’re playing on the highest difficulty settings. This is because the auroch spams unpredictable chain attacks, which can easily catch you off guard. A hit from the standard charge can be enough to kill you in one hit, so you’ll need to be extremely careful when avoiding attacks. If you’re playing on high difficulty settings and want to maximize your chances of success, don’t forget to use the Feast Buff by hosting a feast at your longhouse in Ravensthorpe. A fully upgraded settlement will increase your melee and ranged damage, armor, and health.
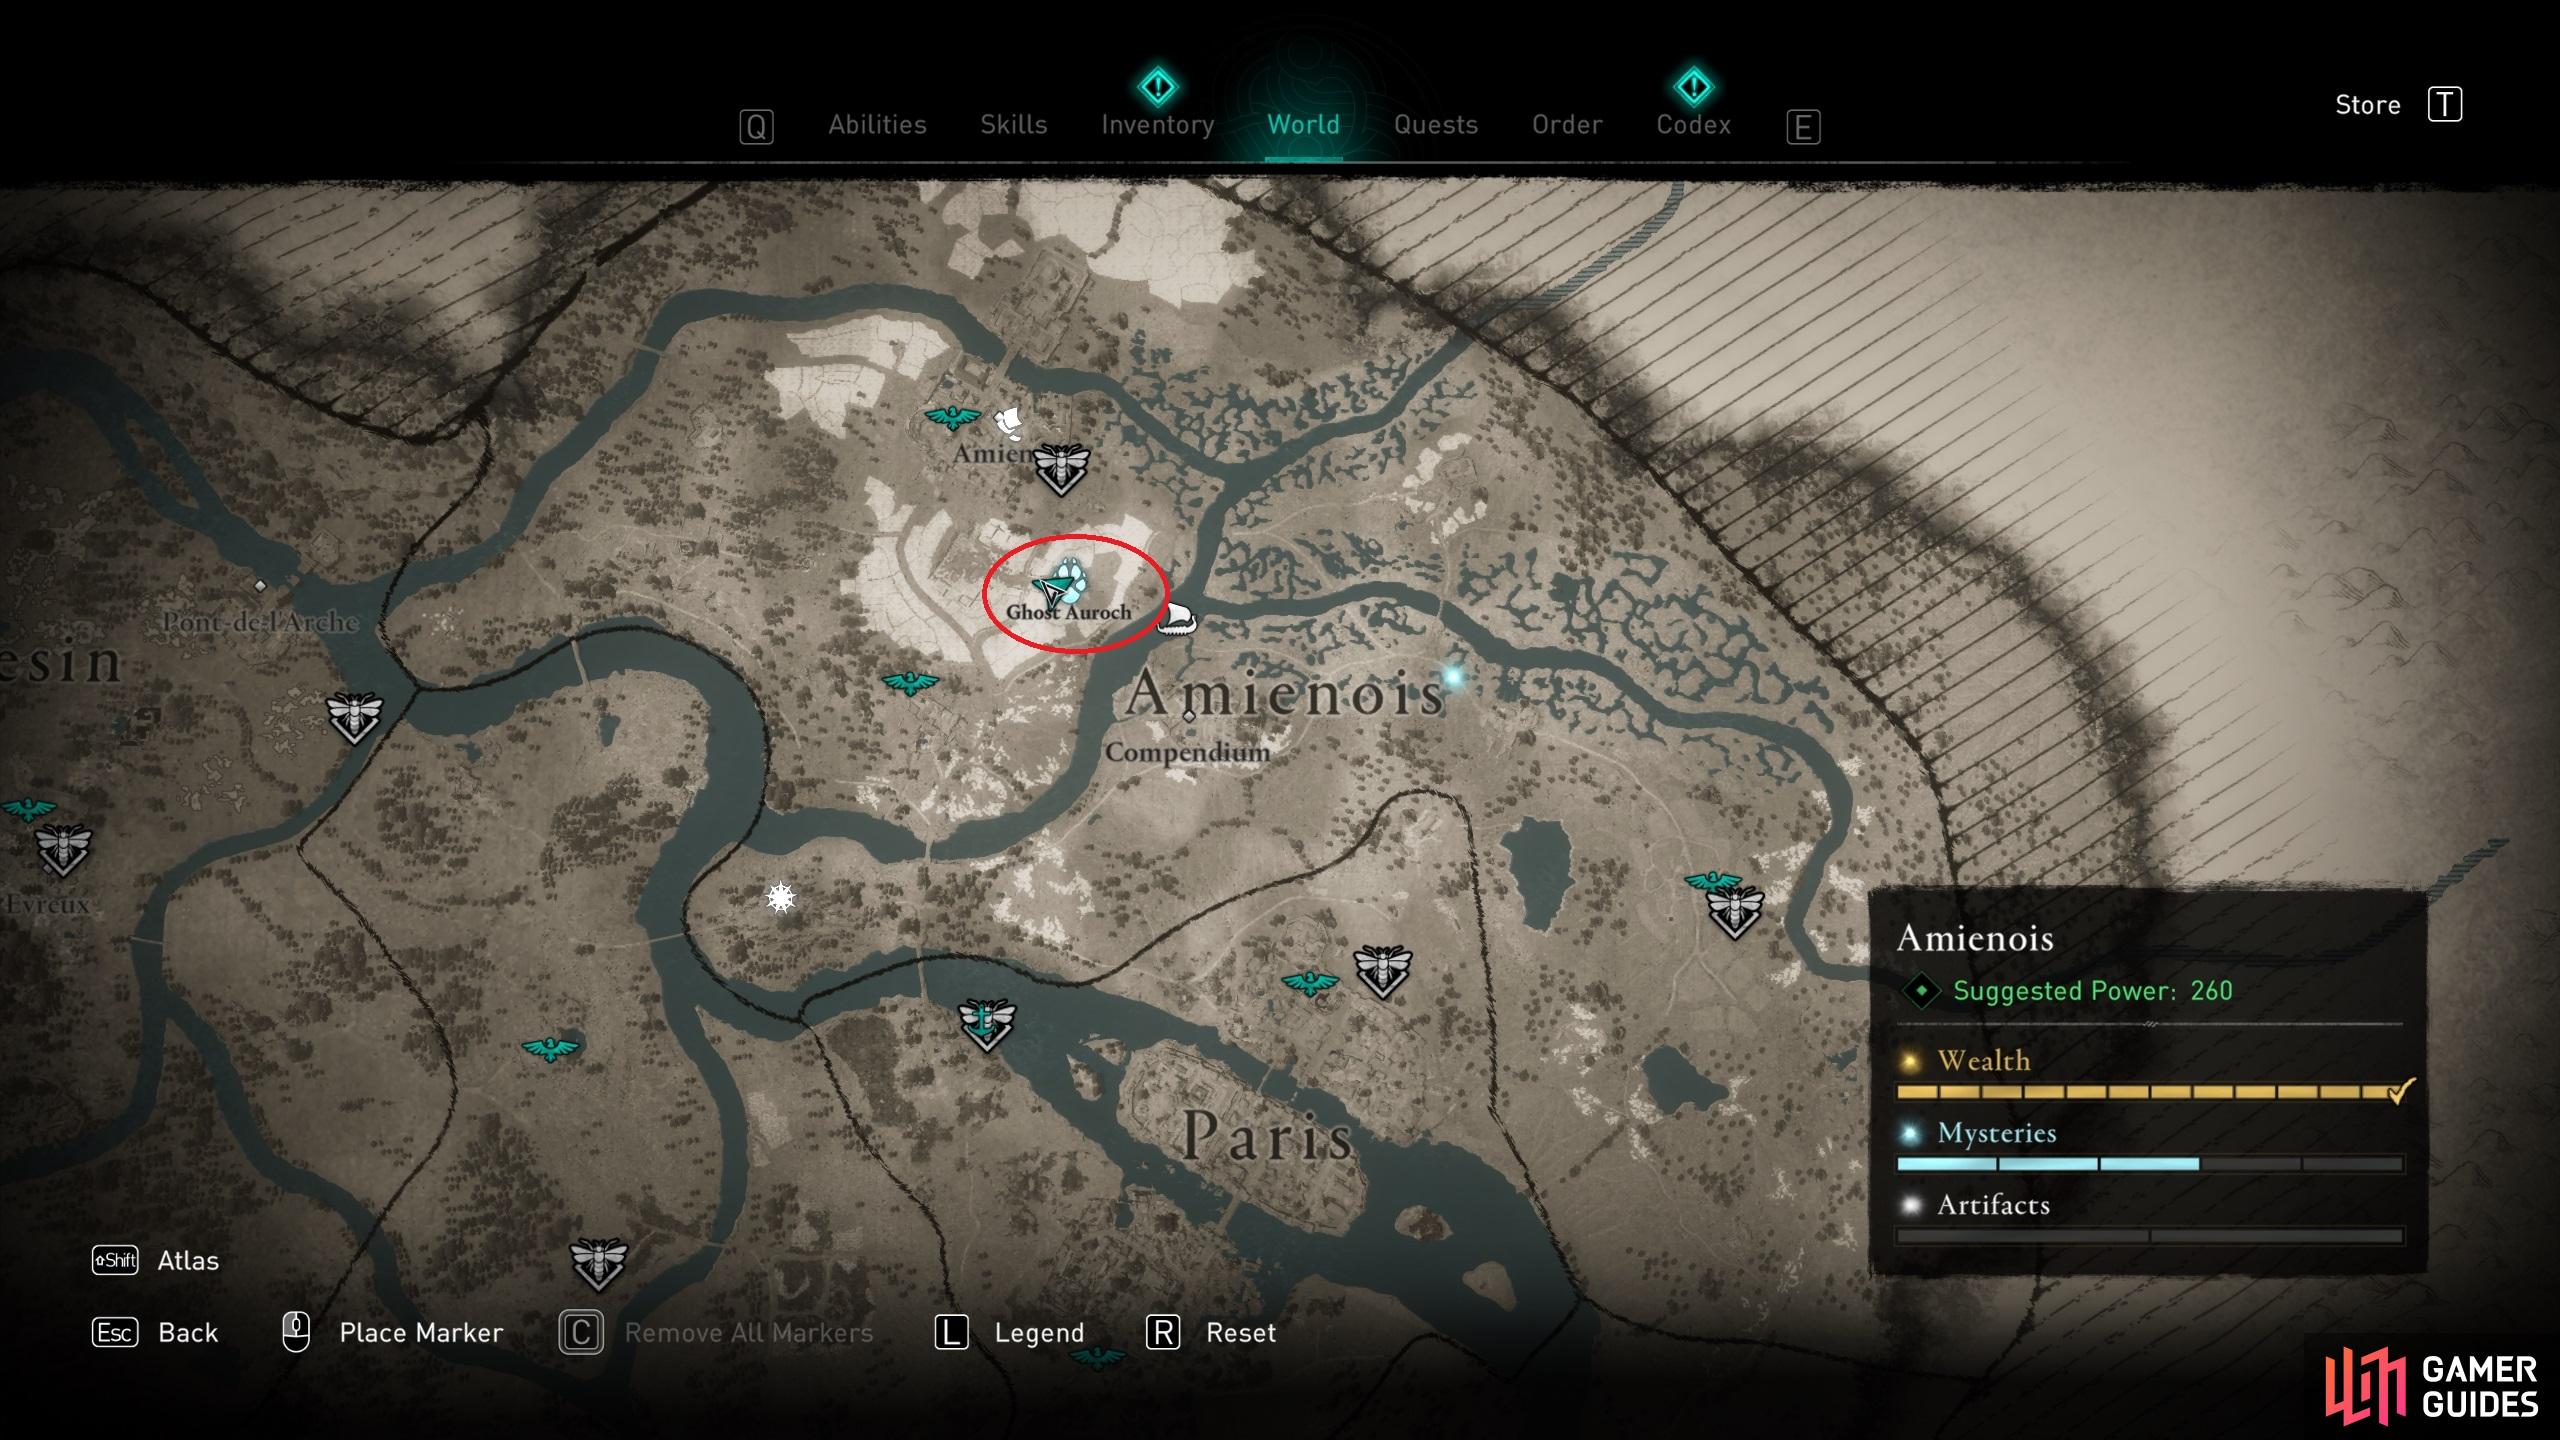
The location of the Ghost Auroch in western Amienois.
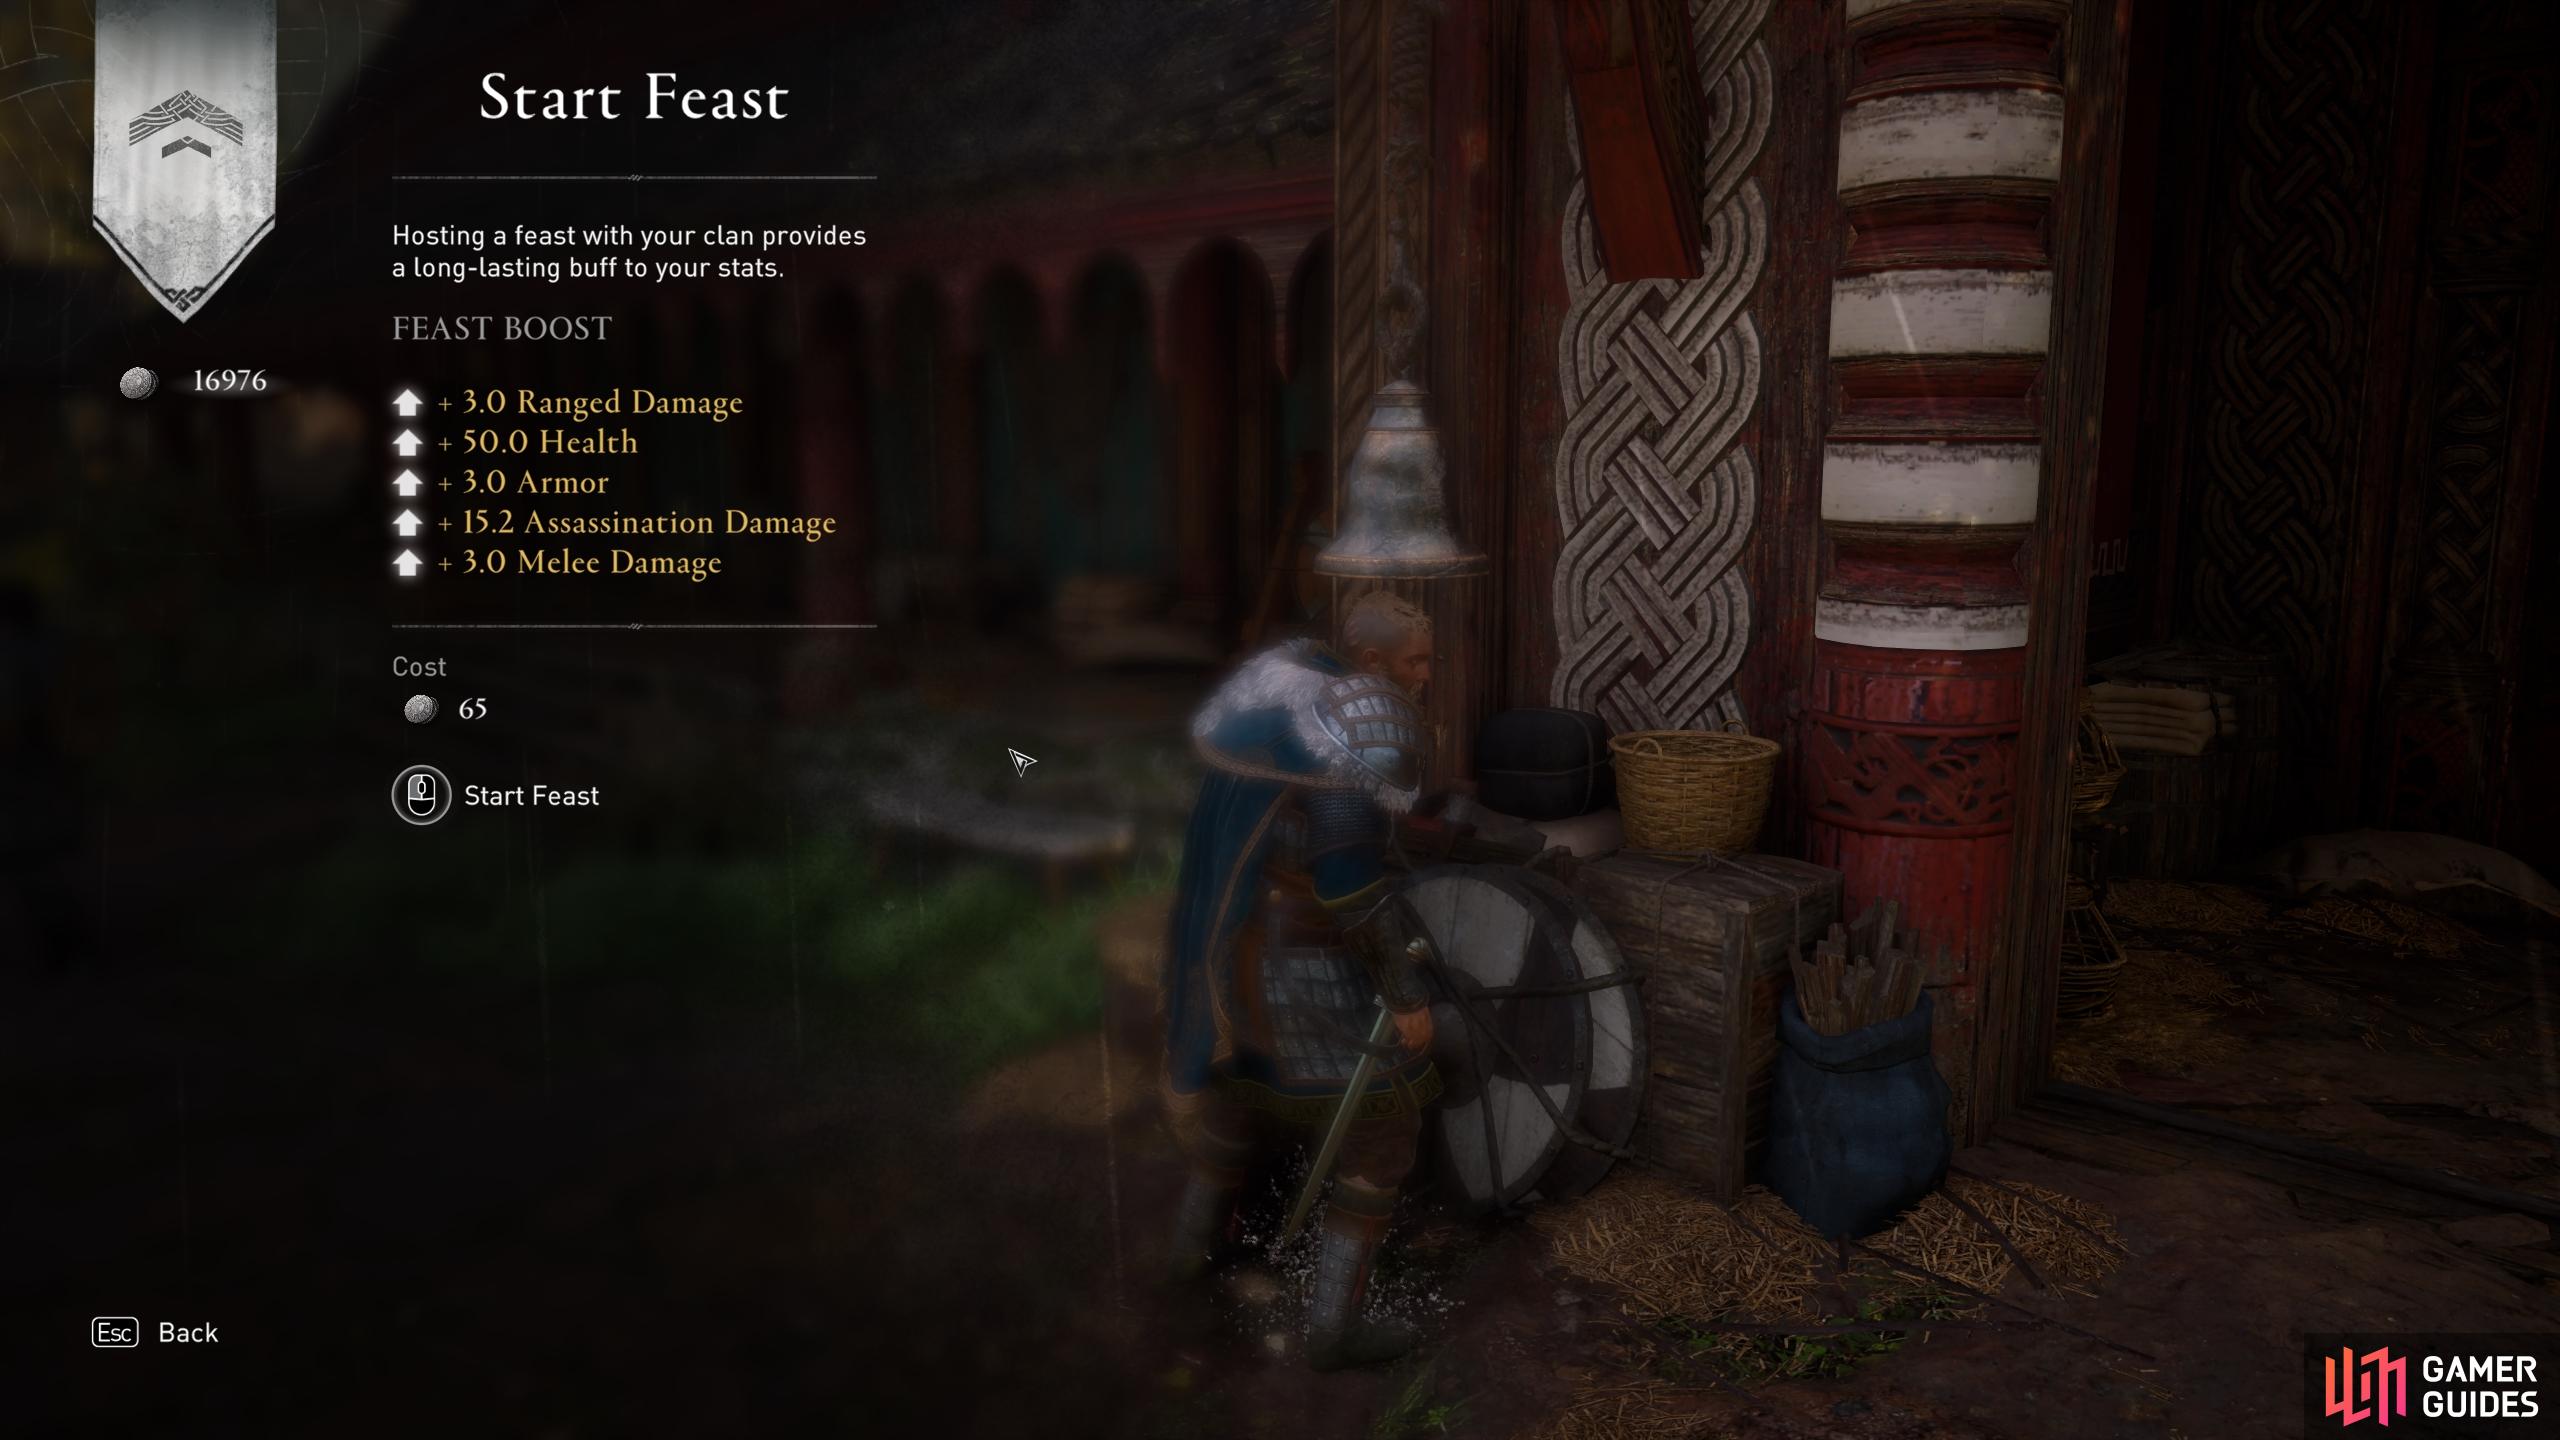
Use the Feast Buff from your longhouse in Ravensthorpe to boost your stats.
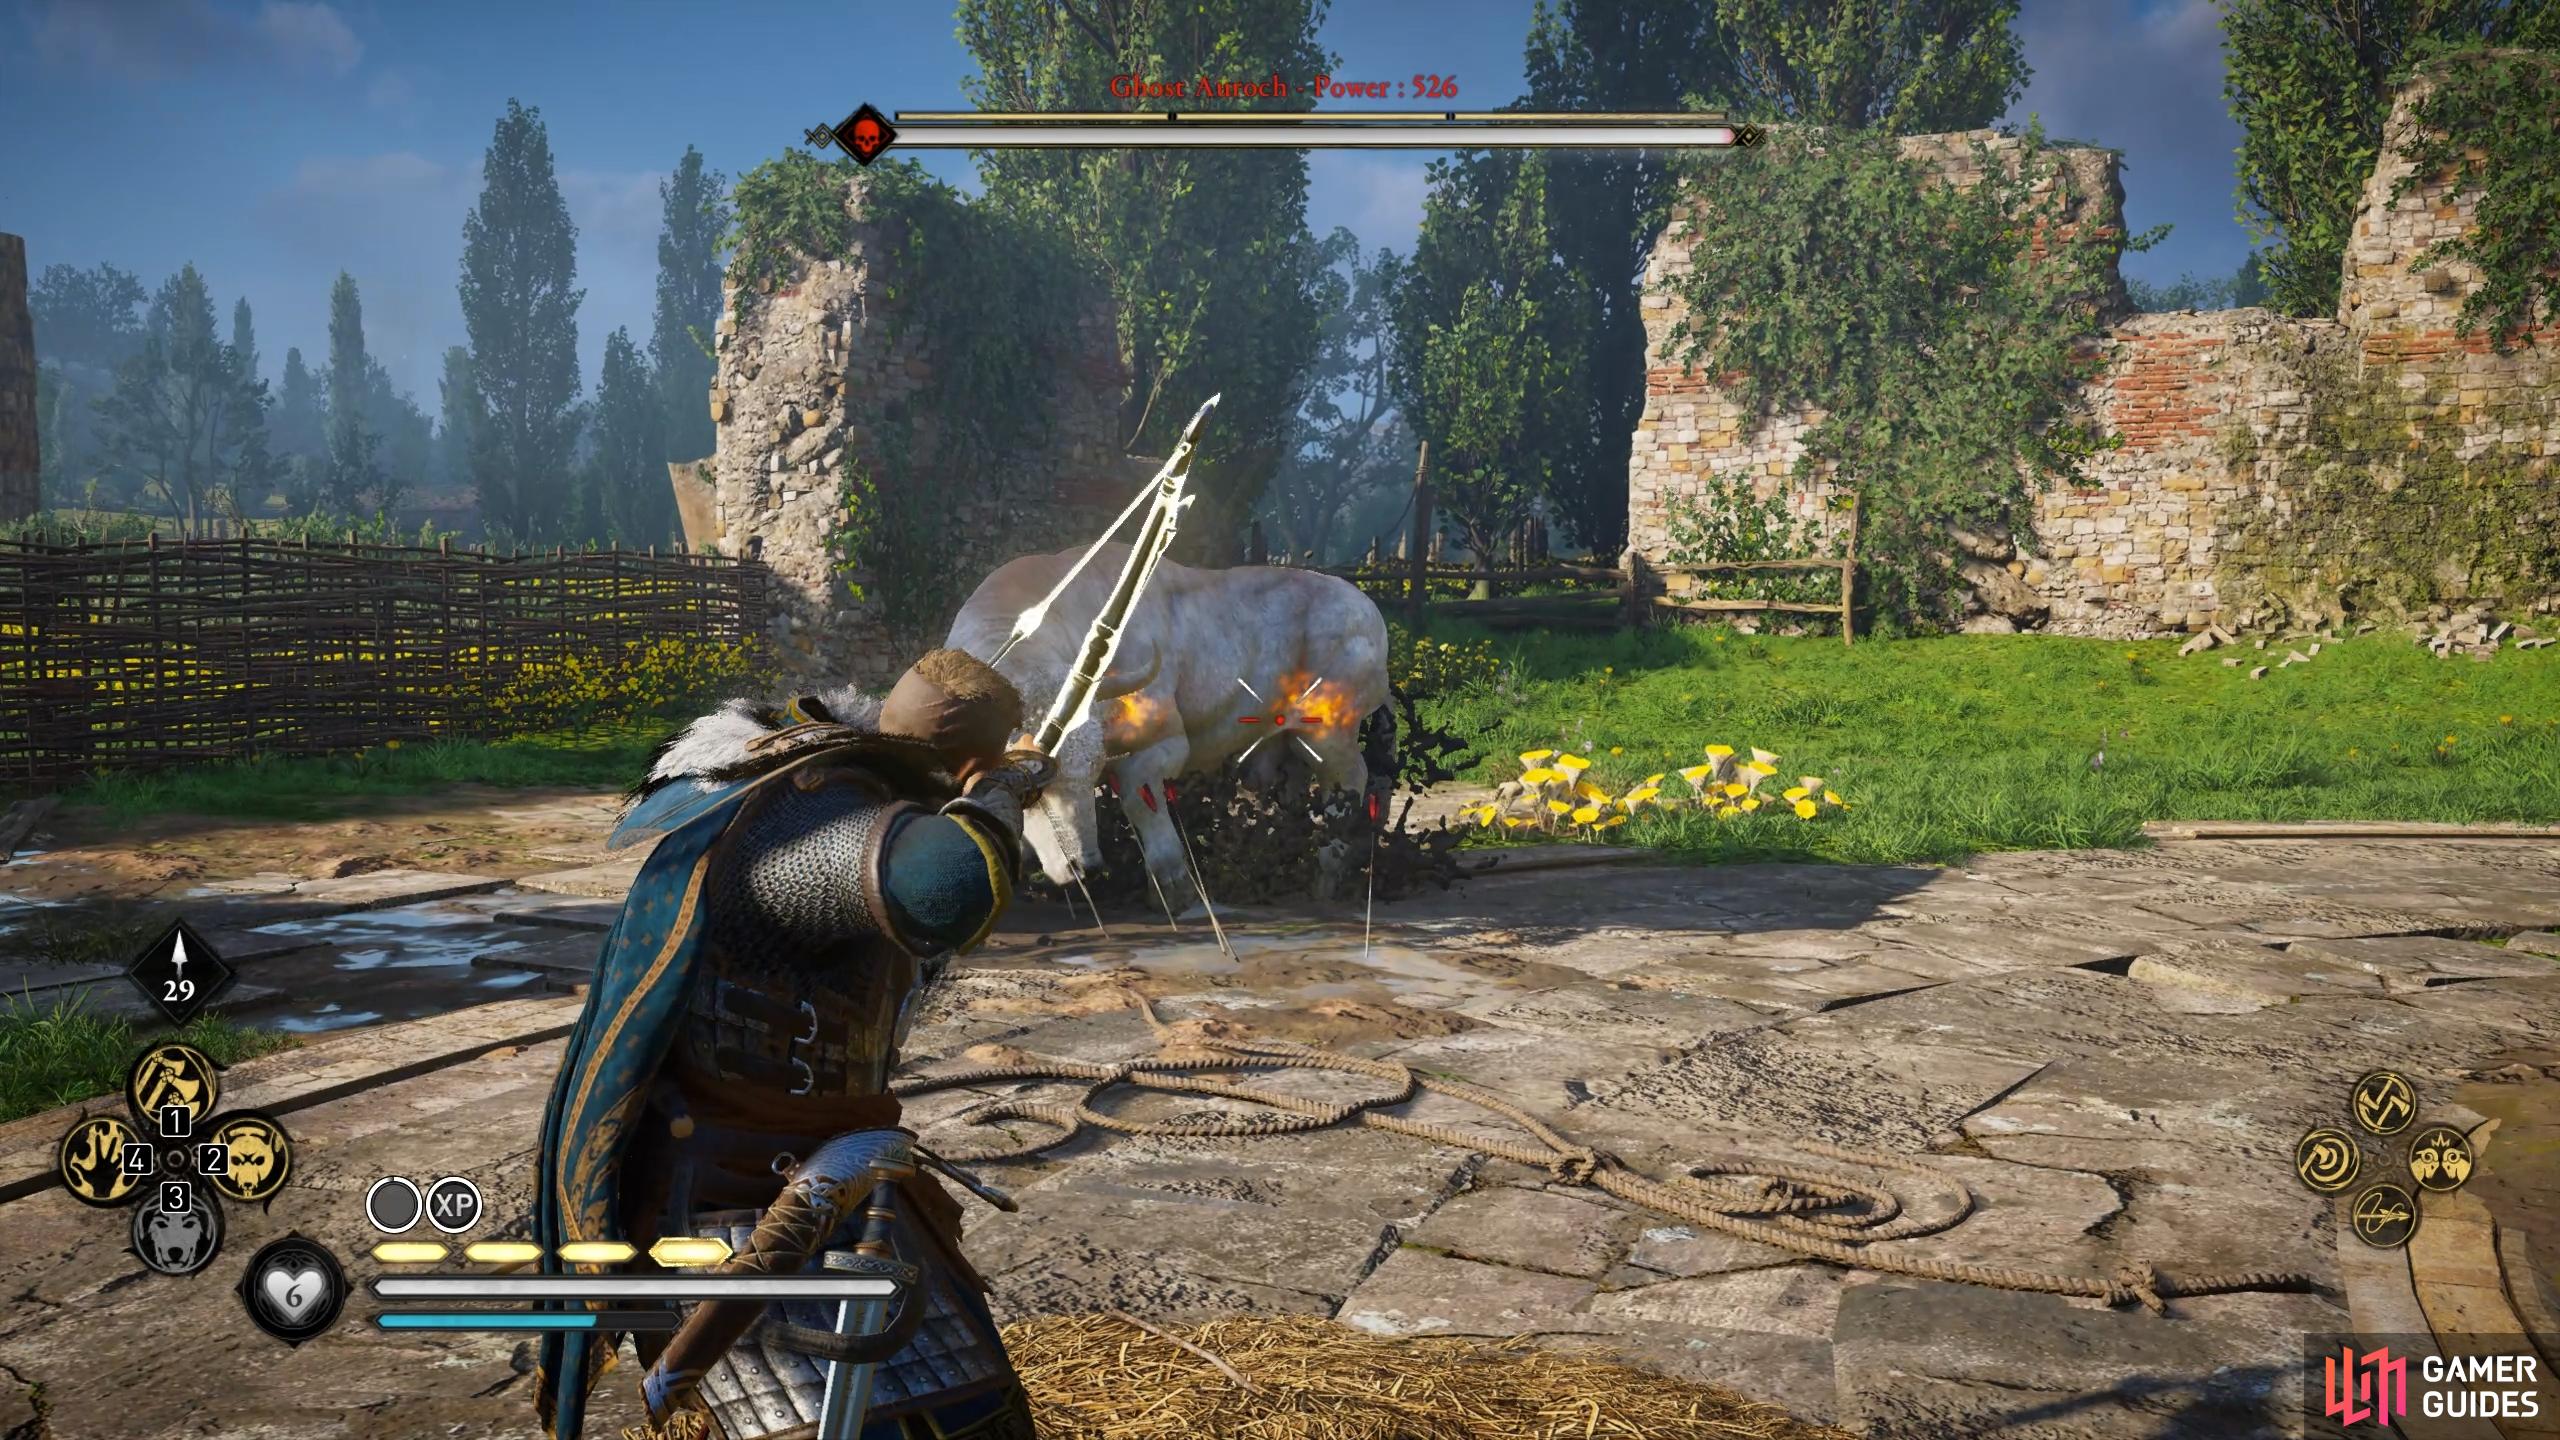
The auroch has three weak points located on its right hind leg, left hind leg, and left front leg. You should aim to hit these as soon as possible, as the first phase of the fight is the easiest. You should be able to hit them relatively easily with your bow, but if you’re struggling you can try to dodge an attack to slow time briefly (the time slow will only occur if you have the Brush with Death skill). This will give you more time to aim for each weak point before time resumes its normal pace. If you’re still struggling to hit the weak points, the new Precision Axe Throw ability from the River Raids will allow you to hit them automatically. Once you’ve each all three weak points, you can execute a stun attack to inflict massive damage.
If you’ve hit all the weak points and executed a stun attack, it’ll only take a few more hits before you deplete about a quarter of the auroch’s health. At this point a new phase of the fight will begin, during which the auroch crashes through a fence and runs onto the nearby road. Eivor will automatically call their mount at this point, prompting you to chase the auroch while mounted. You should avoid doing this, as it isn’t necessary and could leave you in a vulnerable position when the auroch begins to charge you later. Instead, chase after the auroch on foot and aim to shoot it as soon as it stops. You’ll notice a white aura appearing around the auroch when it stops, indicating that it’s healing. Shooting it once will stop the healing process.
As soon as you hit the auroch and interrupt its healing, it will begin a charge toward you. You’ll need to be ready to dodge or roll away from this, since one hit at this point can kill you immediately. You won’t be able to block or parry these charge attacks, so don’t bother trying. The use of a special ability of your own will only briefly interrupt the auroch before it begins to charge again. At this stage, your best option is to fire as many arrows into the auroch’s head as possible before it reaches you. Arrow shots to the head will inflict a lot more damage if you charge the shot first, but you could opt to spam with a light bow instead if you prefer.
As you move from the road to the arena throughout the fight, you’ll find it useful to use some abilities over others. Harpoon Impalement is essentially useless here, since it inflicts very little damage without the ability to pull the aurochs in a specific direction. Instead, we recommend using Throwing Axe Fury whenever you can, which will inflict high damage and interrupt the aurochs briefly. The melee and ranged version of Poison Strike and Fire Strike abilities can also be useful, as they apply damage over time to the aurochs while you kite it around the battleground. The Thrill of War (Way of the Raven) skill will allow you to replenish adrenaline throughout the fight, but you can also consume the yellow mushrooms scattered around if necessary.
Once you’ve seen the aurochs run into the road once, the aim here is to make the fight as short as possible, while still being conscious of avoiding the deadly charge attacks. This means that you should create as much distance between yourself and the aurochs as possible, striking with your bow when you can, and using special abilities when you have the time. You should avoid using special abilities when you’re too close to the aurochs, as this will lock you in an animation for a few seconds, allowing the aurochs to catch you off guard. It’s a good idea to roll away from the aurochs rather than dodge sometimes, since one dodge will not be enough to distance yourself from the chain attacks. A roll also gives you enough distance to fit in a quick Throwing Axe Fury, a few arrow shots, or a series of swift strikes with the spear. If you find yourself running low on stamina after rolling, using Throwing Axe Fury will replenish your stamina bar.
It may take a few attempts to kill the Ghost Auroch on high difficulty settings, but so long as you err on the side of caution to avoid the charge attacks and don’t take too many risks when attacking, you should be able to grind it down fairly quickly.
No Comments