
This quest begins immediately after Skal!. Eivor has celebrated with Toka and Pierre, and seen Sigfred leave the leadership of his clan to Toka. In the meantime, Count Oda has sent word to Eivor that Richardis and Bernard may be in trouble.
Fire and Faith, Siege of Paris DLC.
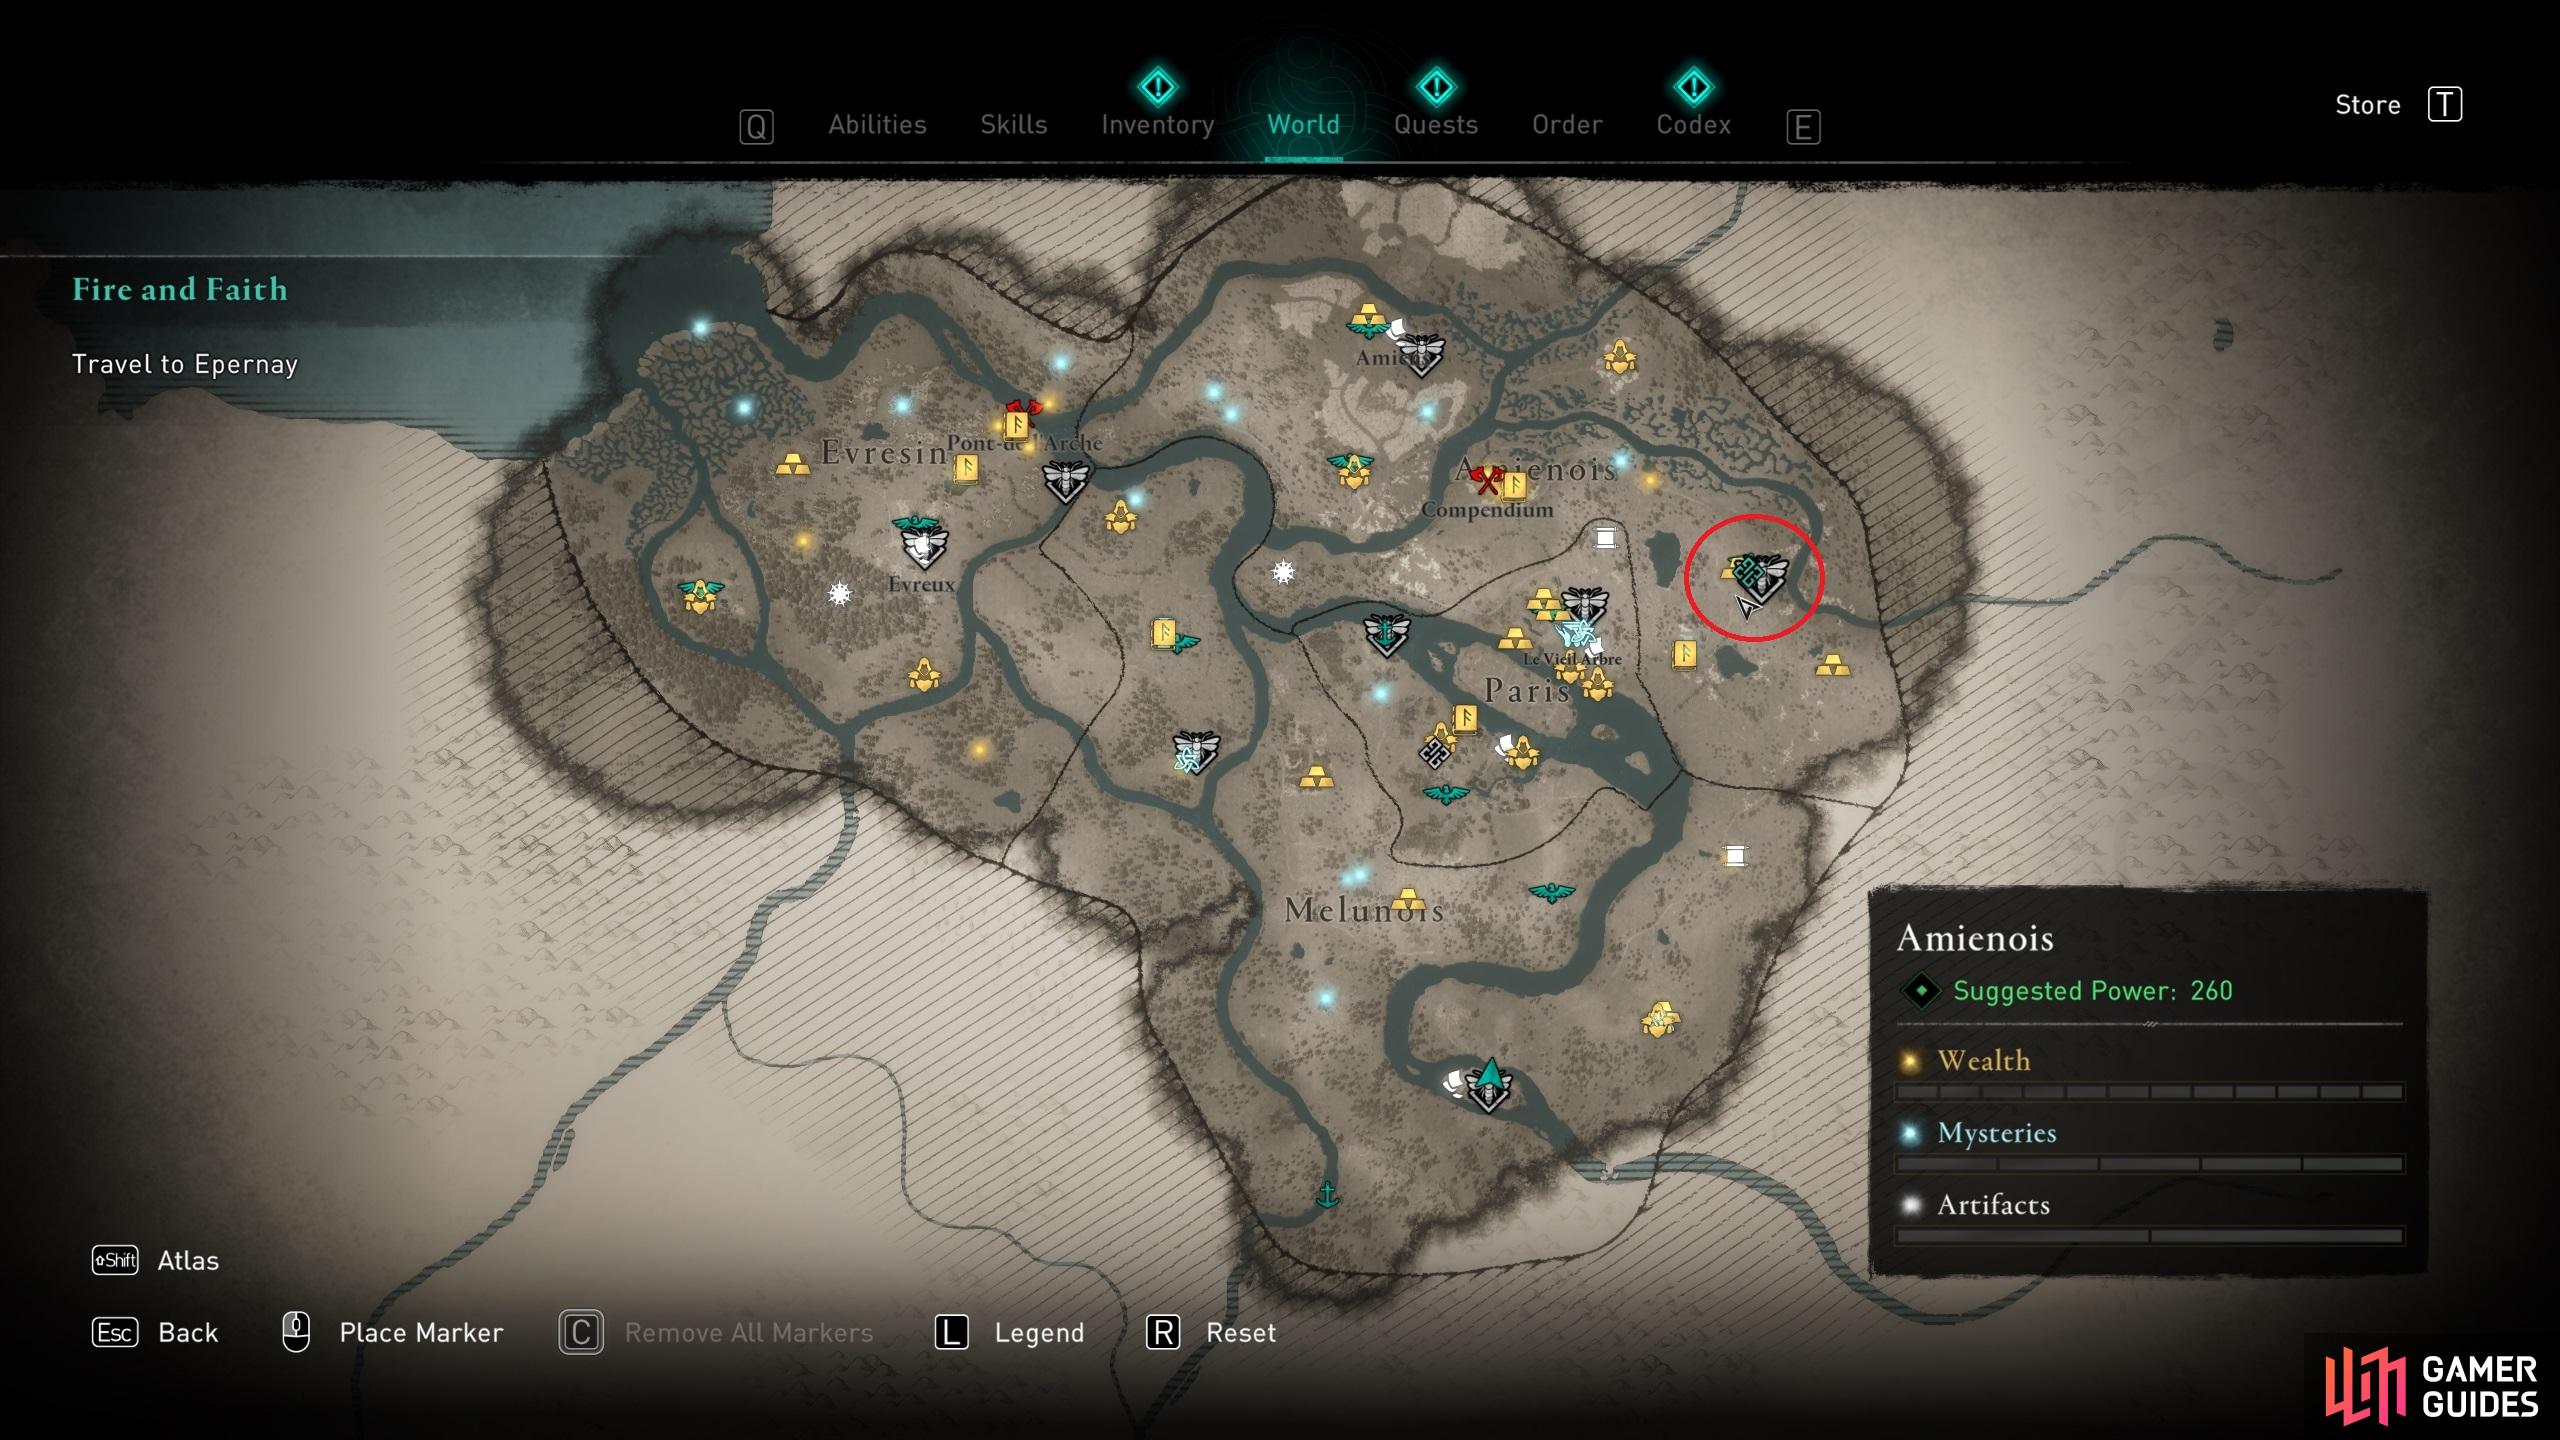
Travel to Epernay and Speak to Count Odo
Count Odo has summoned Eivor to Epernay, located in the northeast of Francia. When you arrive, you’ll find Odo sat at a feasting table outside. Don’t worry about the nearby Frankish soldiers, none of them are hostile toward Eivor. When you speak with Odo, a cutscene will begin during which Eivor and Odo will recognise their common traits and interests. Odo will offer Eivor a lasting peace and alliance if he agrees to kill King Charles. You’ll have the following dialogue options here:
Kill Charles or Promise Nothing?
“I will kill Charles.”
“I promise nothing.”
It doesn’t matter which you choose at this point, but know that you’ll be presented with an argument against killing Charles later, so it may not be wise to promise anything to Count Odo at this point. However, the consequences will only be significant for your roleplaying preferences.
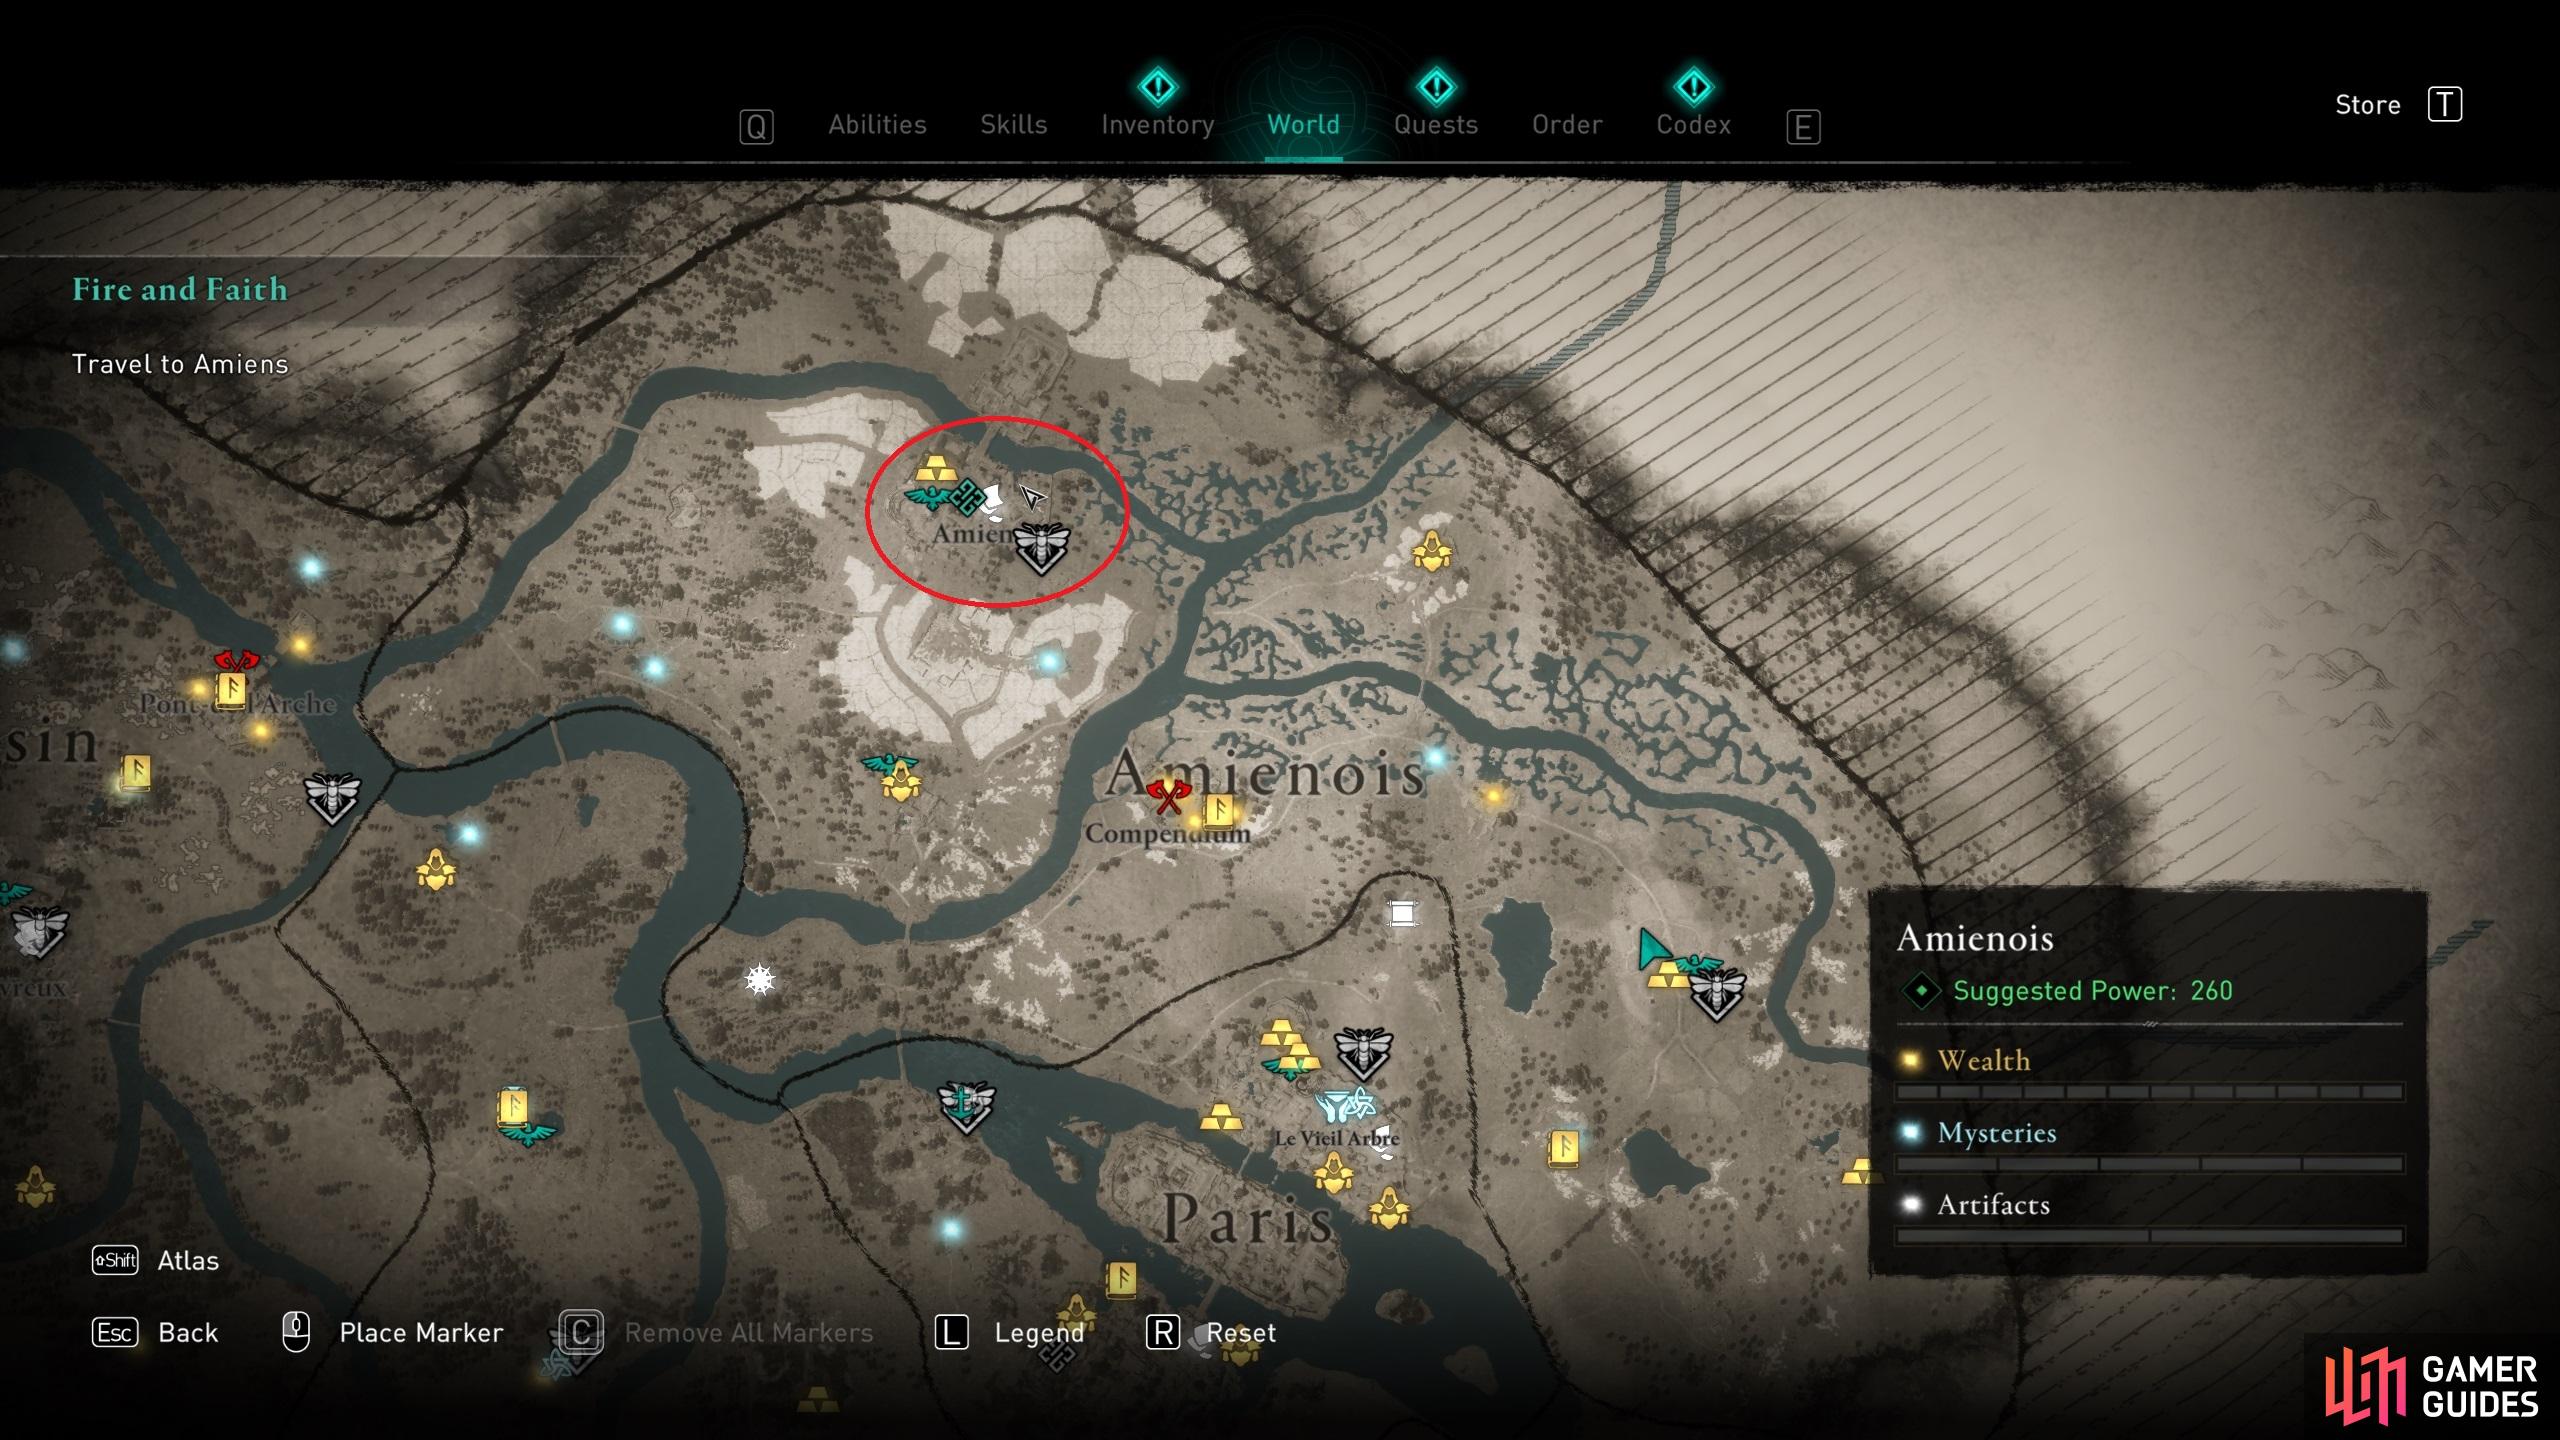
Travel to Amiens and Find Bernard
Once you’ve spoken with Count Odo, you’ll need to travel to Amiens, in the north of Francia, to search for Richardis and Bernard. The first objective you’ll encounter is to find and reach the Slaughtered Calf Tavern.
Investigate the Slaughtered Calf Tavern
To locate the tavern, use your raven to scout the area. It’s a large tavern so you shouldn’t have any issue in finding it. Walk in through the front door to prompt some comments from Eivor as they witness the aftermath of a slaughter. The tavernkeep won’t be much use here yet, so you’ll need to go upstairs and use the wooden posts to jump around the tavern to the second floor. Here you can examine three objects to complete the investigation:
- A dead monk on the floor
- A red poppy, indicating that it was Odo’s soldiers who were slaughtered
- A scroll which could belong to Bernard
Once you’ve interacted with all three objects, you can return to the tavernkeep below and ask him about the scroll. He will confirm that the scroll is likely Bernard’s, and that he overheard Richardis suggest that Bernard should go to the priests and nuns at the nearby church if there’s trouble. This is your next lead.
Look for Bernard in the Church
The church you’re looking for is located just to the northwest of the Slaughtered Calf Tavern. Make your way there and climb the walls into the courtyard, where you’ll find an entrance inside. You may need to kill a few guards along the way, but once you’re in the church you’ll find Bernard hiding at its western end. Walk toward him to trigger a cutscene, during which Eivor discovers that King Charles intends to burn Richardis alive in a trial by fire.
Reach the Trial by Fire and Rescue Richardis
To reach Richardis, you’ll need to climb the walls of the fort to the north. The western walls are in disrepair, and here you’ll find a way in by climbing some scaffolding. Once you’re inside the outer walls, climb the tower and then just the wooden plank at its eastern end to jump into the haystack in the inner walls, where the trial by fire is taking place. Once you’ve jumped, a cutscene will begin, leading into another boss fight with Gozlin, who has somehow survived your last meeting.
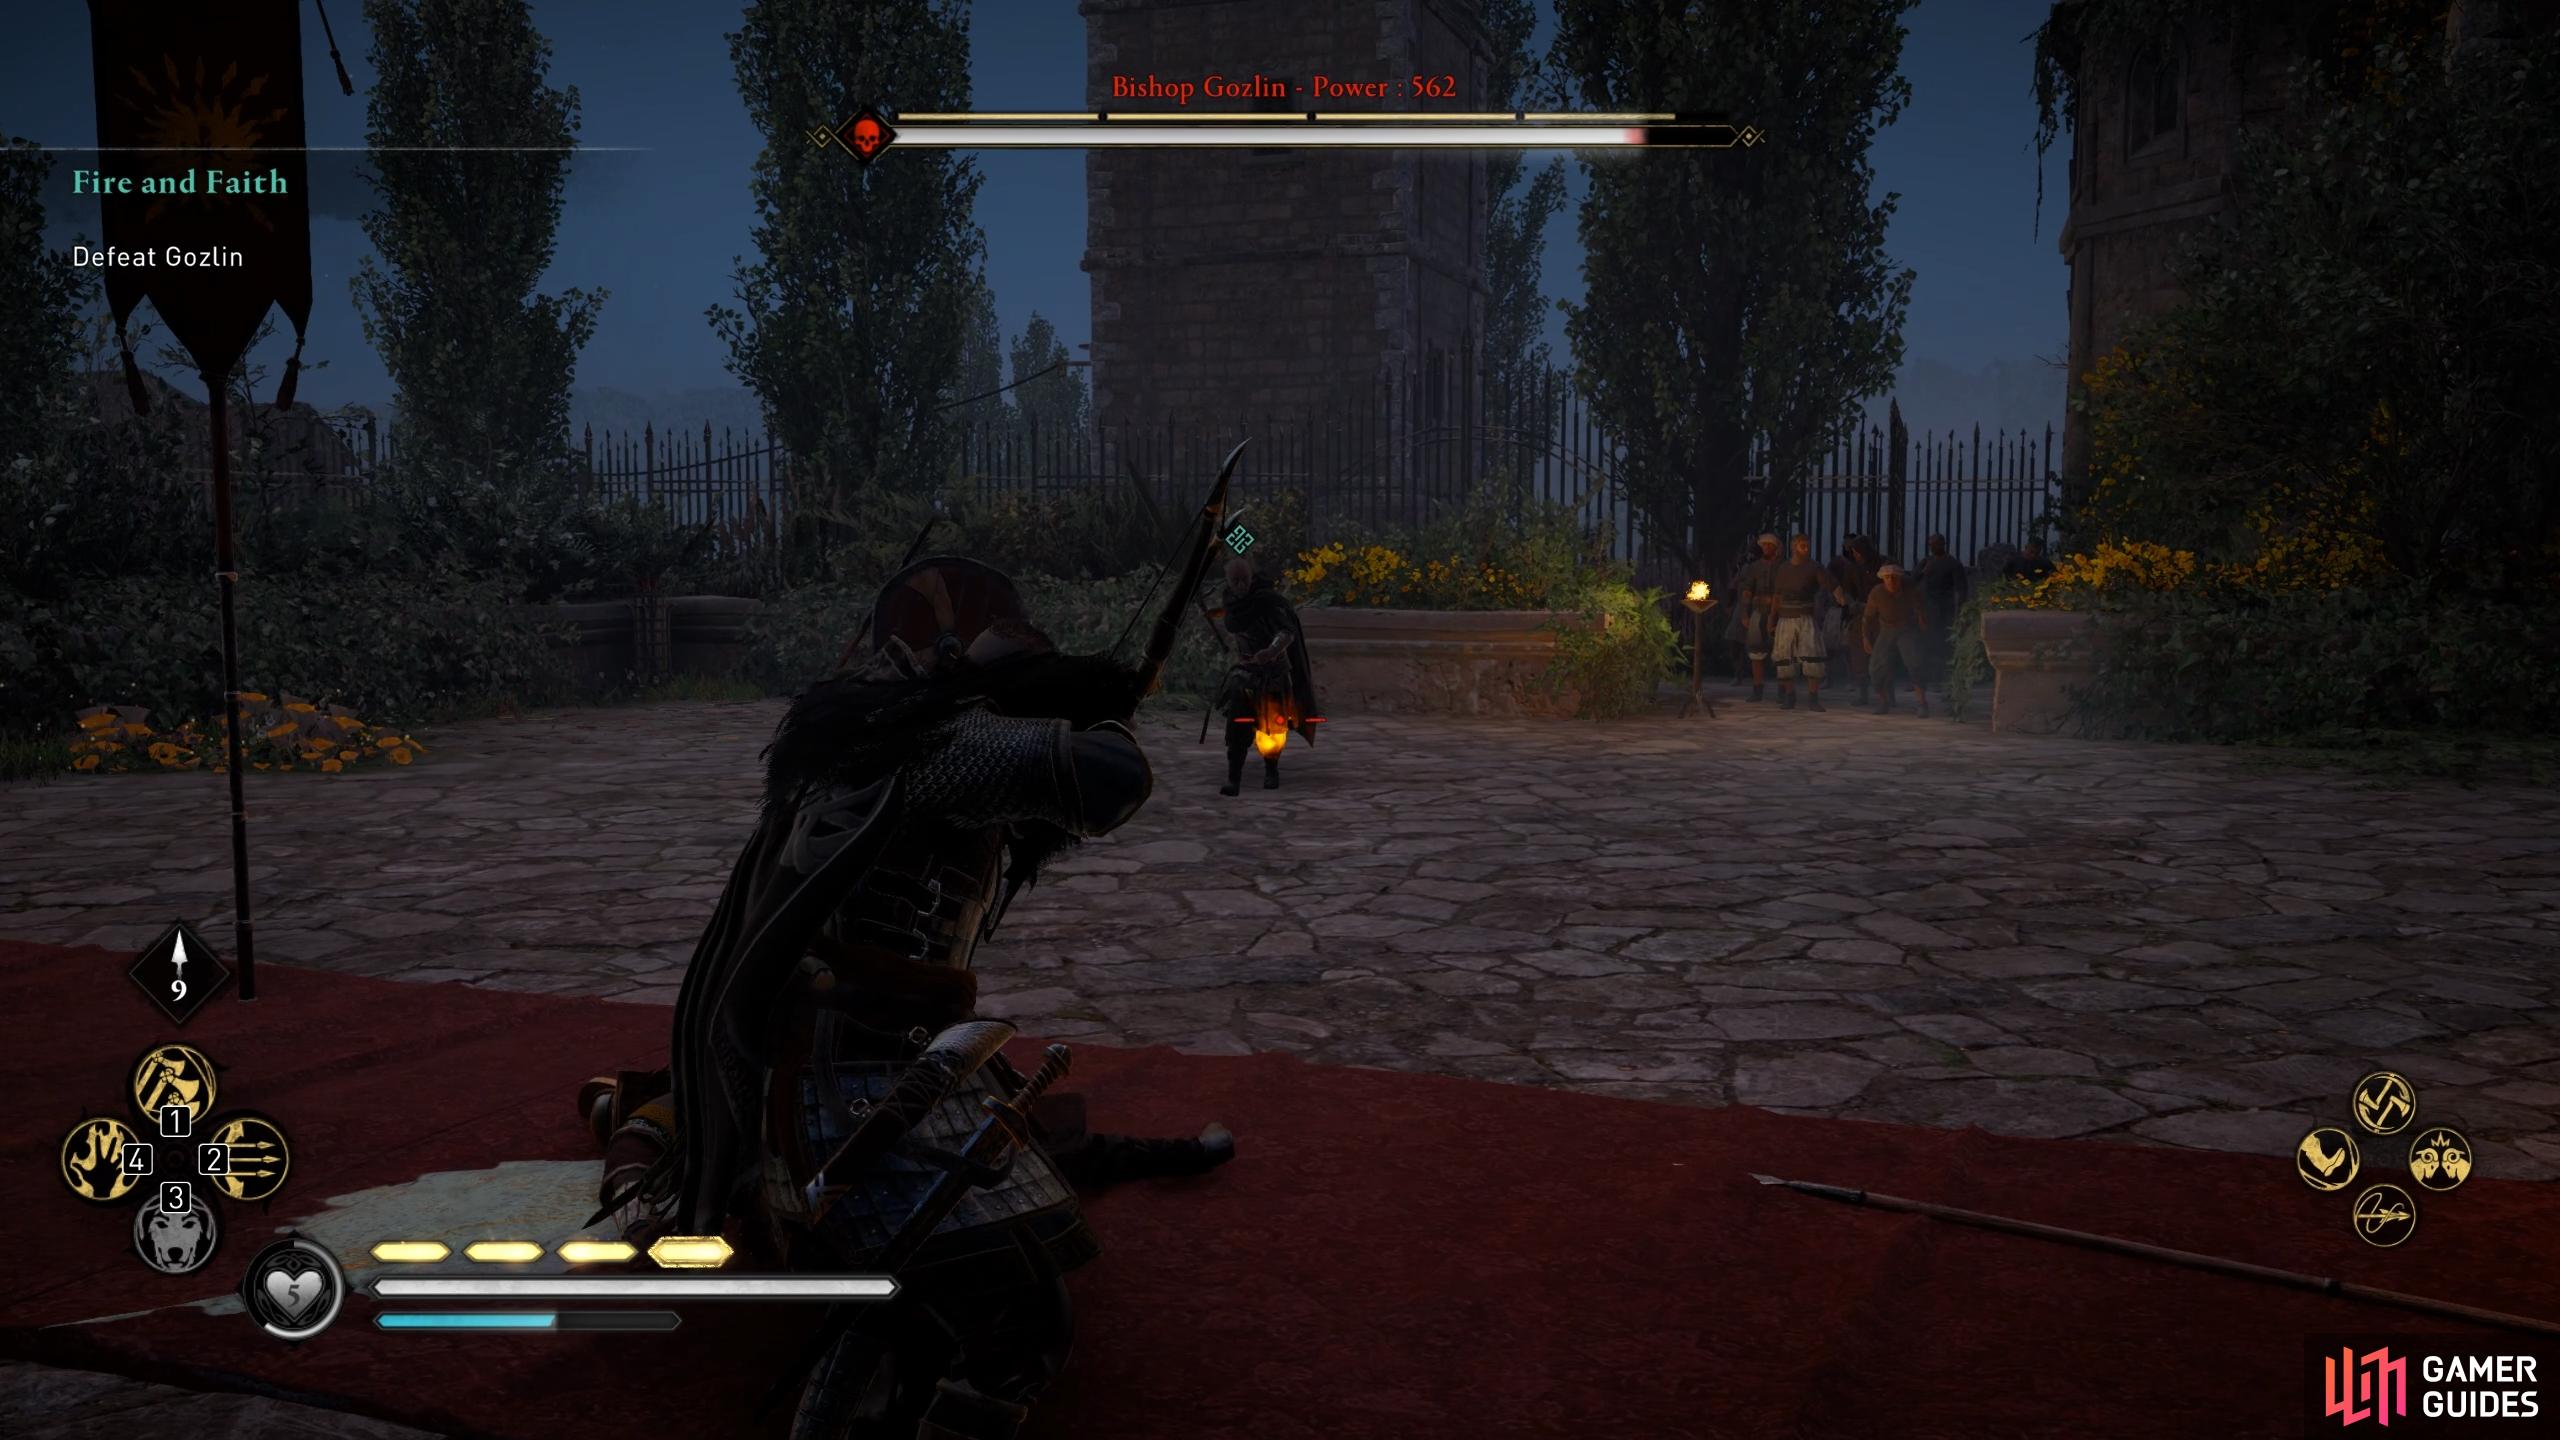
Boss Fight: Gozlin
The fight with Gozlin is fairly simple, and will only prove challenging if you’re playing on the highest difficulty settings. This is because you’ll have to contend with waves of elite soldiers who will fight alongside Gozlin throughout the fight. You’ll need to keep moving to avoid being caught in a corner by a number of elite soldiers, who can bring your health down quickly if you’re not careful. As ever, dodge and roll are your best friends for quickly escaping a sticky situation.
You’ll find weak points on Gozlin’s left leg and right arm. Try to hit these early on to weaken his defences and make him vulnerable to a stun attack. If you’re playing on higher difficulty settings, you’ll need to hit him with some special abilities to further weaken his defences, or wait until his health is sufficiently depleted with regular attacks.
Gozlin has two main red rune aura special abilities which he uses frequently. The first is a leap attack which allows him to reach Eivor quickly in one swift jump, at the end of which he’ll inflict impact damage which will knock Eivor back and take a large amount of health. You’ll need to dodge or roll away from this whenever you see the red rune aura appear. The second occurs when Gozlin is in melee range with Eivor, and he will often use it if you try to chain too many attacks at once. Essentially, it’s a swift spin with his blade which will again knock Eivor back, but it can be easily avoided if you move as soon as you see the red rune aura appear.
The other special attack which Gozilin will use is a chain attack, precipitated by an orange aura rather than a red one. This attack can be parried or blocked if you time it correctly, which will in turn stun Gozlin and replenish Eivor’s stamina. However, if you’re not confident with timing parries or blocks, you can easily avoid the attacks and break the chain by dodging or rolling away as normal. An alternative method of stopping Gozlin during a special attack is using one of your own special abilities. A fully upgraded Vikingr Salute is particularly useful here, since it will not only interrupt Gozlin, but also stun him for a few seconds afterwards, giving you time to spam some heavy or light attacks.
So long as you’re aware of the basic mechanics that Gozlin has in his skill arsenal, you should be able to avoid being hit most of the time. This may prove more difficult with the additional elite soldiers in the fight, but you can deal with these swiftly if you target their own weak points. Just draw your bow to highlight them, shoot the weak point and then finish them off with a stun attack. You’ll have more difficulty hitting the weak points of a Standard Bearer due to their large shields, but if you leave one of these alive, they won’t be much of a problem since they’re pretty slow in combat. However, you should still look out for their spear throws.
Spare Charles, or Charles Must Die?
Once Gozlin is dead, a cutscene will begin during which Richardis is seen to emerge from the fire unscathed, to the amazement of everyone present aside from Charles, who seems supremely annoyed. During the scene Richardis will beg that you spare Charles, and you’ll have to decide between the following options:
“I will spare Charles.”
“Charles must die.”
As with the choice presented to you by Count Odo, it doesn’t matter what you choose here at this point, outside of your own roleplaying preferences. However, Richardis will be grateful if you state that you’ll spare Charles. Once you’ve made your choice, the quest will end.
No Comments