

This page details a guide for the A Fury from the Sea main quest, part of The Tale of Thegn Oswald story arc in Assassin’s Creed Valhalla.
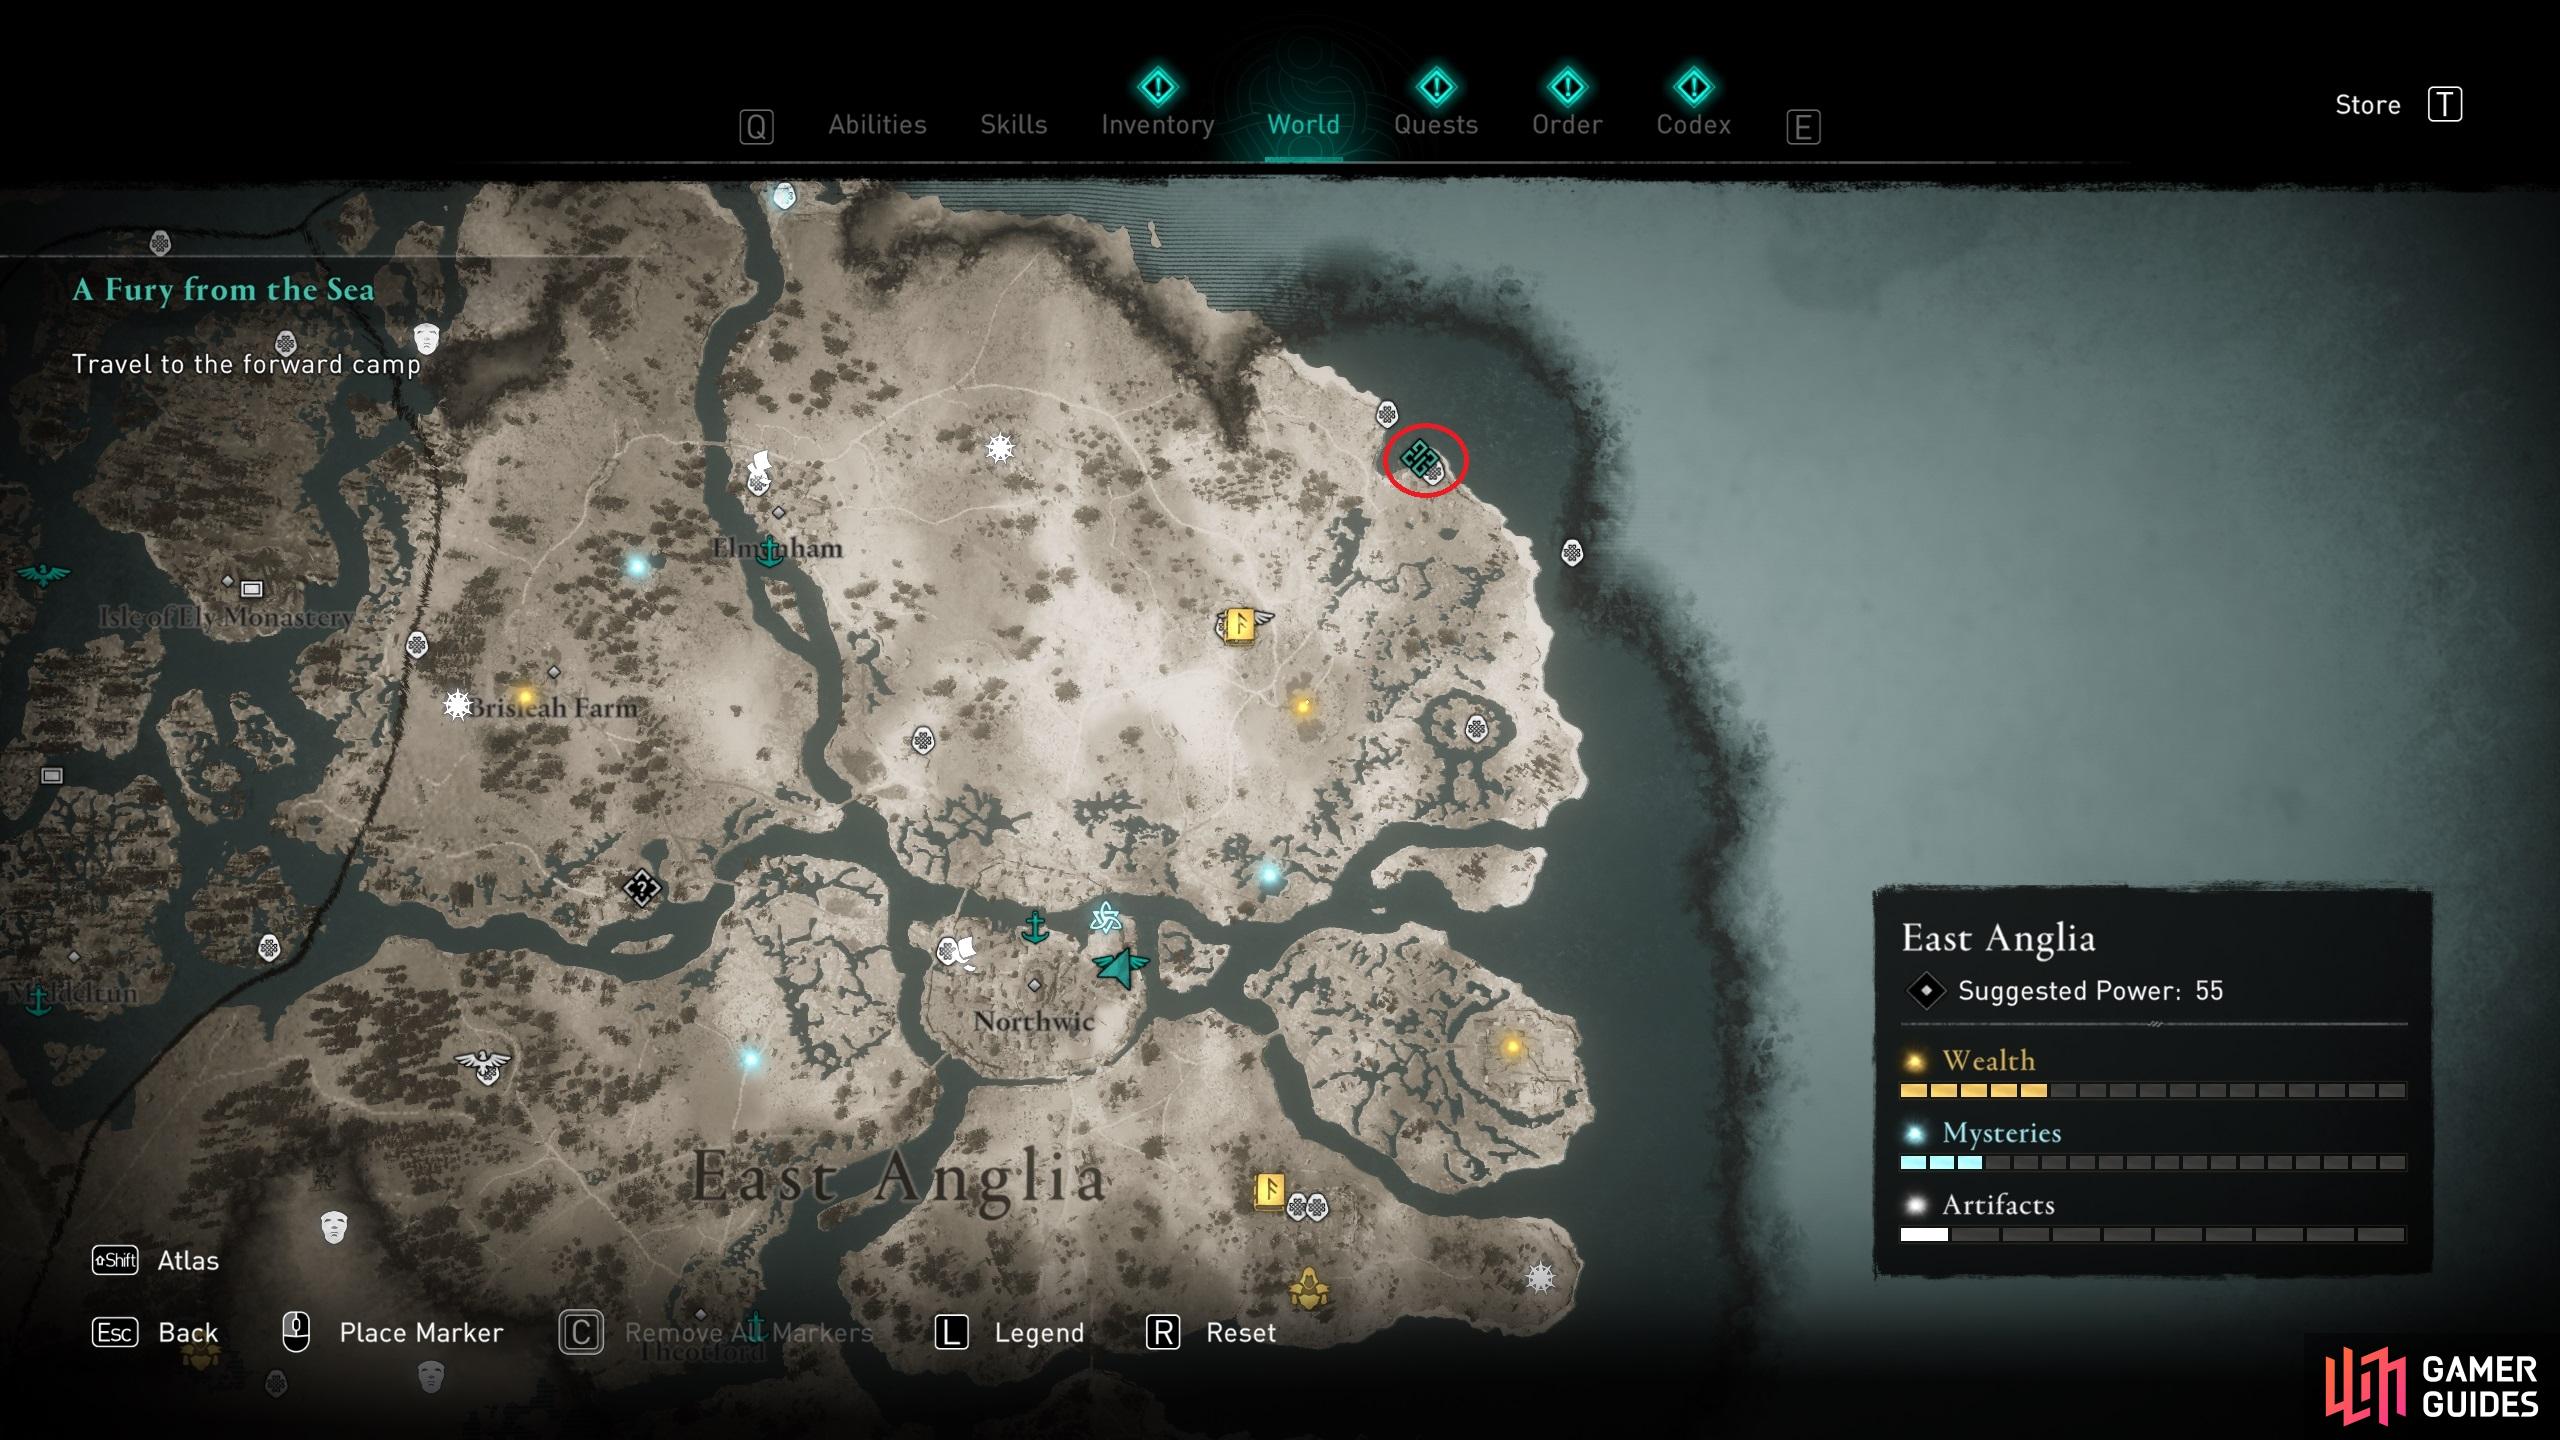
This quest begins immediately after Raising Iron. Now that you’ve secured enough help from the Saxons, it’s time to destroy what remains of Rued’s clan at Burgh Castle. You should travel to the forward camp, located northeast of Northwic on the eastern coast. The quickest route, without using the fast travel point at the Ruined Tower to the north, will be along the Wensum River eastward, then following the coast north.
When you reach the forward camp, speak with Finnr by the cliff edge. You can choose to start the assault now, or come back later if there’s anything you need to do to prepare. Be sure to stock up on rations and arrows before you begin. A cutscene will ensue once you speak with Finnr, during which you’ll have an opportunity to make a speech. It doesn’t matter which option you choose, so just go with whatever you prefer. When the speech is over, the battle will begin.
Assault on Burgh Castle
First Gate
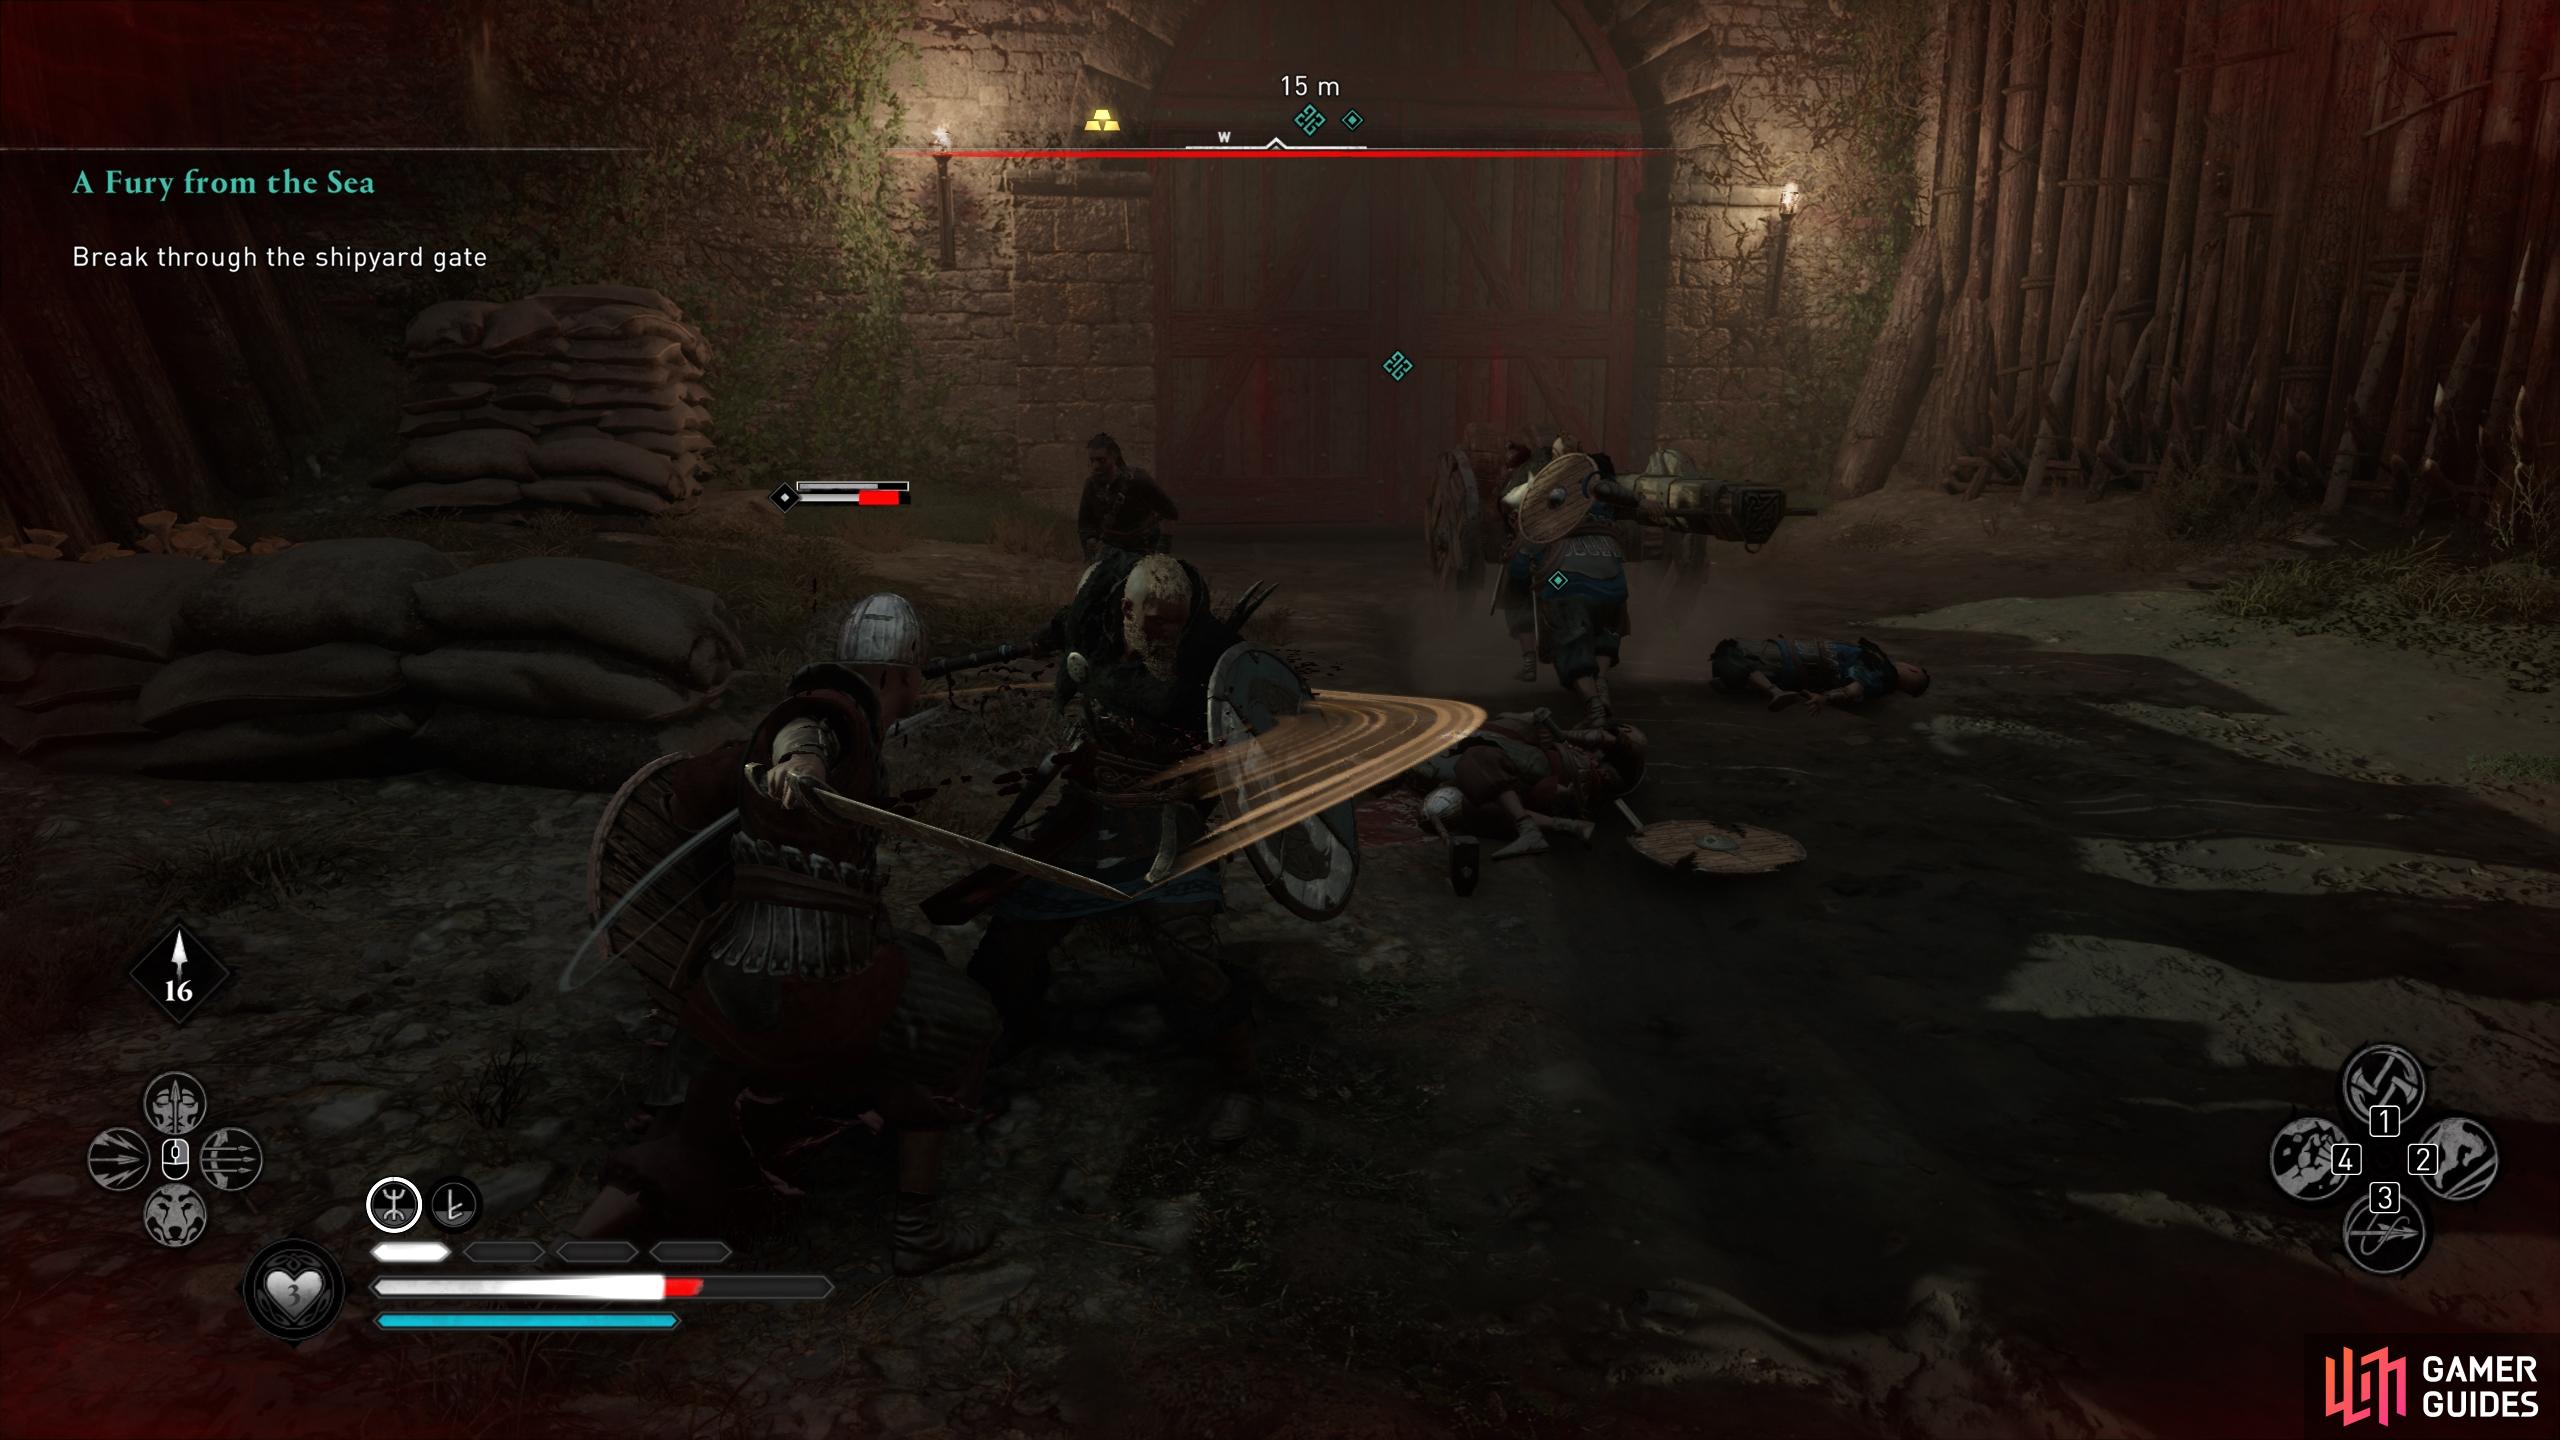
As the battle begins, you’ll find yourself sailing directly for Burgh’s Castle. After a few moments you’ll need to order your crew to raise their shields, to protect yourselves from the incoming fire arrows. Keep your shields raised as you sail toward the castle. When you’re close enough a cutscene will begin, depicting the longship crashing into a section of the castle wall and destroying it. At the end of the cutscene, you’ll find yourself at the walls with your army. Head west with the battle ram and help to destroy the wooden barricade. You’ll have to contend with some archers on the walls surrounding the barricade, and some melee units who will attack while you’re using the battering ram. Kill the archers first, then the melee units as they arrive, and help your warriors with the battering ram whenever you can.
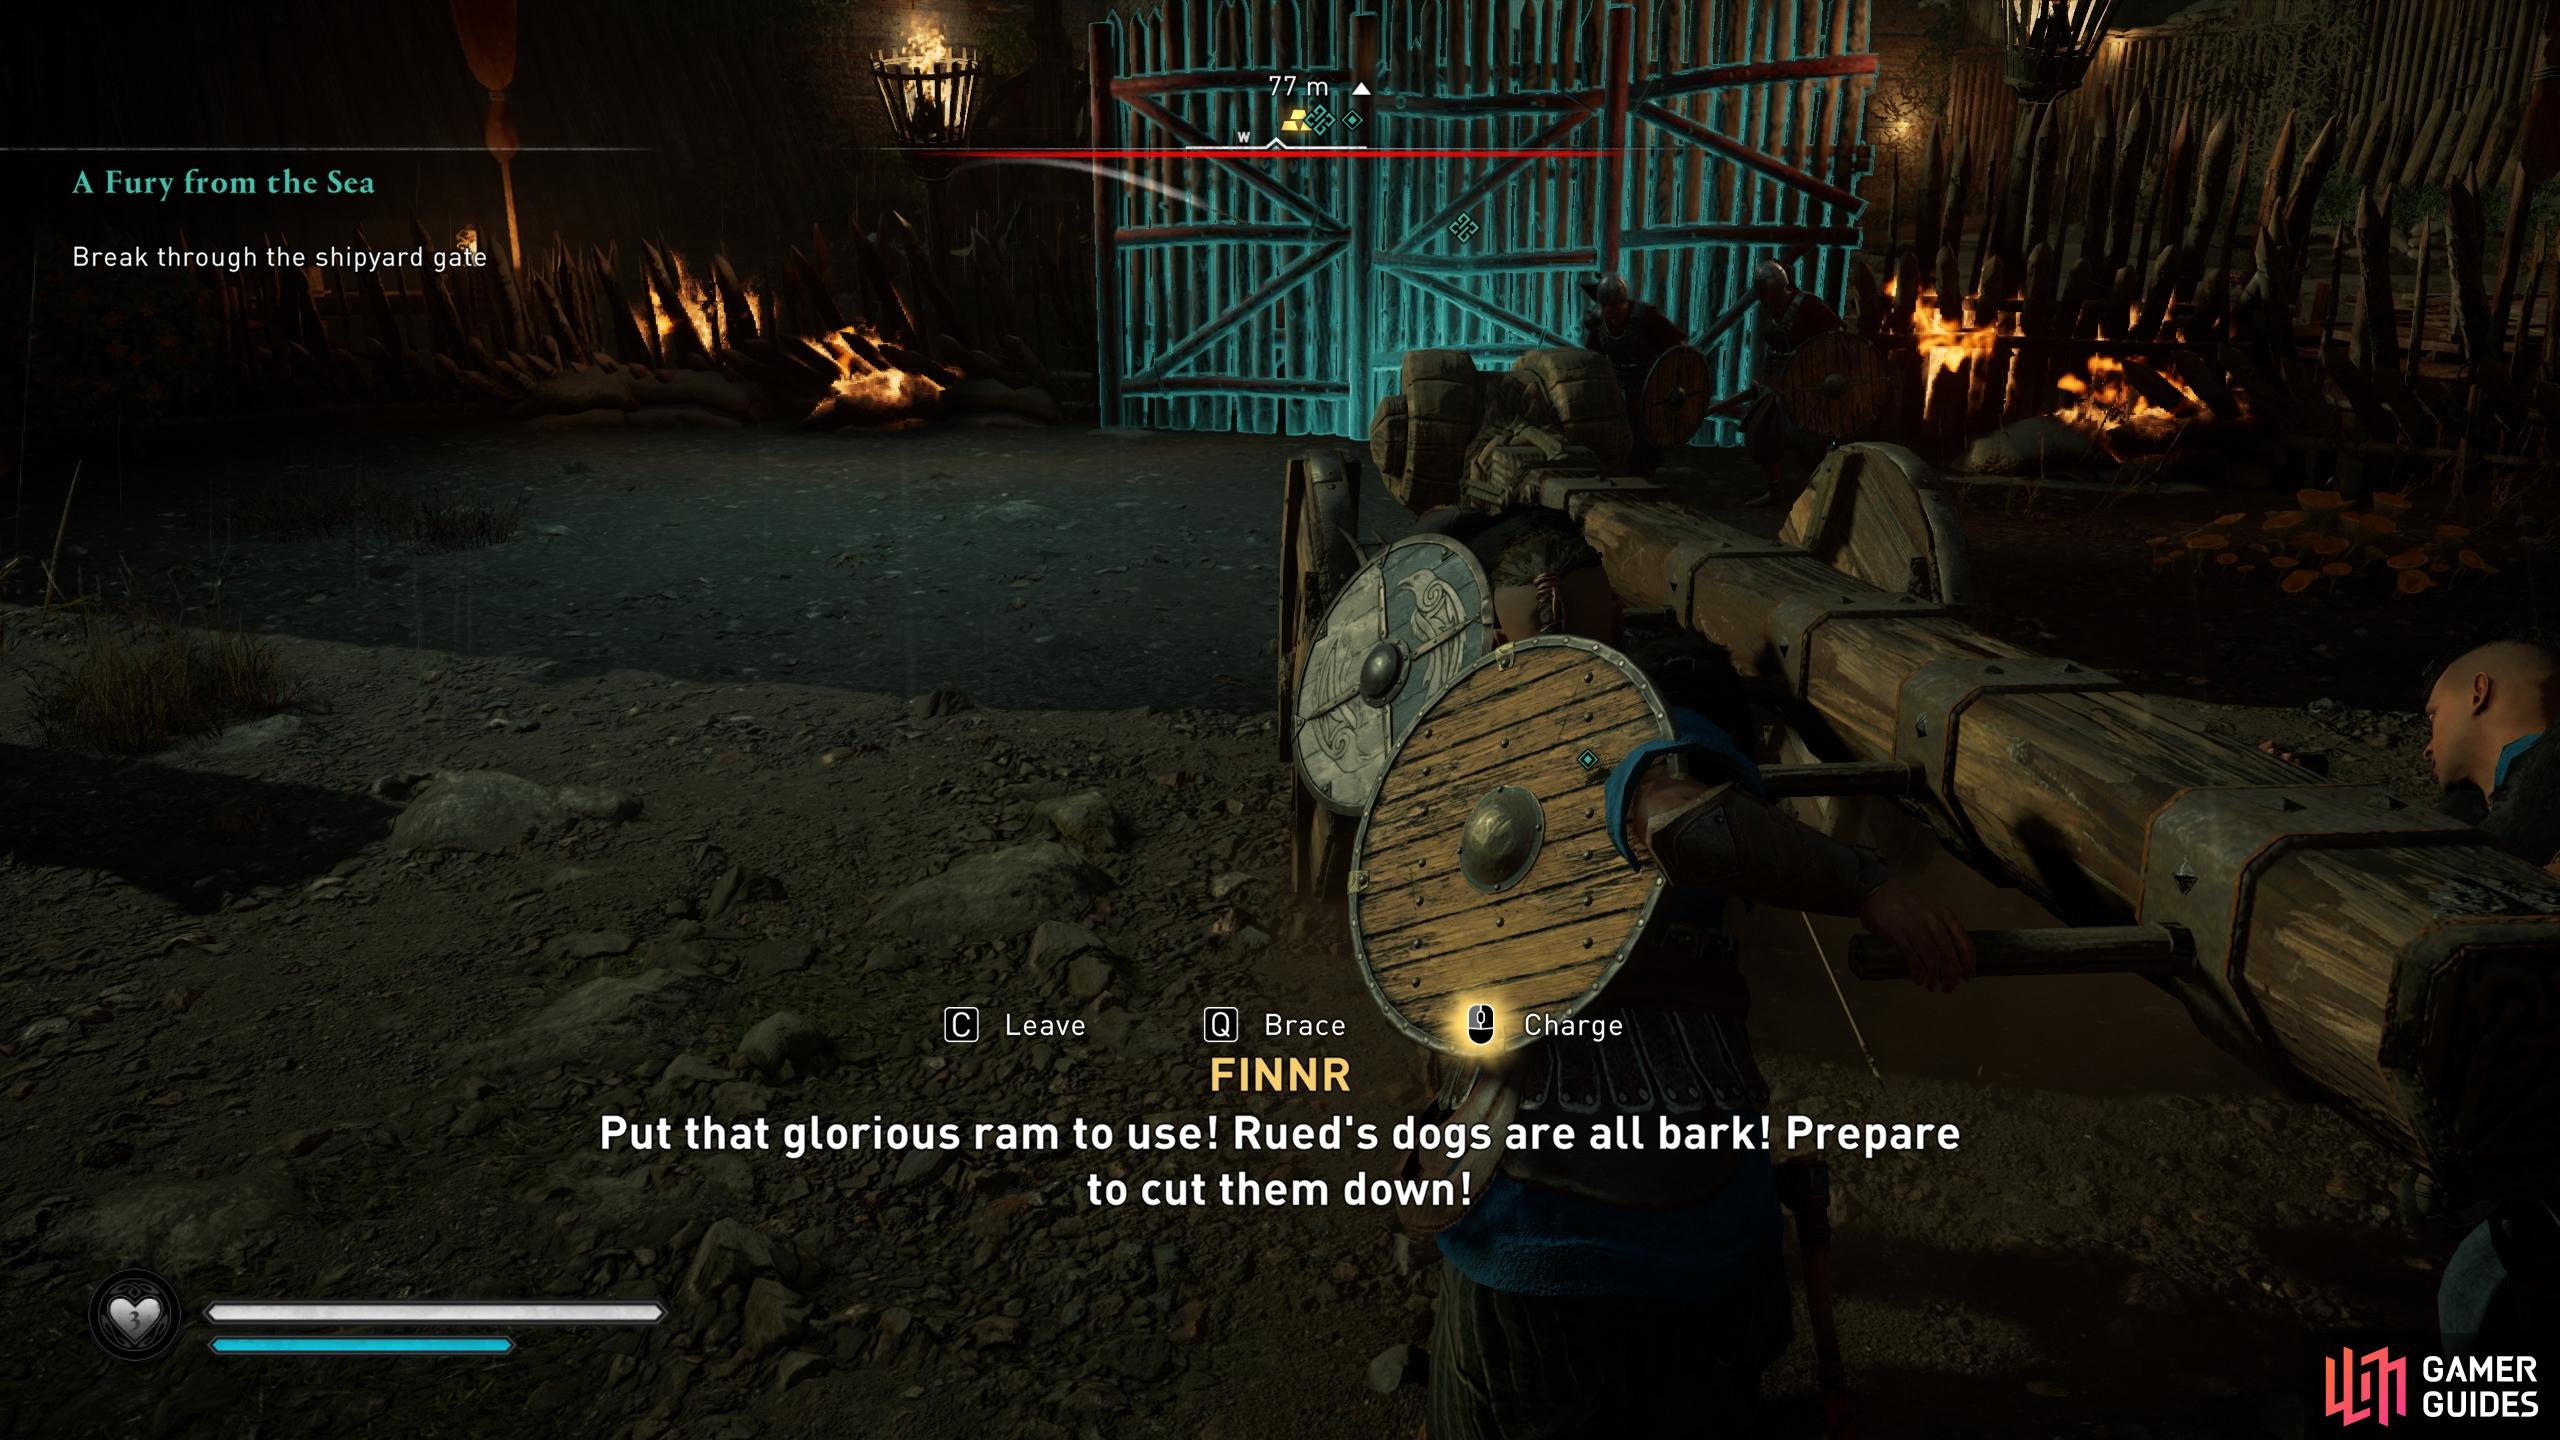
Help your fellow warriors with the battering ram whenever you get the chance.
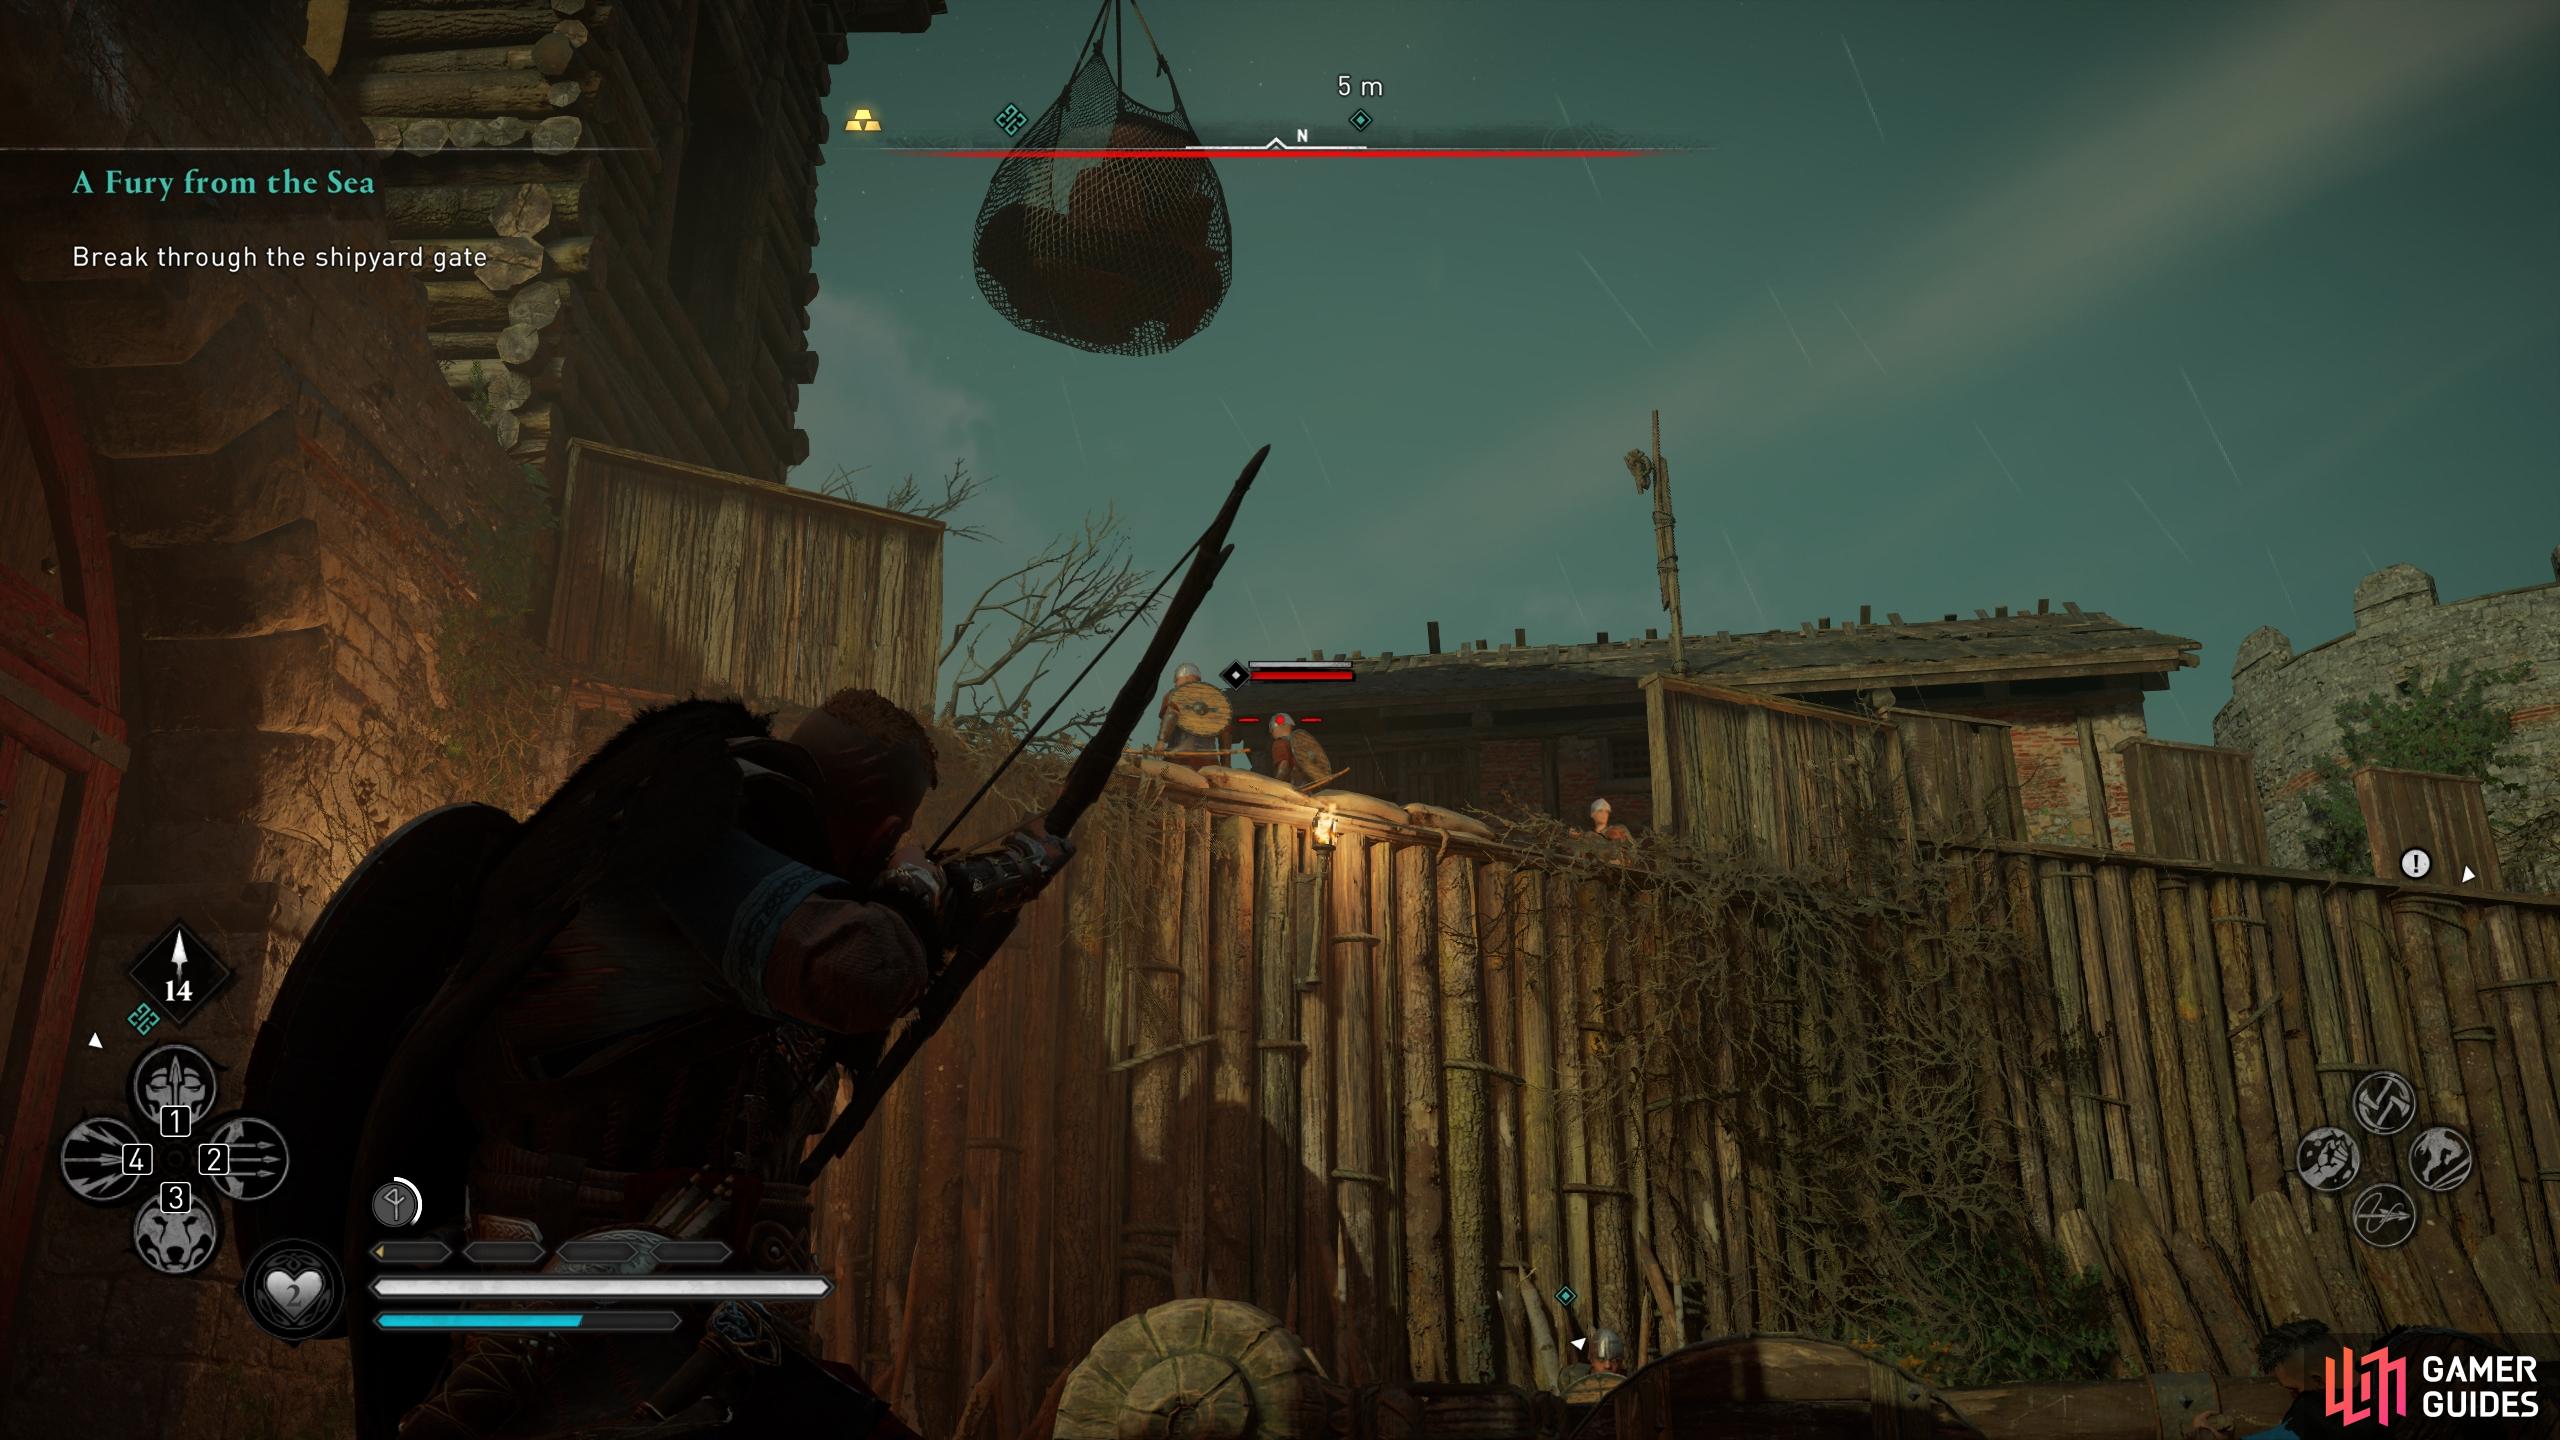
Kill the archers on the walls surrounding the first gate.
Second Gate
Once you break through the first line of defences, you should leave the battering ram while you kill any enemies surrounding it. You’ll need to defend the warriors on the battering ram from any incoming attacks, both on the ground and from the air. Take out as many ground units as you can as quickly as possible, then join the warriors pushing the battering ram again. You’ll need to brace against any incoming arrow volleys, marked by a red circle surrounding a patch of ground, to keep the warriors on the ram safe. You can take out some of the archers on the surrounding walls, but there will be others that you won’t be able to reach. You should therefore focus on smashing through the gate as quickly as possible, but you’ll need to leave it every now and then to kill nearby ground units. The balance between defending from ground and air attacks can be tricky, but so long as you focus on destroying the gate as quickly as possible whenever you get the chance, you shouldn’t be here for long.
You’ll need to kill any melee units which approach the battering ram.

Be sure to use your shield to protect yourself and your warriors when using the battering ram.
Third Gate
As soon as you burst through the second gate, you should turn your attention on a battle tower to the northwest. Here you’ll see a group of archers closely bunched together. Take them out by any means necessary to relieve fire from the battering ram. Once you shoot at the archers a few times, they should come down to meet you in melee combat. Valdis will join you at this point, so you’ll have a bit more support on the ground. Once the battle tower is free of foes, turn your attention to the high walls to the southeast. Here you’ll find a few more archers, rather unwisely standing next to a fire pot. Shoot the fire pot to rid the battering ram of their fire. If that wasn’t enough to kill the warrior using the ballista right next to the fire pot, be sure to take them out with a few arrows too.
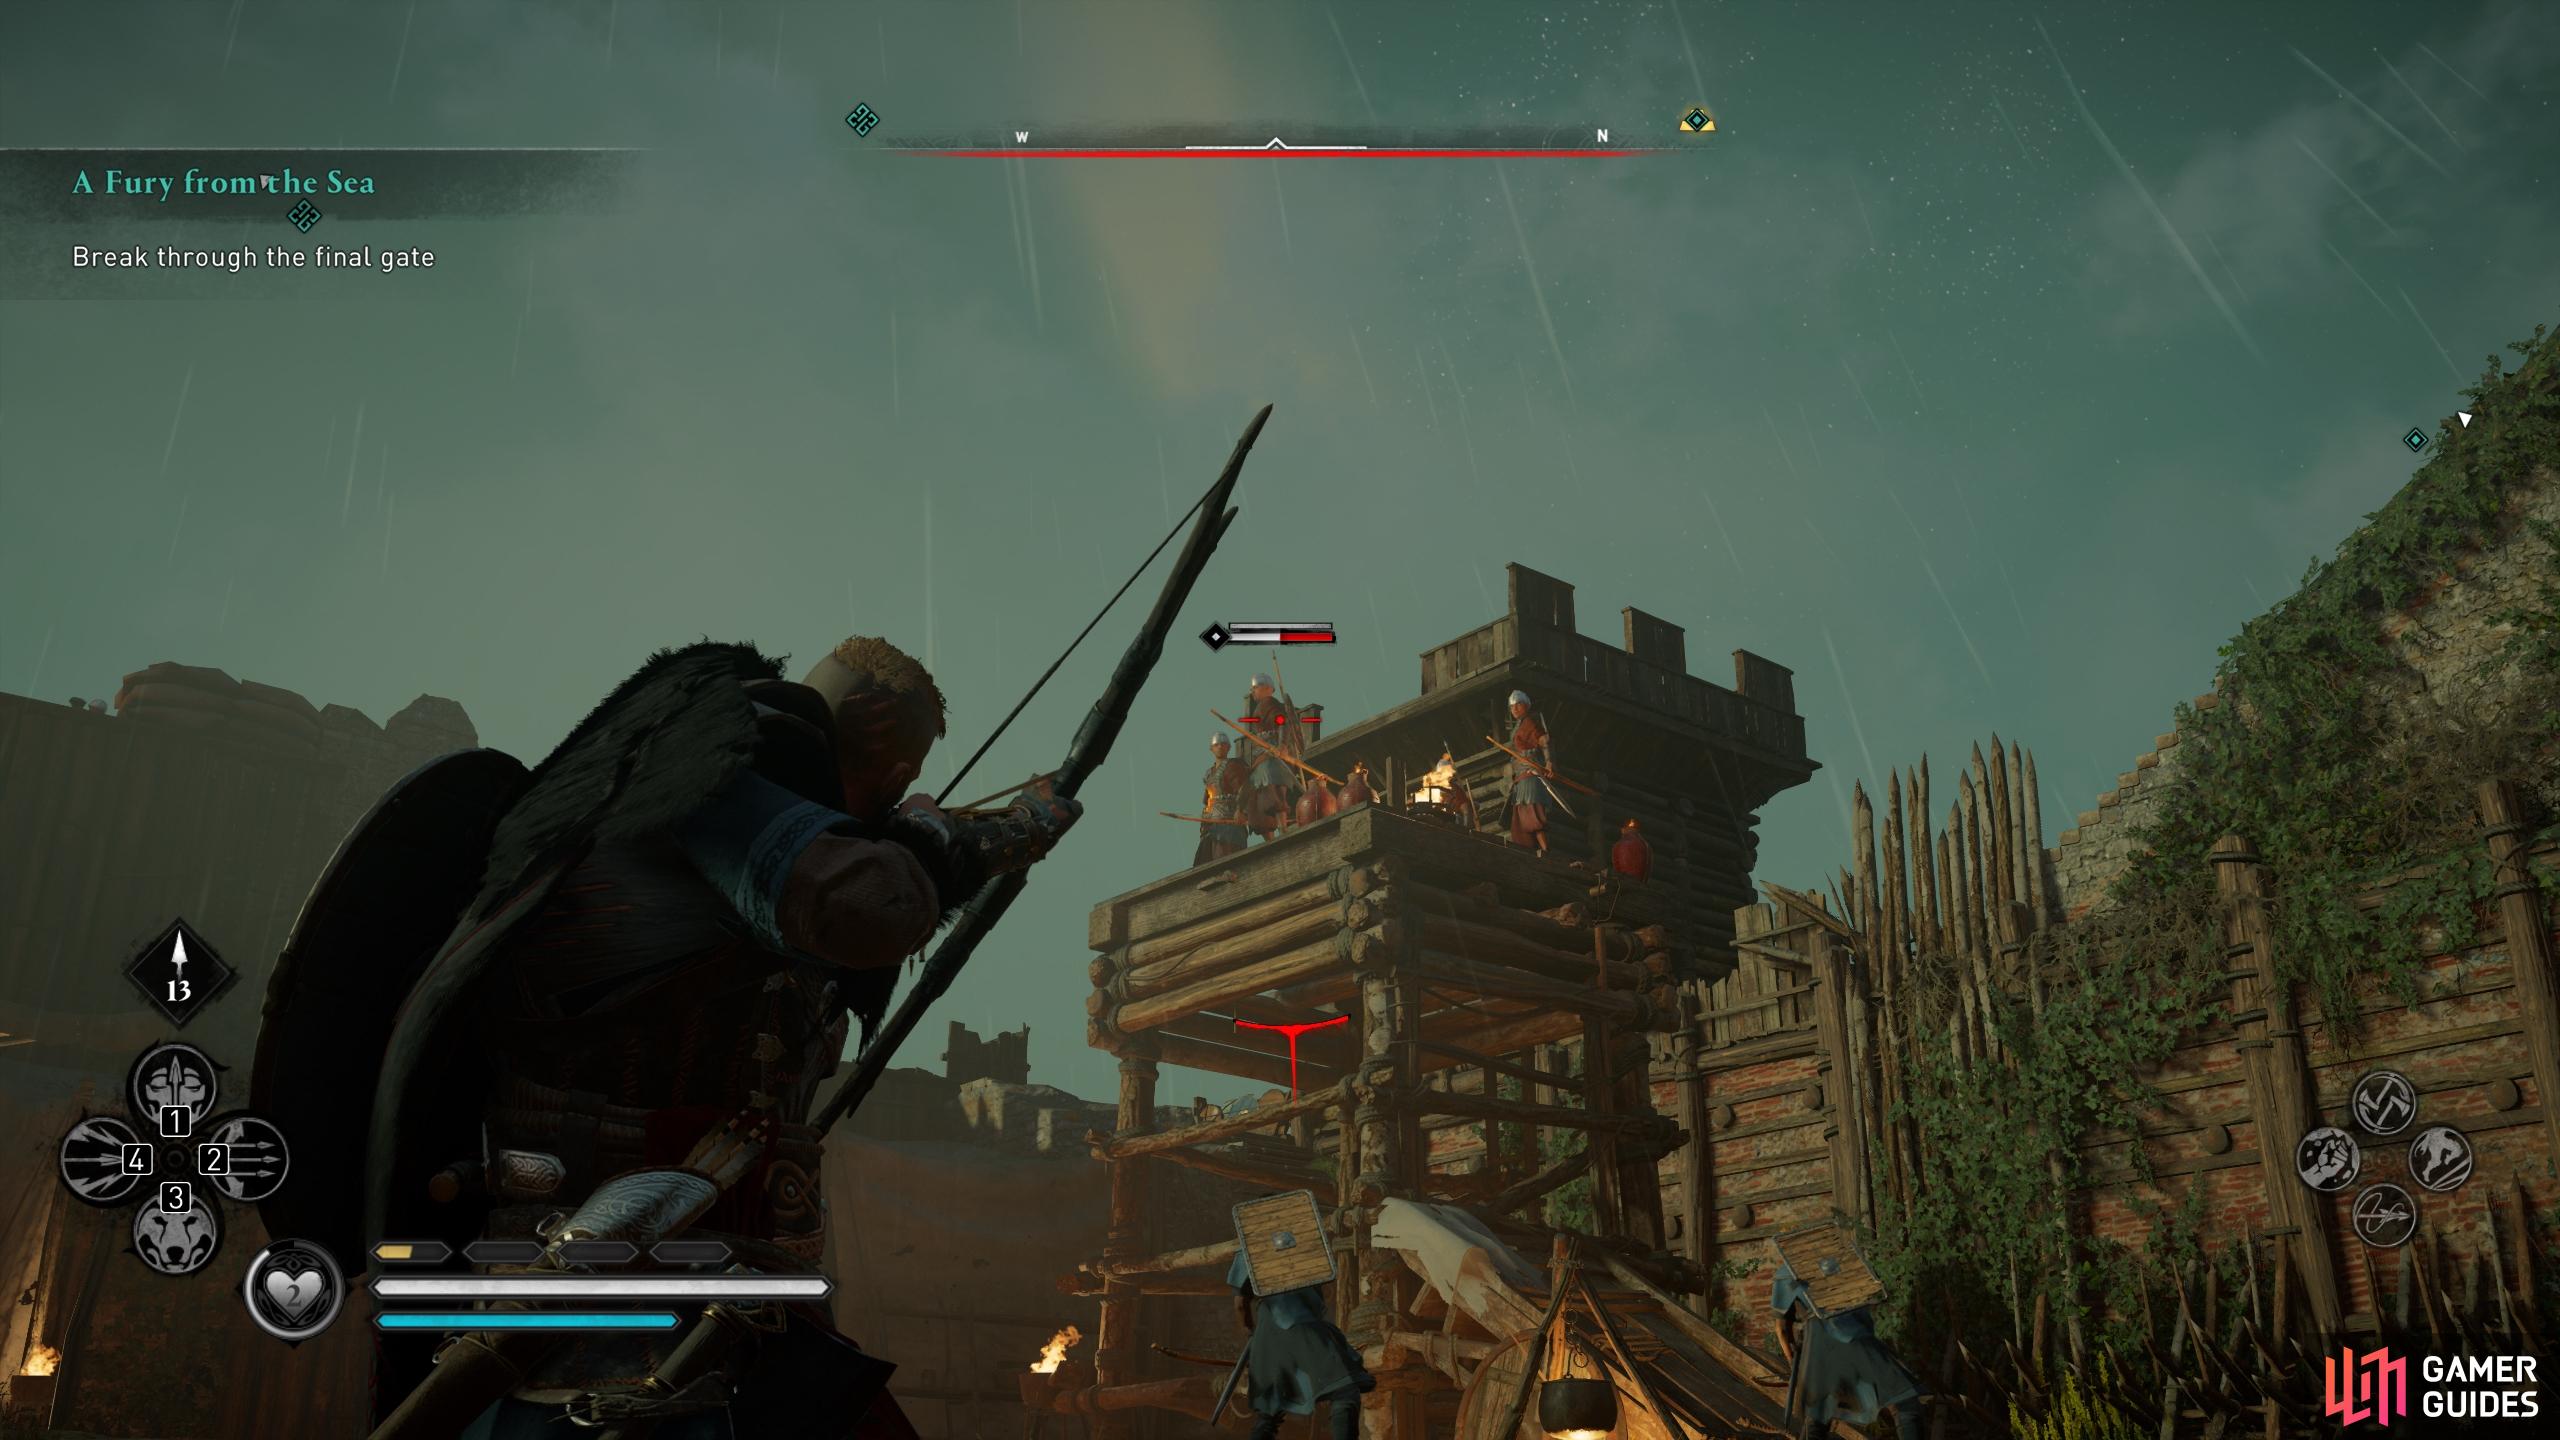
(1 of 4) Kill the archers on the battle tower so they don’t fire at the battering ram.
The walls just above the third gate will be crawling with archers, but thankfully you’ll find another fire pot right next to them. Shoot it to send them running in flames, then help with the battering ram to destroy the third gate. With all the archers on the surrounding walls dead, you should no longer need to worry about incoming fire while you’re using the battering ram. Valdis and her archers will also protect you from any ground units. When the gate is breached, a cutscene will play during which you find out that both Oswald and Rued survived their fall.
Boss Fight: Defeat Rued
Now that you’re in the heart of the castle, all that remains is to defeat Rued and rescue Oswald. You’ll need to cut through a fair few warriors first, though, including a couple of Woe-Bringers. Kill as many as you wish here (you don’t have to kill any if you don’t want to), and then climb the wall to the south. Whatever you do, preserve your special abilities and arrows until you face Rued.
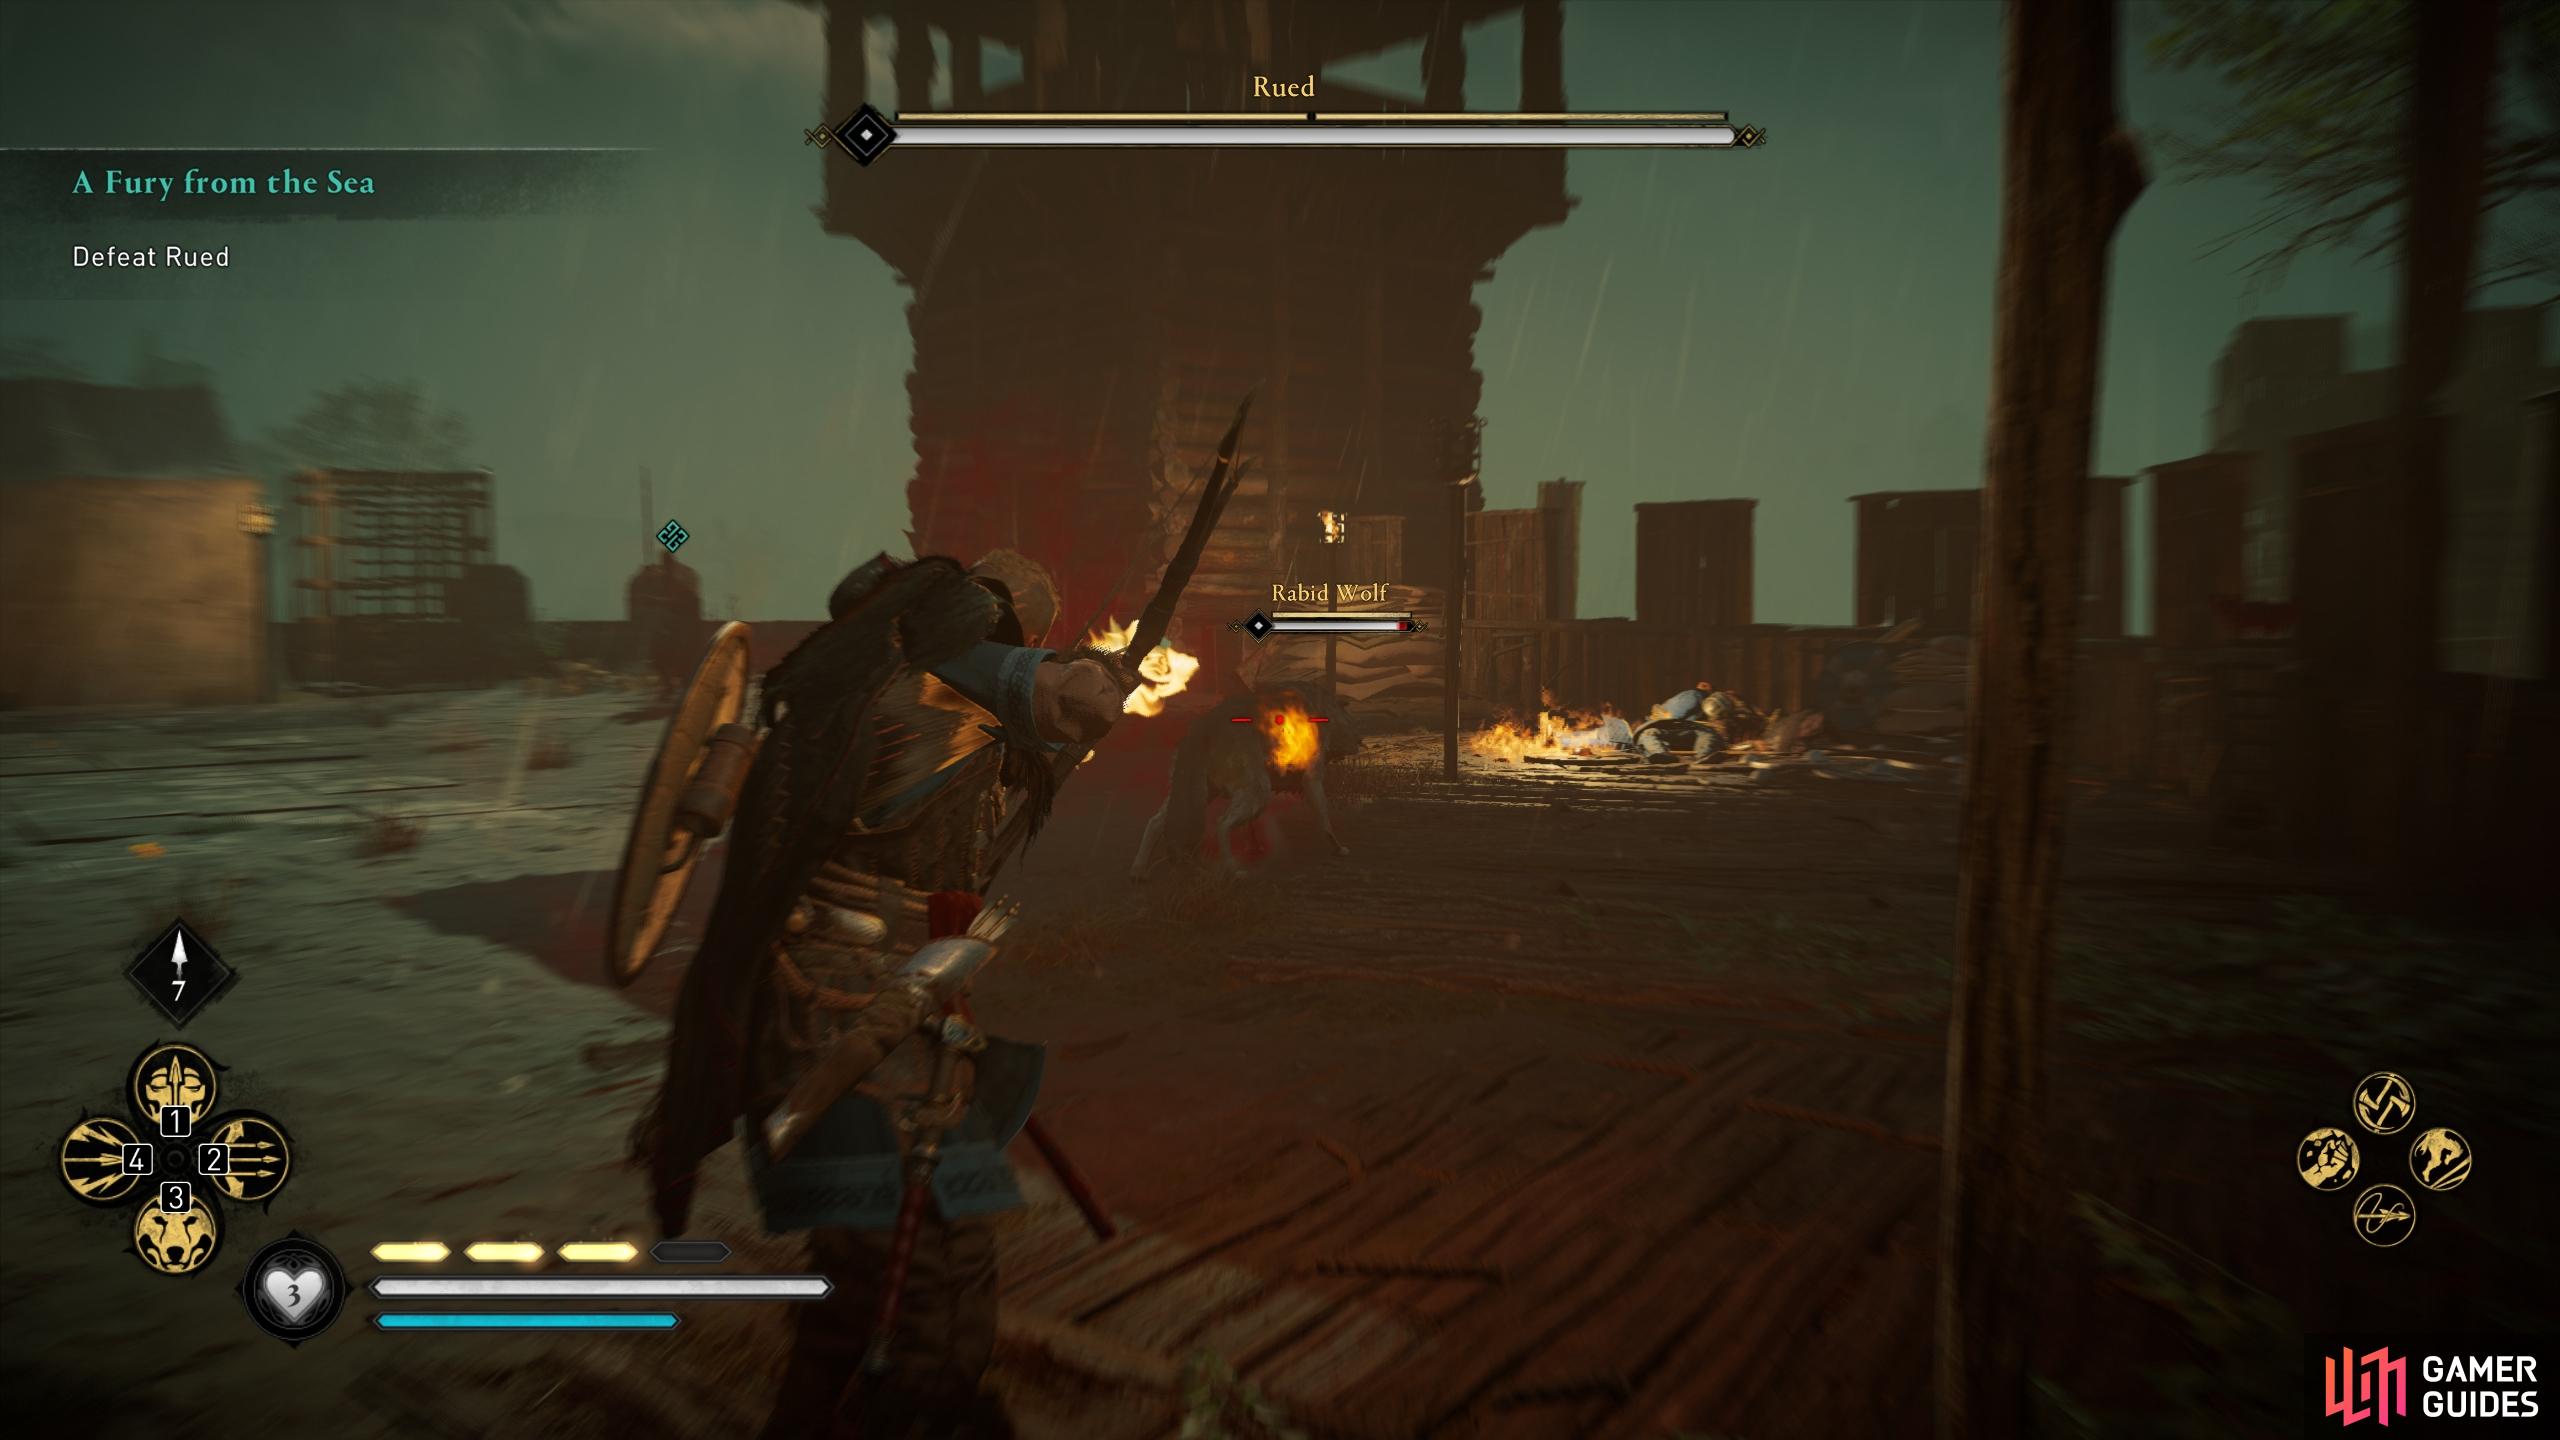
At the top of the wall you’ll find Rued, alongside a Rabid Wolf. You’ll want to kill this wolf first to make evading incoming attacks much easier. Be sure to lock onto the wolf if you find the mechanic useful, then bring it down with a series of light and heavy attacks. It doesn’t have anywhere near as much health as Rued, so it shouldn’t take long before it’s dead. If you’re having any trouble with the wolf, you’ll find a weak point on its side which you can exploit to weaken its defences. You can also use the fires nearby to light your arrows, inflicting greater damage on a single hit and causing some damage over time.
When the wolf is dead, Rued will light his sword on fire. Any hit you sustain from him will now set you on fire, so you’ll need to perform a dodge or roll to extinguish the fire as soon as possible. You’ll find his weak point on his left foot, so be sure to aim for this (especially with fire arrows) to weaken his defences and leave him vulnerable to stun attacks. If you’re anywhere near Rued when he misses his initial sword attack, he’ll immediately follow it up with a second. To avoid this, it’s best to perform a roll rather than a dodge, or quickly follow a dodge with a series of swift light attacks. You can also retaliate with a heavy attack at this point, but you’ll have much less time to do so unless you have the Brush With Death skill, providing you with some breathing space as time slows after a successful dodge.
Once you begin to take Rued’s health down beyond the first quarter of the bar, he’ll begin to heal himself if you leave him alone for too long. This is signalled by a white aura of runes encircling him (see above), so whenever you see this be sure to interrupt him as soon as possible. You’ll also have to contend with Rued throwing some flaming projectiles at you from time to time. These can be returned to him if you time it correctly with the Missile Reversal skill, but if you don’t have that or aren’t too confident with the timing, a simple dodge or roll will suffice. When you bring Rued down to a quarter of his health, a brief cutscene will initiate, but this won’t last more than a few seconds. The fight will proceed in much the same way as it has so far, so keep it up and Rued will soon fall.
Kill or Spare Rued?
The choice to kill or spare Rued may turn out to be more difficult than anticipated. To spare him will please Oswald and provide a potentially more satisfying end to the story arc, while killing him will please not only the vision of Odin, but also Finnr. To see the outcome of each choice, see the spoilers below.
If you choose to kill Rued, you are guaranteed to recruit Finnr to your longship crew, but Oswald won’t be pleased. In truth, this has no real impact on the broader story, but it does mean that you won’t be able to see Oswald kill Rued later, or have the chance to finish him off yourself later. Note that you will still be able to recruit Finnr if you choose to fight Rued later.
If you allow Rued to live, to be put on trial by Oswald and his God, this will lead to a satisfying end in the next quest, during which Oswald eventually fights Rued. If this transpires, Finnr will pledge himself to Oswald. If you choose to kill Rued later instead of Oswald, Finnr will join your crew and Oswald will accept Rued’s death at your hands.
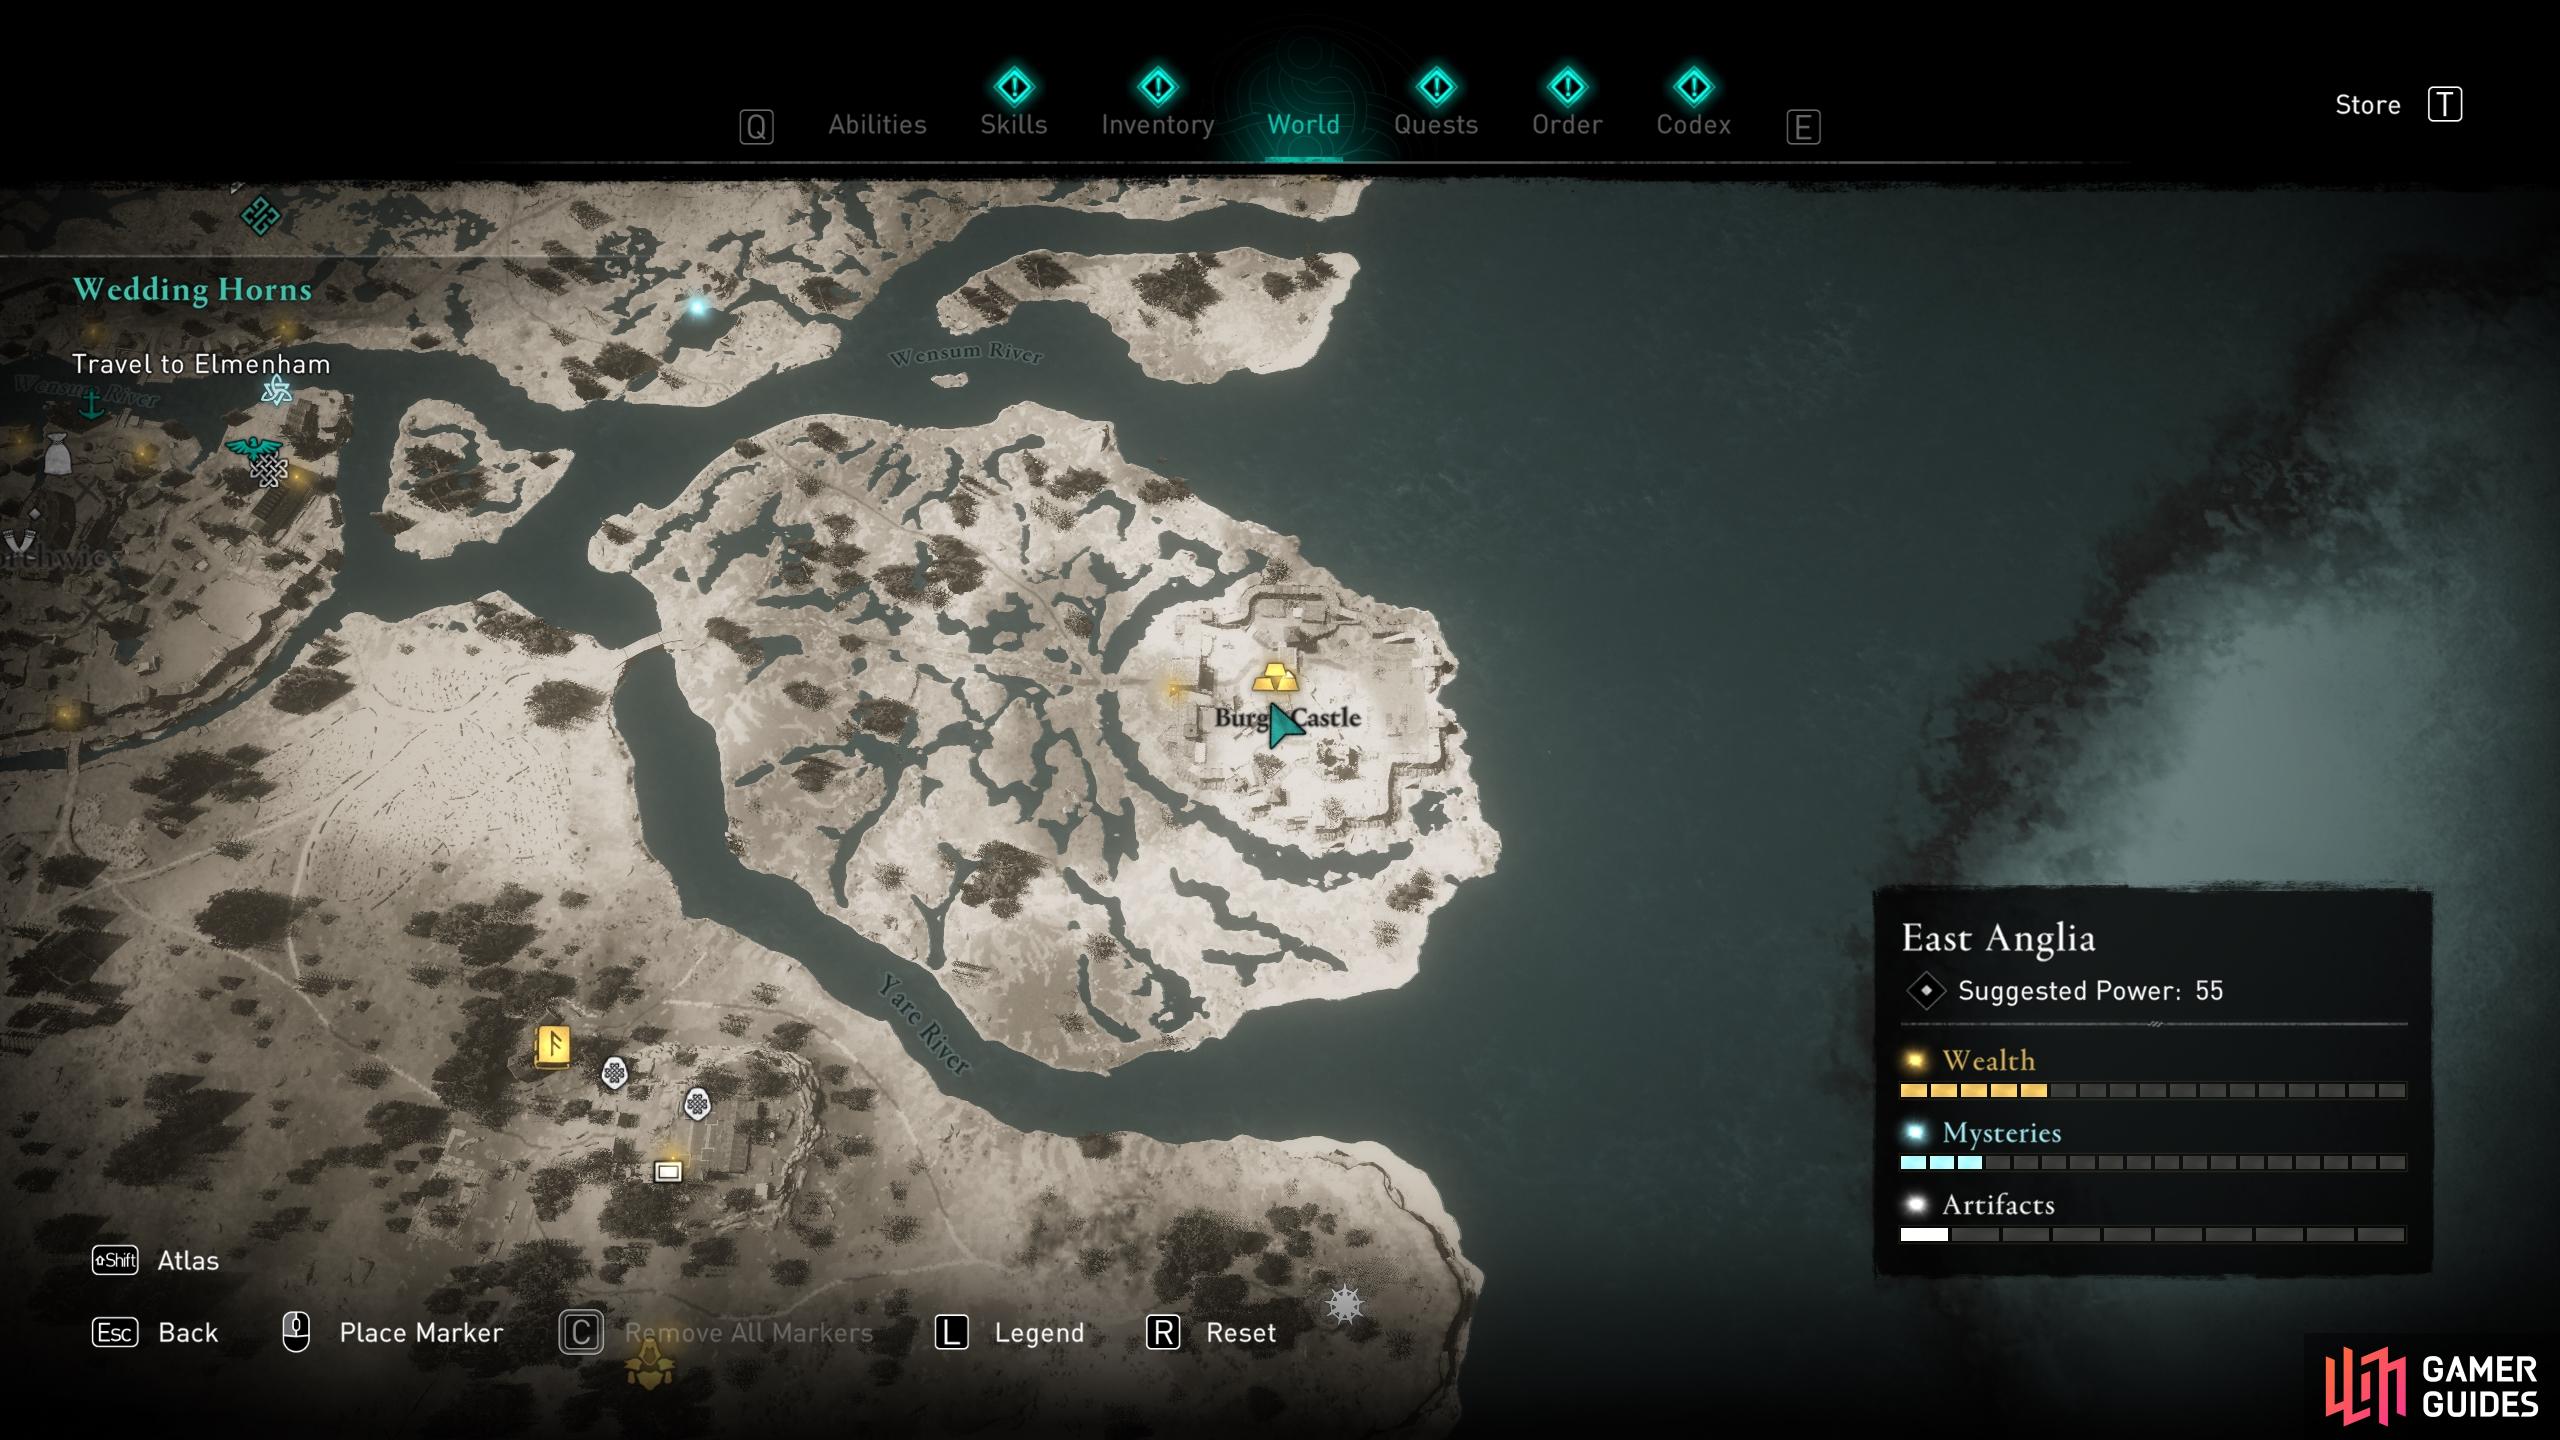
Whatever you decide, once the decision is made and the cutscene plays out, you’ll need to speak with Oswald to complete the quest. Before you leave Burgh Castle, you should head north to the jailhouse, within which you’ll find a treasure chest containing a Nickel Ingot. You’ll need to destroy the small box beside the barricades, and then move them to access the treasure chest behind.
No Comments